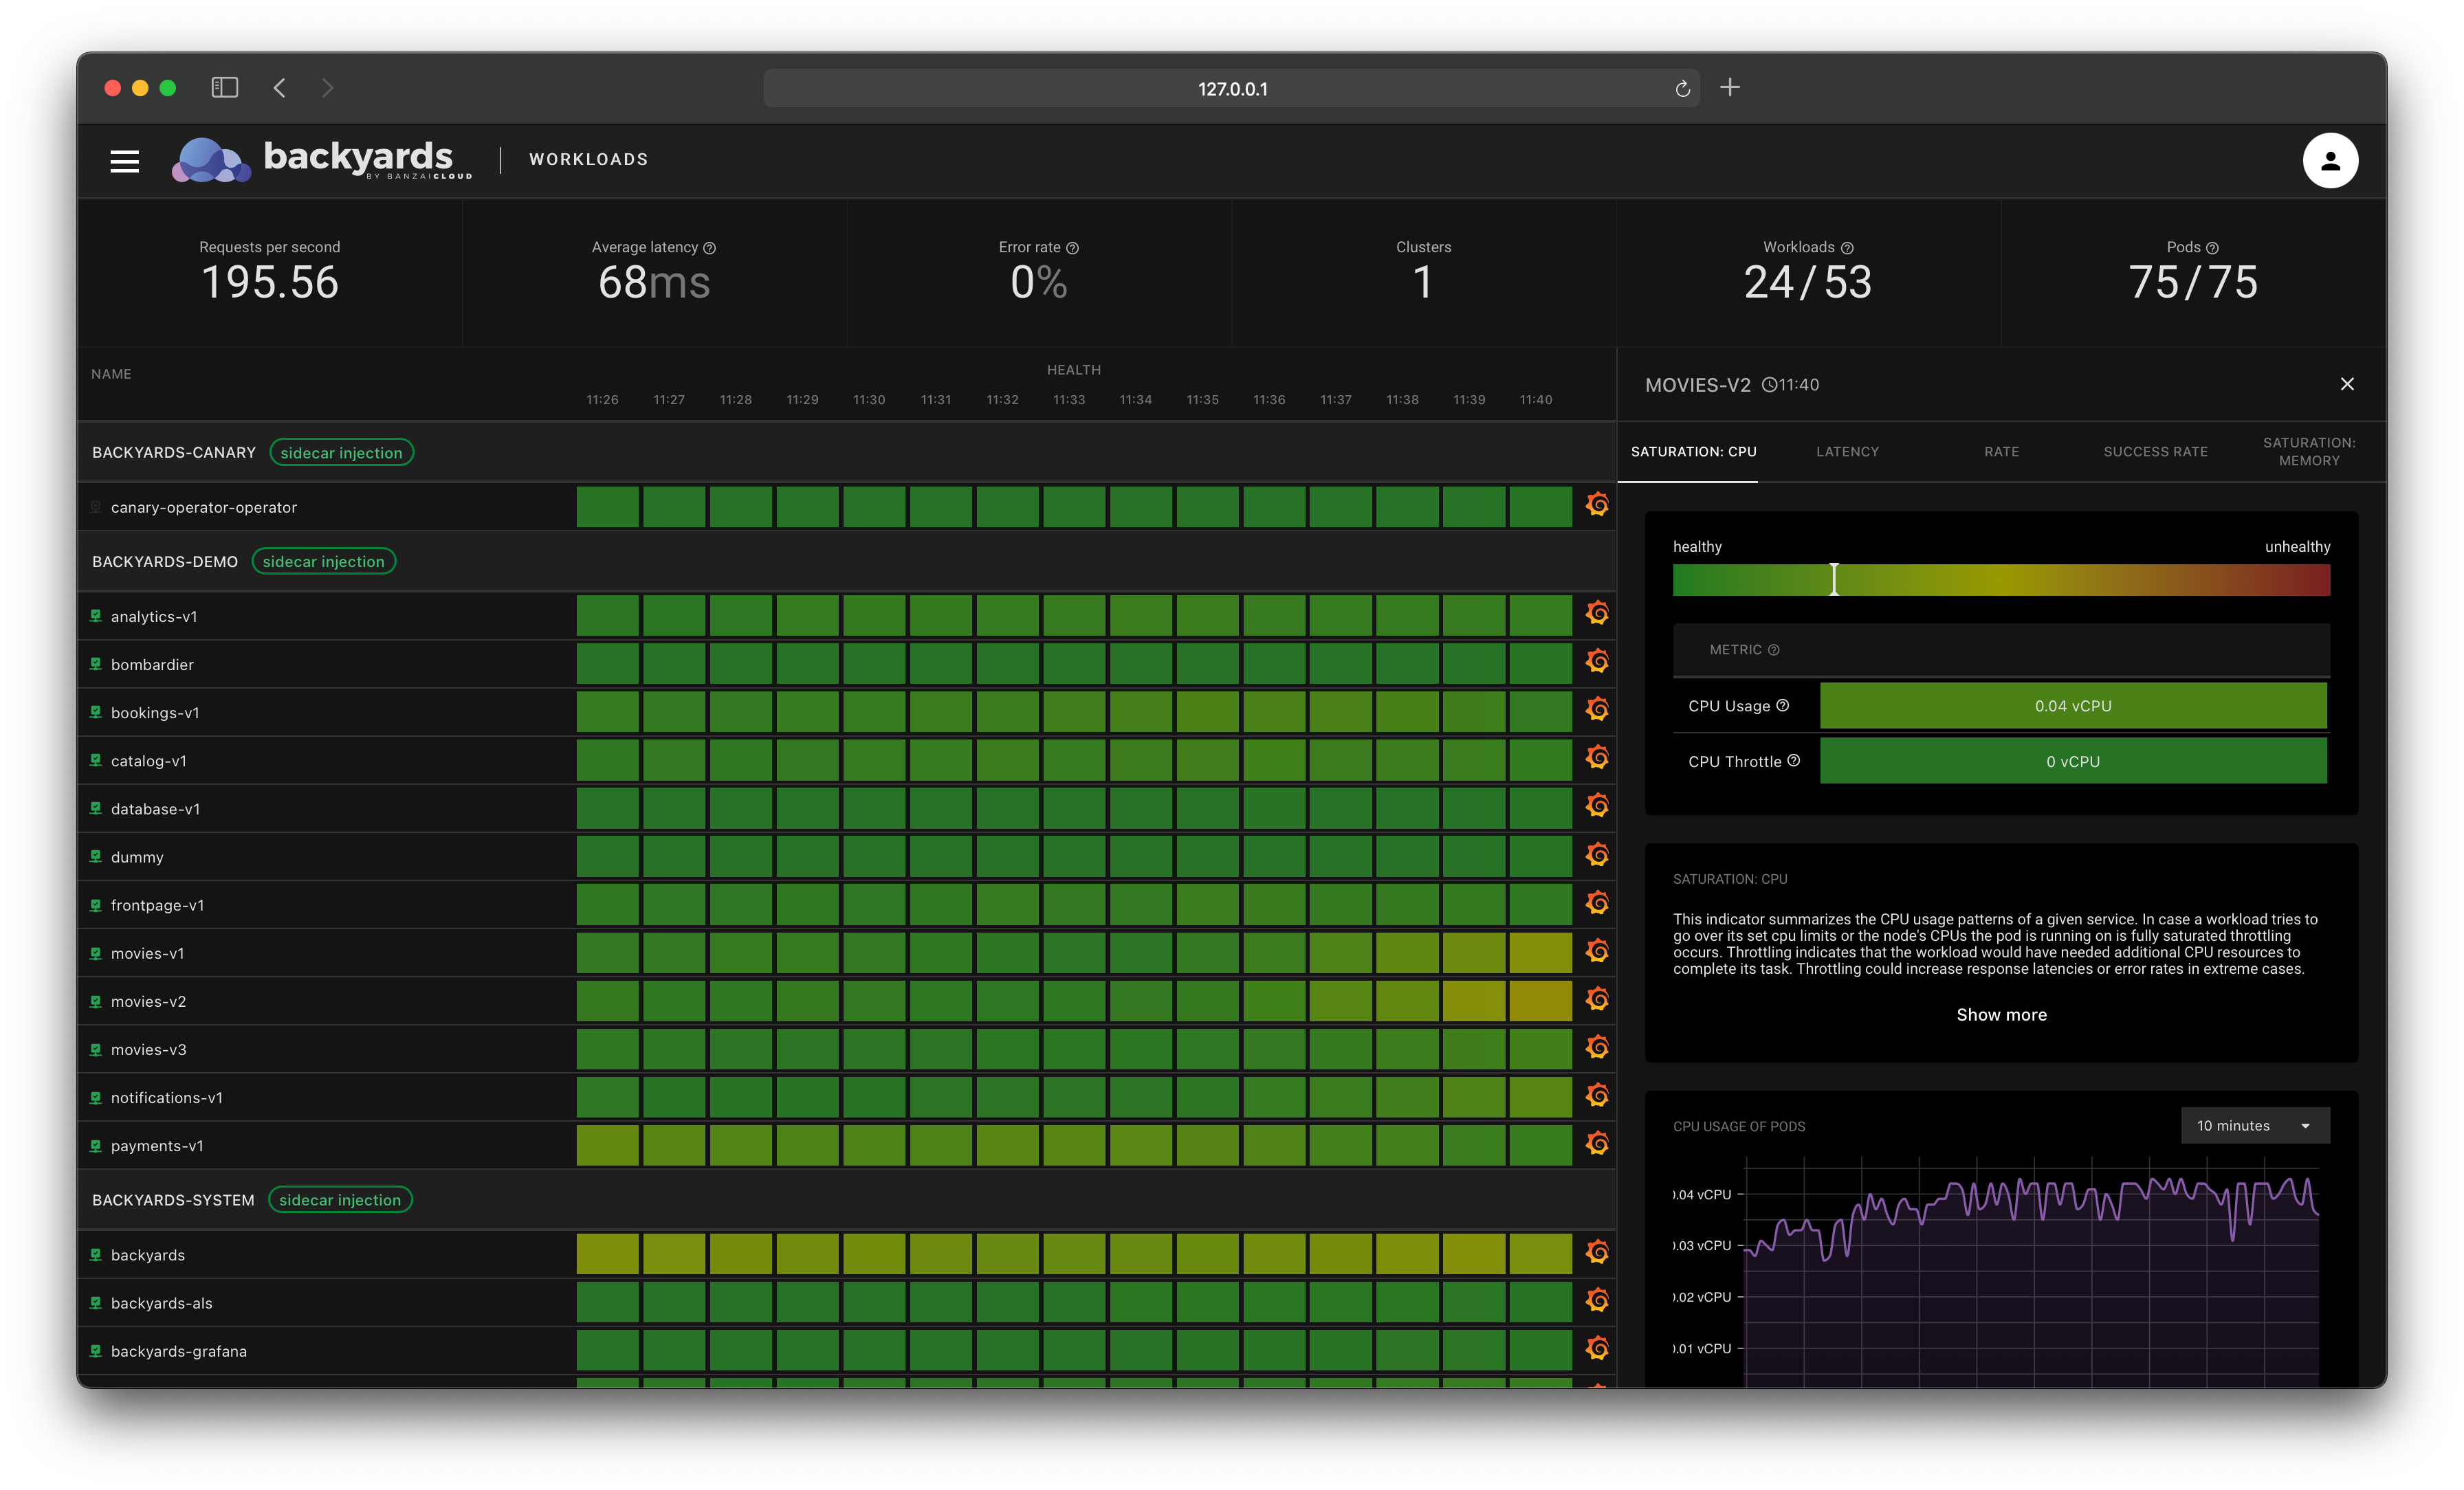
Backyards (now Cisco Service Mesh Manager) is Banzai Cloud’s widely popular production ready Istio distribution, which helps to install, upgrade, secure, operate, and observe an Istio service mesh.
In this blog post, we will discuss
- the high-level architecture overview of Backyards,
- three different ways to start using Backyards.
Introduction 🔗︎
If you’re not familiar with Backyards (now Cisco Service Mesh Manager), and want to know why we decided to build this product, we suggest reading the blog post about the first major release.
To learn more about Backyards, check out our other blogs about it, its documentation, or its product page.
High-level architecture 🔗︎
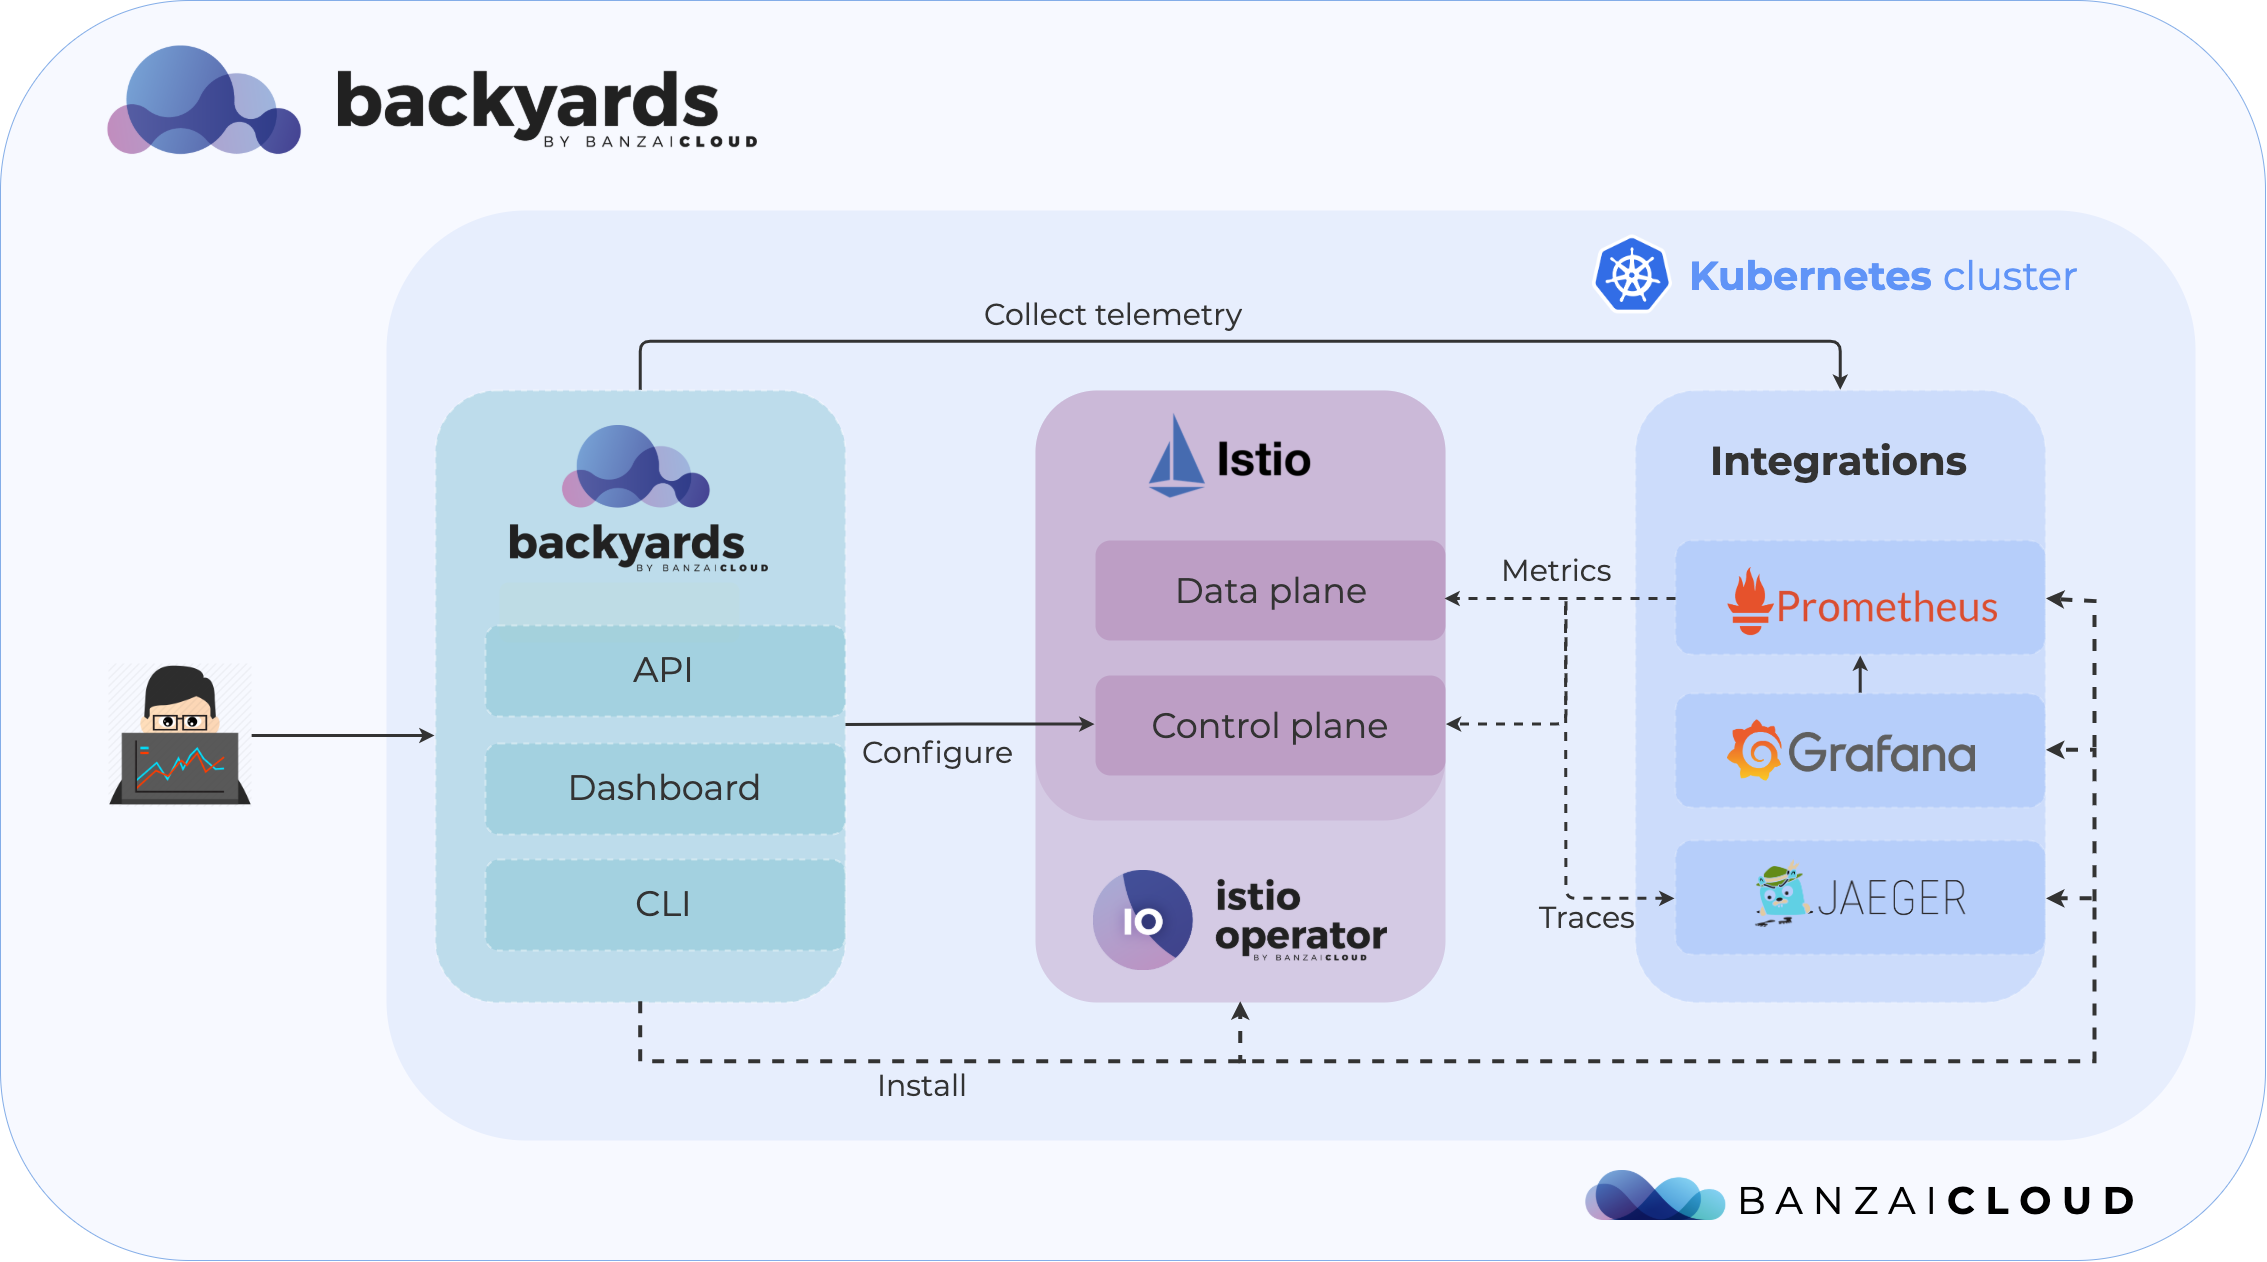
Backyards (now Cisco Service Mesh Manager) consists of the following components:
-
Service mesh management: The open source Banzai Cloud Istio operator helps to install/upgrade/manage Istio deployments. Its unique features include managing multiple ingress/egress gateways in a declarative fashion, and automated and fine-tuned multi cluster management.
-
The core components of Backyards are:
- the Backyards backend (exposing a GraphQL API)
- the Backyards UI, a web interface
- the Backyards CLI
- the Backyards operator
Backyards’s soul is its backend, which exposes a GraphQL API. The Backyards UI (dashboard) and CLI interact with this API. The Backyards operator is an optional component which helps with a declarative installation method to support GitOps workflows.
-
External out-of-the-box integrations:
These components are automatically installed and configured by Backyards by default to be able to work with Istio. You can also integrate Backyards with your own Prometheus, Grafana, Jaeger, or Cert manager - Backyards follow the batteries included but replaceable paradigm.
Installation methods 🔗︎
You can get started with Backyards the following ways:
-
Run locally (~5 minutes): You will deploy Backyards to a single-node Kubernetes cluster running on your development machine.
-
Run on a Kubernetes cluster (~10 minutes): You will deploy Backyards to a Kubernetes cluster of your choice.
-
Run with Pipeline (~10 minutes): You will create a Kubernetes cluster and deploy Backyards on it with Pipeline.
Run locally 🔗︎
Recommended if you don’t have or don’t want to create a Kubernetes cluster, but want to try out Backyards quickly.
-
Install one of the following tools to run a Kubernetes cluster locally:
- Minikube (recommended for Linux)
- Docker for Desktop (recommended for Mac/Windows) provides Kubernetes support as noted here
- Kind
-
Ensure that the local Kubernetes cluster has at least:
- 4 CPU’s
- 8.0 GiB memory
- 16 GB disk space
-
Launch the local Kubernetes cluster with one of the following tools:
-
Minikube:
minikube start --cpus=4 --memory=8192 -
Docker for Desktop:
In preferences, choose
Enable Kubernetes. -
Kind:
kind create cluster
-
-
Register for a free Backyards evaluation by submitting the form at the Try Backyards page.
-
Install Backyards:
If you don’t have a local LoadBalancer setup, you should use a NodePort type
istio-ingressgatewayservice. To do that, create a file calledlocal_istio_cr.yamlwith the following content:apiVersion: istio.banzaicloud.io/v1beta1 kind: Istio metadata: name: mesh namespace: istio-system spec: gateways: ingress: serviceType: "NodePort"Then, run the following command to first install the Backyards CLI tool, and then Backyards on the cluster with all of its components.
This command first installs Istio with the open-source Banzai Cloud Istio operator, then installs Backyards (now Cisco Service Mesh Manager) itself as well as a demo application to be able to try out all features quickly.
Register for the free tier version of Cisco Service Mesh Manager (formerly called Banzai Cloud Backyards) and follow the Getting Started Guide for up-to-date instructions on the installation.
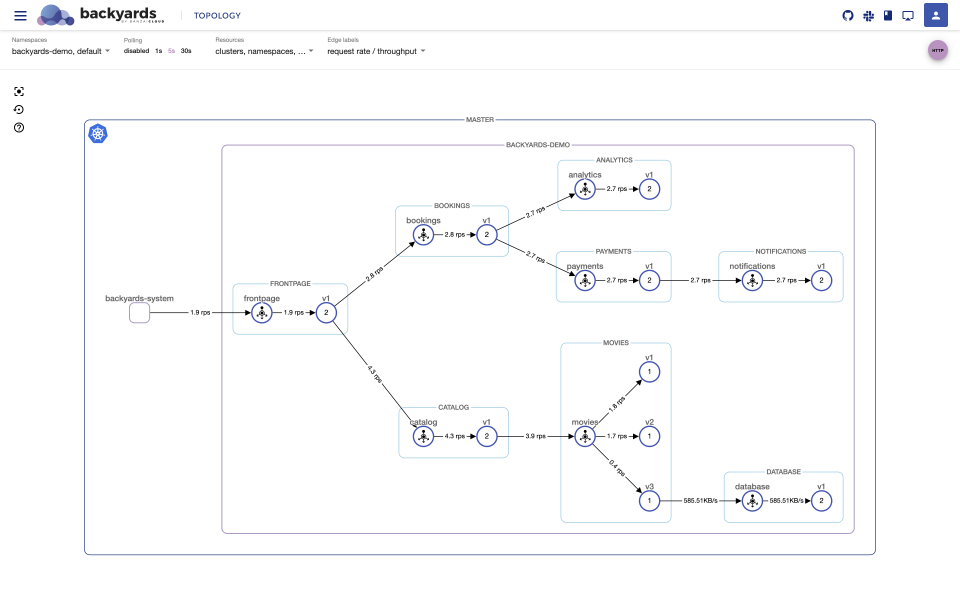
After the installation of each component is finished, the Backyards UI will automatically open and send some traffic to the demo application and the Backyards dashboard should appear.
-
Explore the features:
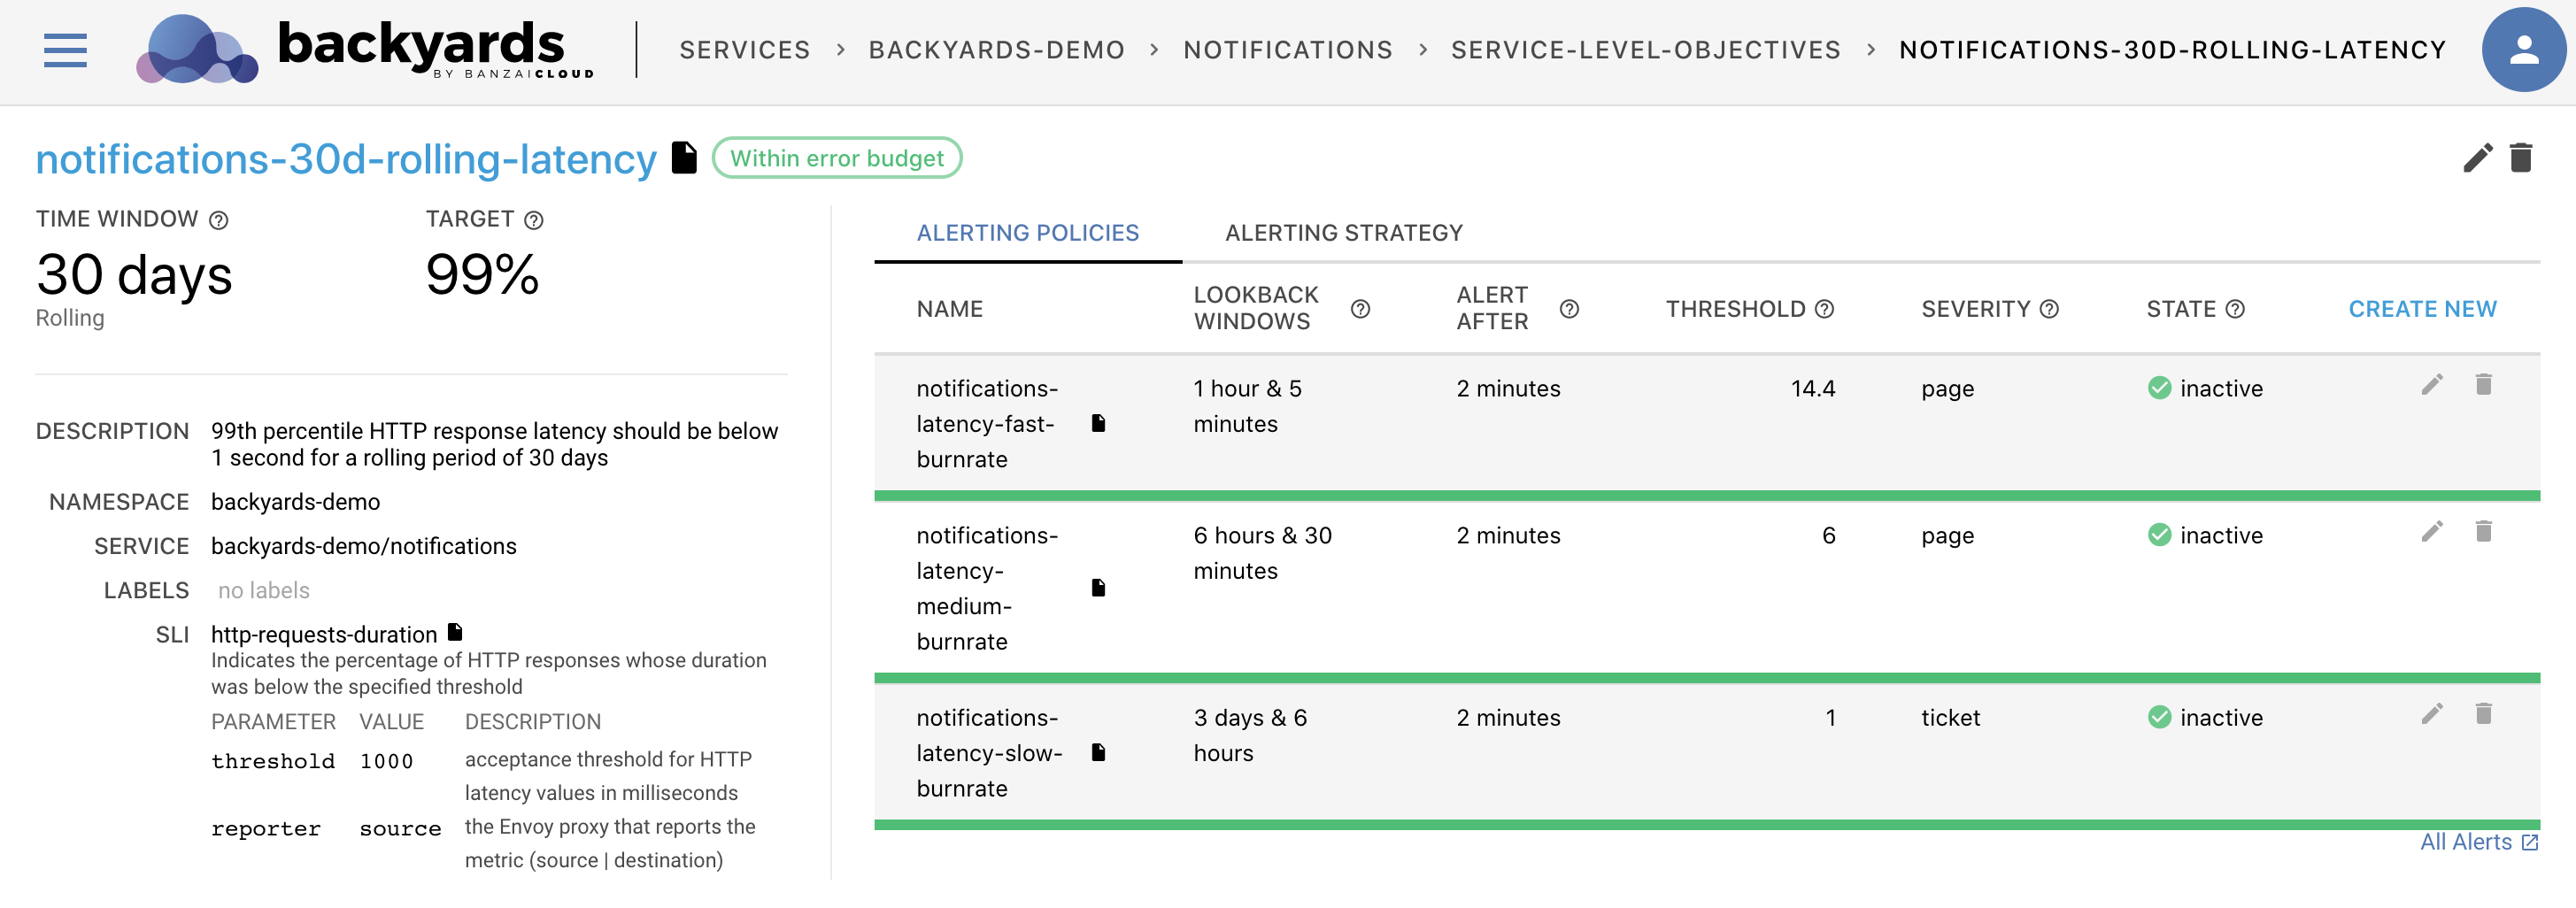
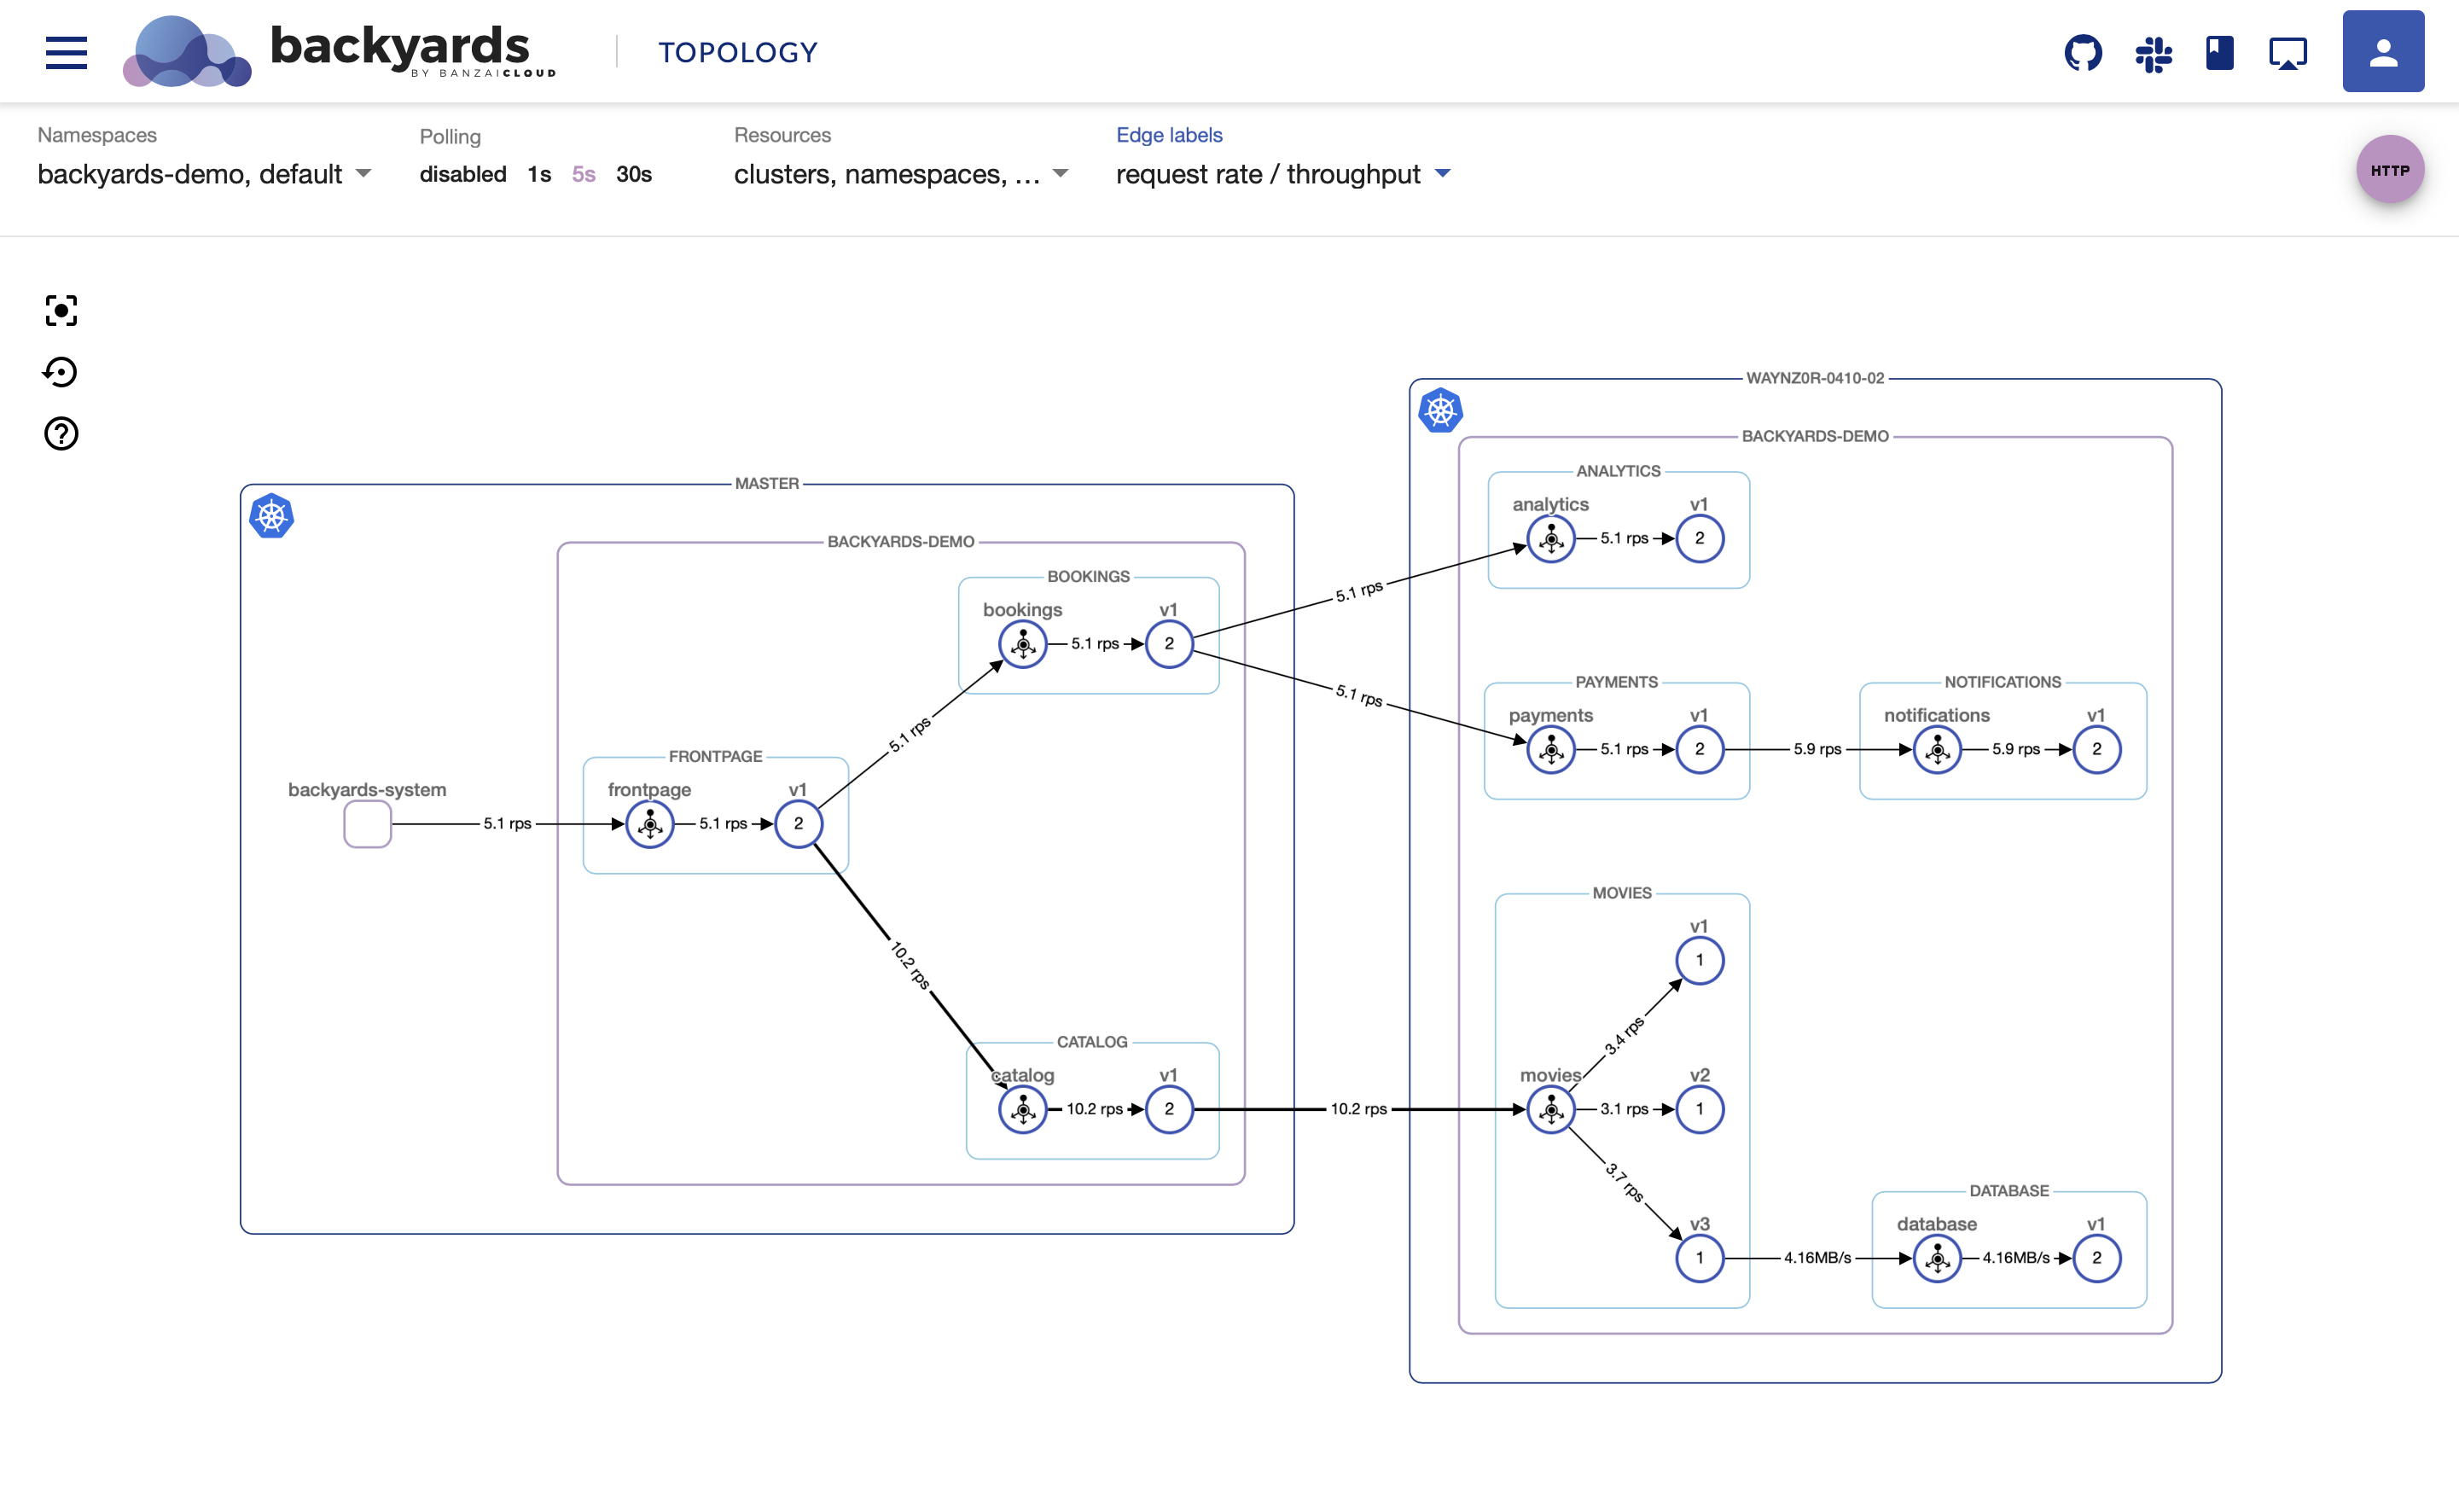
At this point, Backyards is up and running. You can experiment with any of the available features from the docs or from our blogs.
-
Cleanup:
When you’re done experimenting, you can remove the demo application, Backyards, and Istio from your cluster with the following command, which removes all of these components in the correct order:
$ backyards uninstall -a
Run on a Kubernetes cluster 🔗︎
Recommended if you have a Kubernetes cluster and want to try out Backyards quickly.
-
Create a cluster:
Create or grab a Kubernetes cluster to test on. Make sure that
KUBECONFIGis set for that cluster. -
Register for a free Backyards evaluation by submitting the form at the Try Backyards page.
-
Install Backyards:
After you have a cluster, a similar command needs to be run as with the local setup:
Register for the free version and install the CLI.
For more info, please to refer to the run locally section.
Run with Pipeline 🔗︎
Recommended if you are already a Pipeline user or looking for a fully managed solution (including the cloud or datacenter of your choice, Kubernetes and Istio as well alongside all the required components).
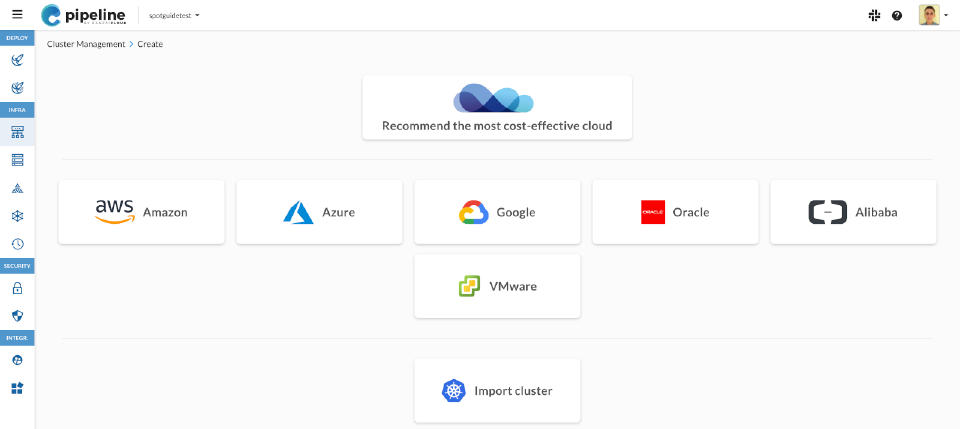
Banzai Cloud Pipeline is a container management platform where you can create and manage Kubernetes clusters on several cloud providers or on-prem. It has a public hosted version which you can use for free. You can create a cluster with Pipeline and then deploy Backyards with a few clicks on a nice and convenient UI.
-
Login to Pipeline.
-
Create a cluster with the Pipeline UI:
-
Install Backyards:

-
Install Backyards demo application:
Make sure that
KUBECONFIGis set for your cluster, then run:$ backyards demoapp install -
Explore the features:
At this point, you can experiment with any of the available Backyards features.
-
Cleanup:
At the end, you can delete Backyards from the cluster and the cluster itself from the Pipeline UI.
Takeaway 🔗︎
Backyards (now Cisco Service Mesh Manager), Banzai Cloud’s production ready Istio distribution, can be very easily and quickly evaluated in different environments.
If you give it a try and you would consider using it in your production environment as well, reach out to us, so that we can discuss what would be the ideal setup for your use case.


