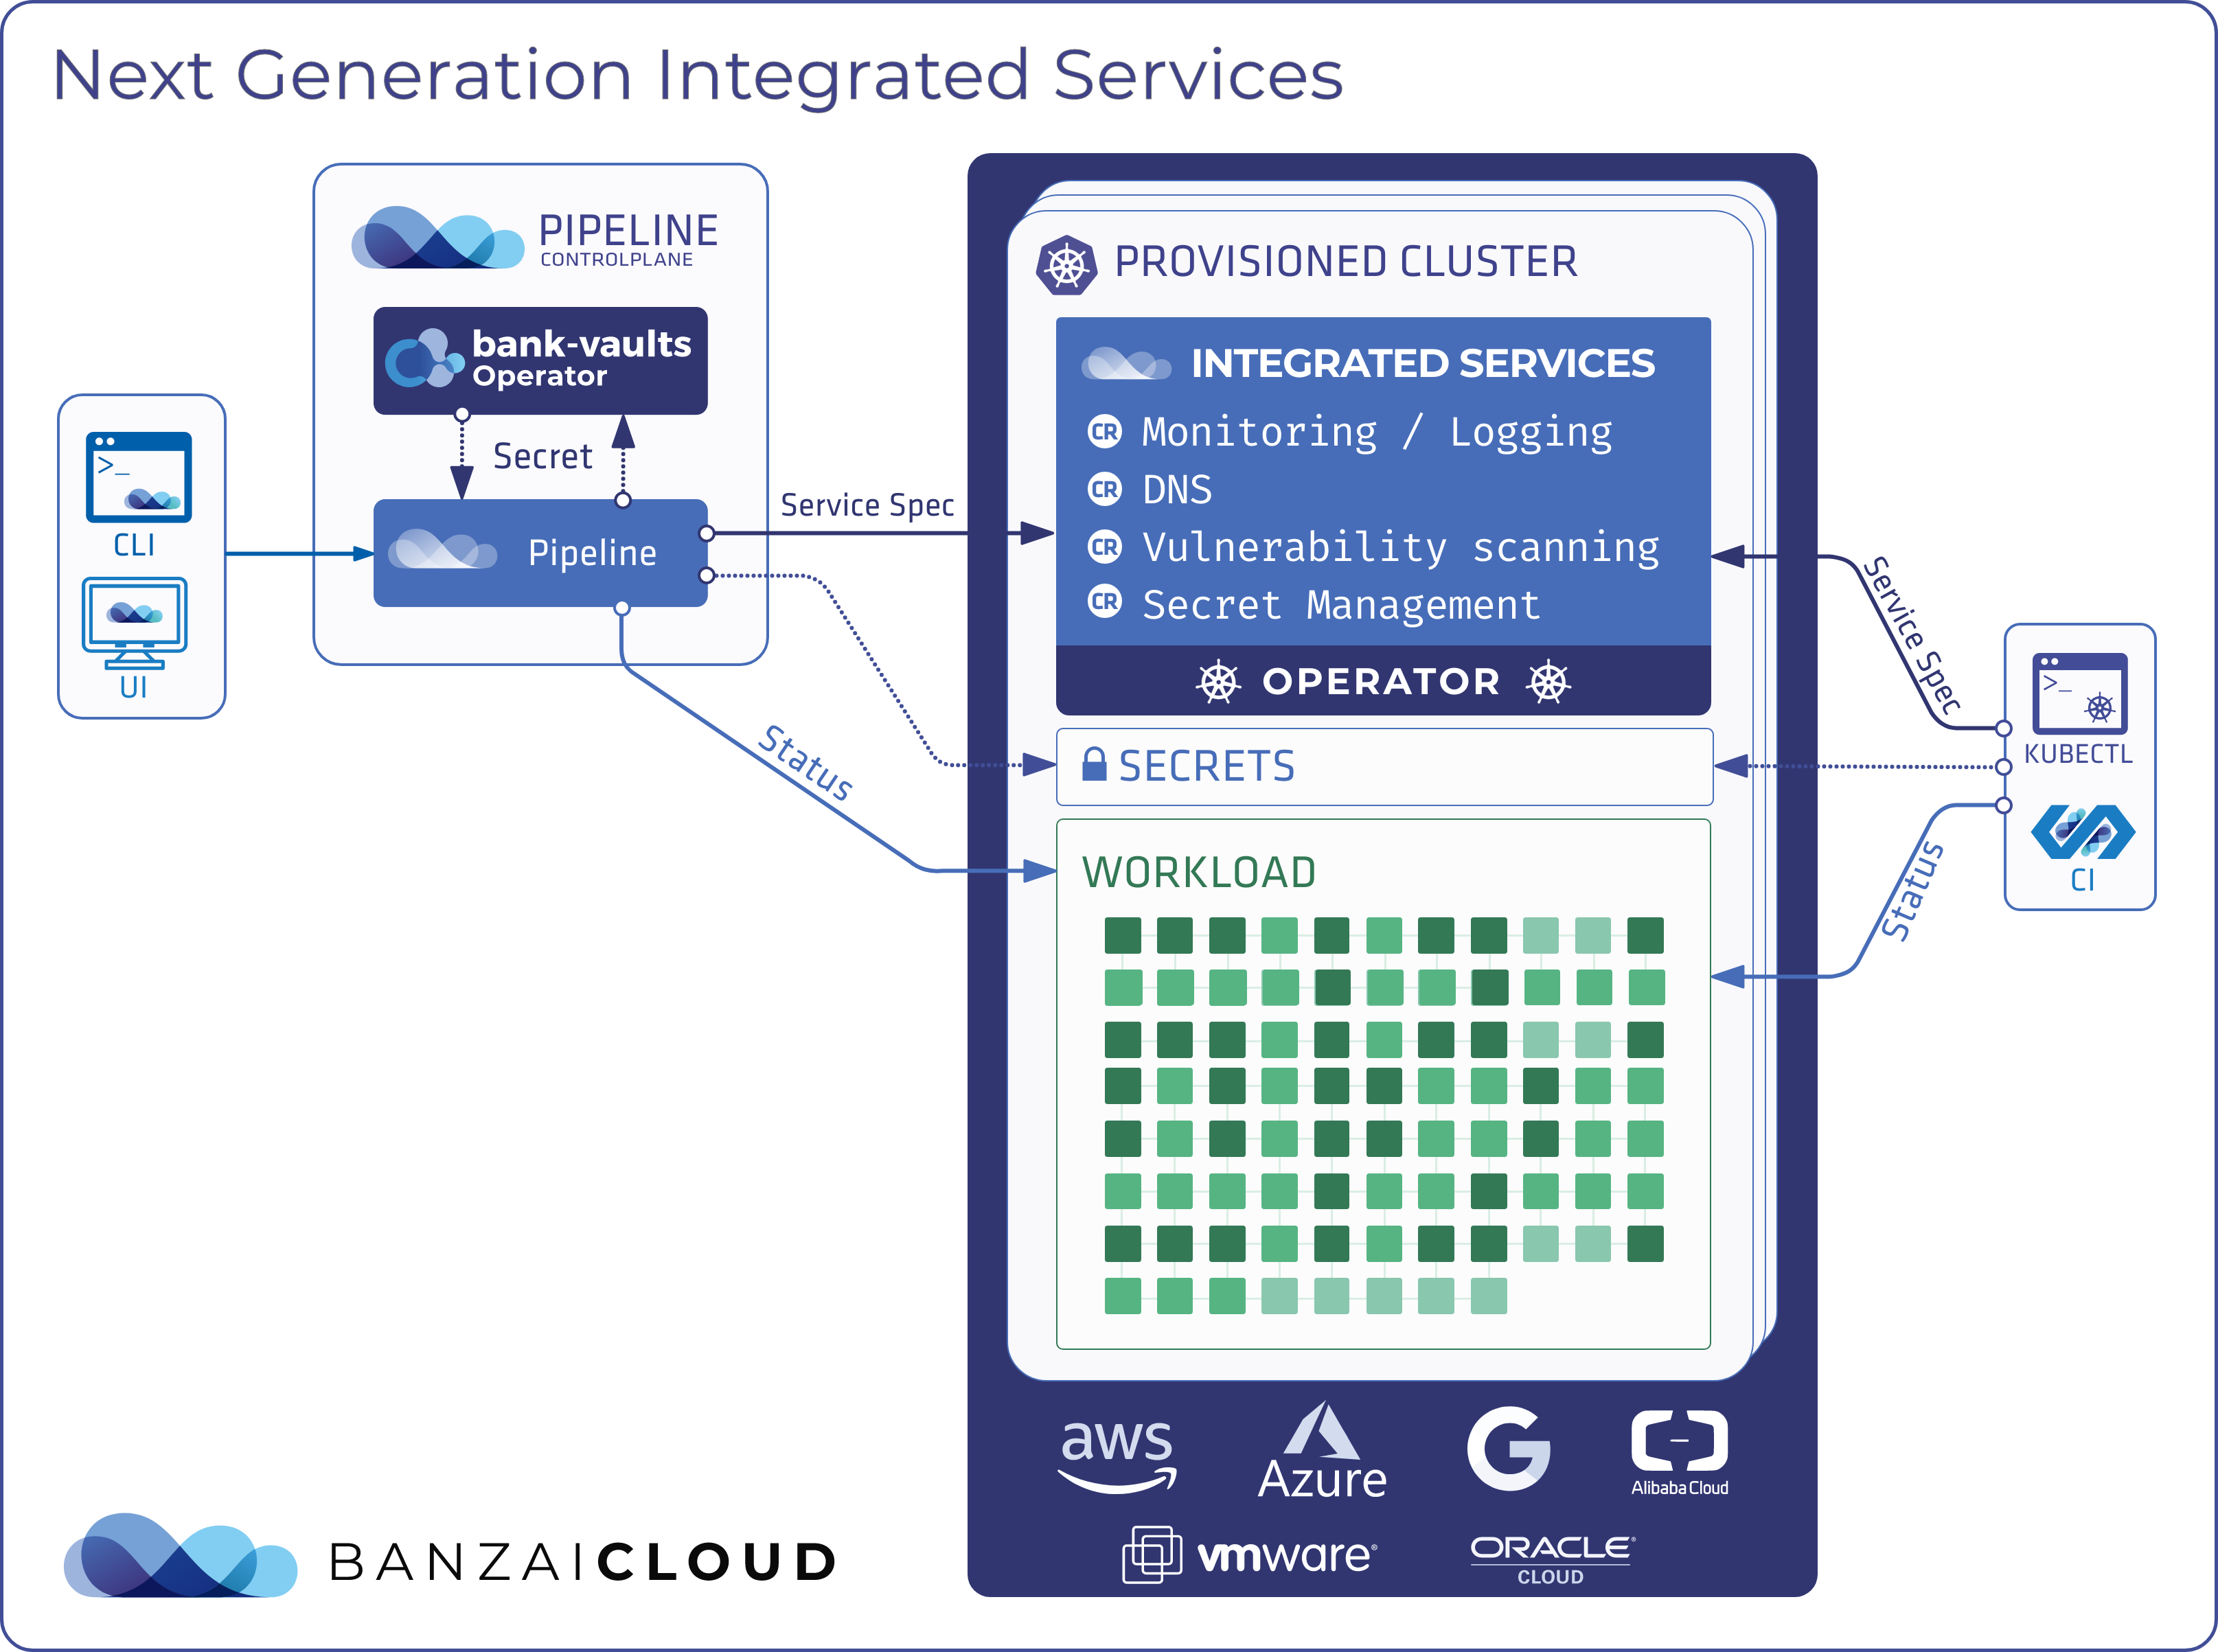
Over the last few months we’ve been working on implementing a new internal Pipeline framework for managing integrated cluster services. While most of those services had already been supported as part of our cluster create flow, now they have been separated from that flow and have been componentized in Banzai Cloud Platform 2.0. This was done for two reasons: we wanted to give users the flexibility to install and uninstall these services at any time during a cluster’s lifecycle, and we wanted them to be able to do so on any Kubernetes cluster, even ones that were not created by Pipeline (note, with 2.0 we began to support bringing your own Kubernetes).
These integrated services provide a fast and convinient way of setting up production ready cluster-related services: services like logging, monitoring, Vault based security, container image vulnerability scans, or — the subject of this post — DNS.
What is a DNS integrated service? 🔗︎
tl;dr: integrated cluster services for DNS are a convenient way of configuring automated public DNS management for Kubernetes clusters in Pipeline.
Automatic DNS management is a must-have for the type of dynamic infrastructures found in Kubernetes clusters. Clusters can change a lot over the course of their lifecycles, with many services coming and going. Internally, Kubernetes DNS solves problems pertaining to service discovery by reacting to changes in the cluster and adjusting DNS records accordingly. The same concept can be applied to DNS outside the cluster.
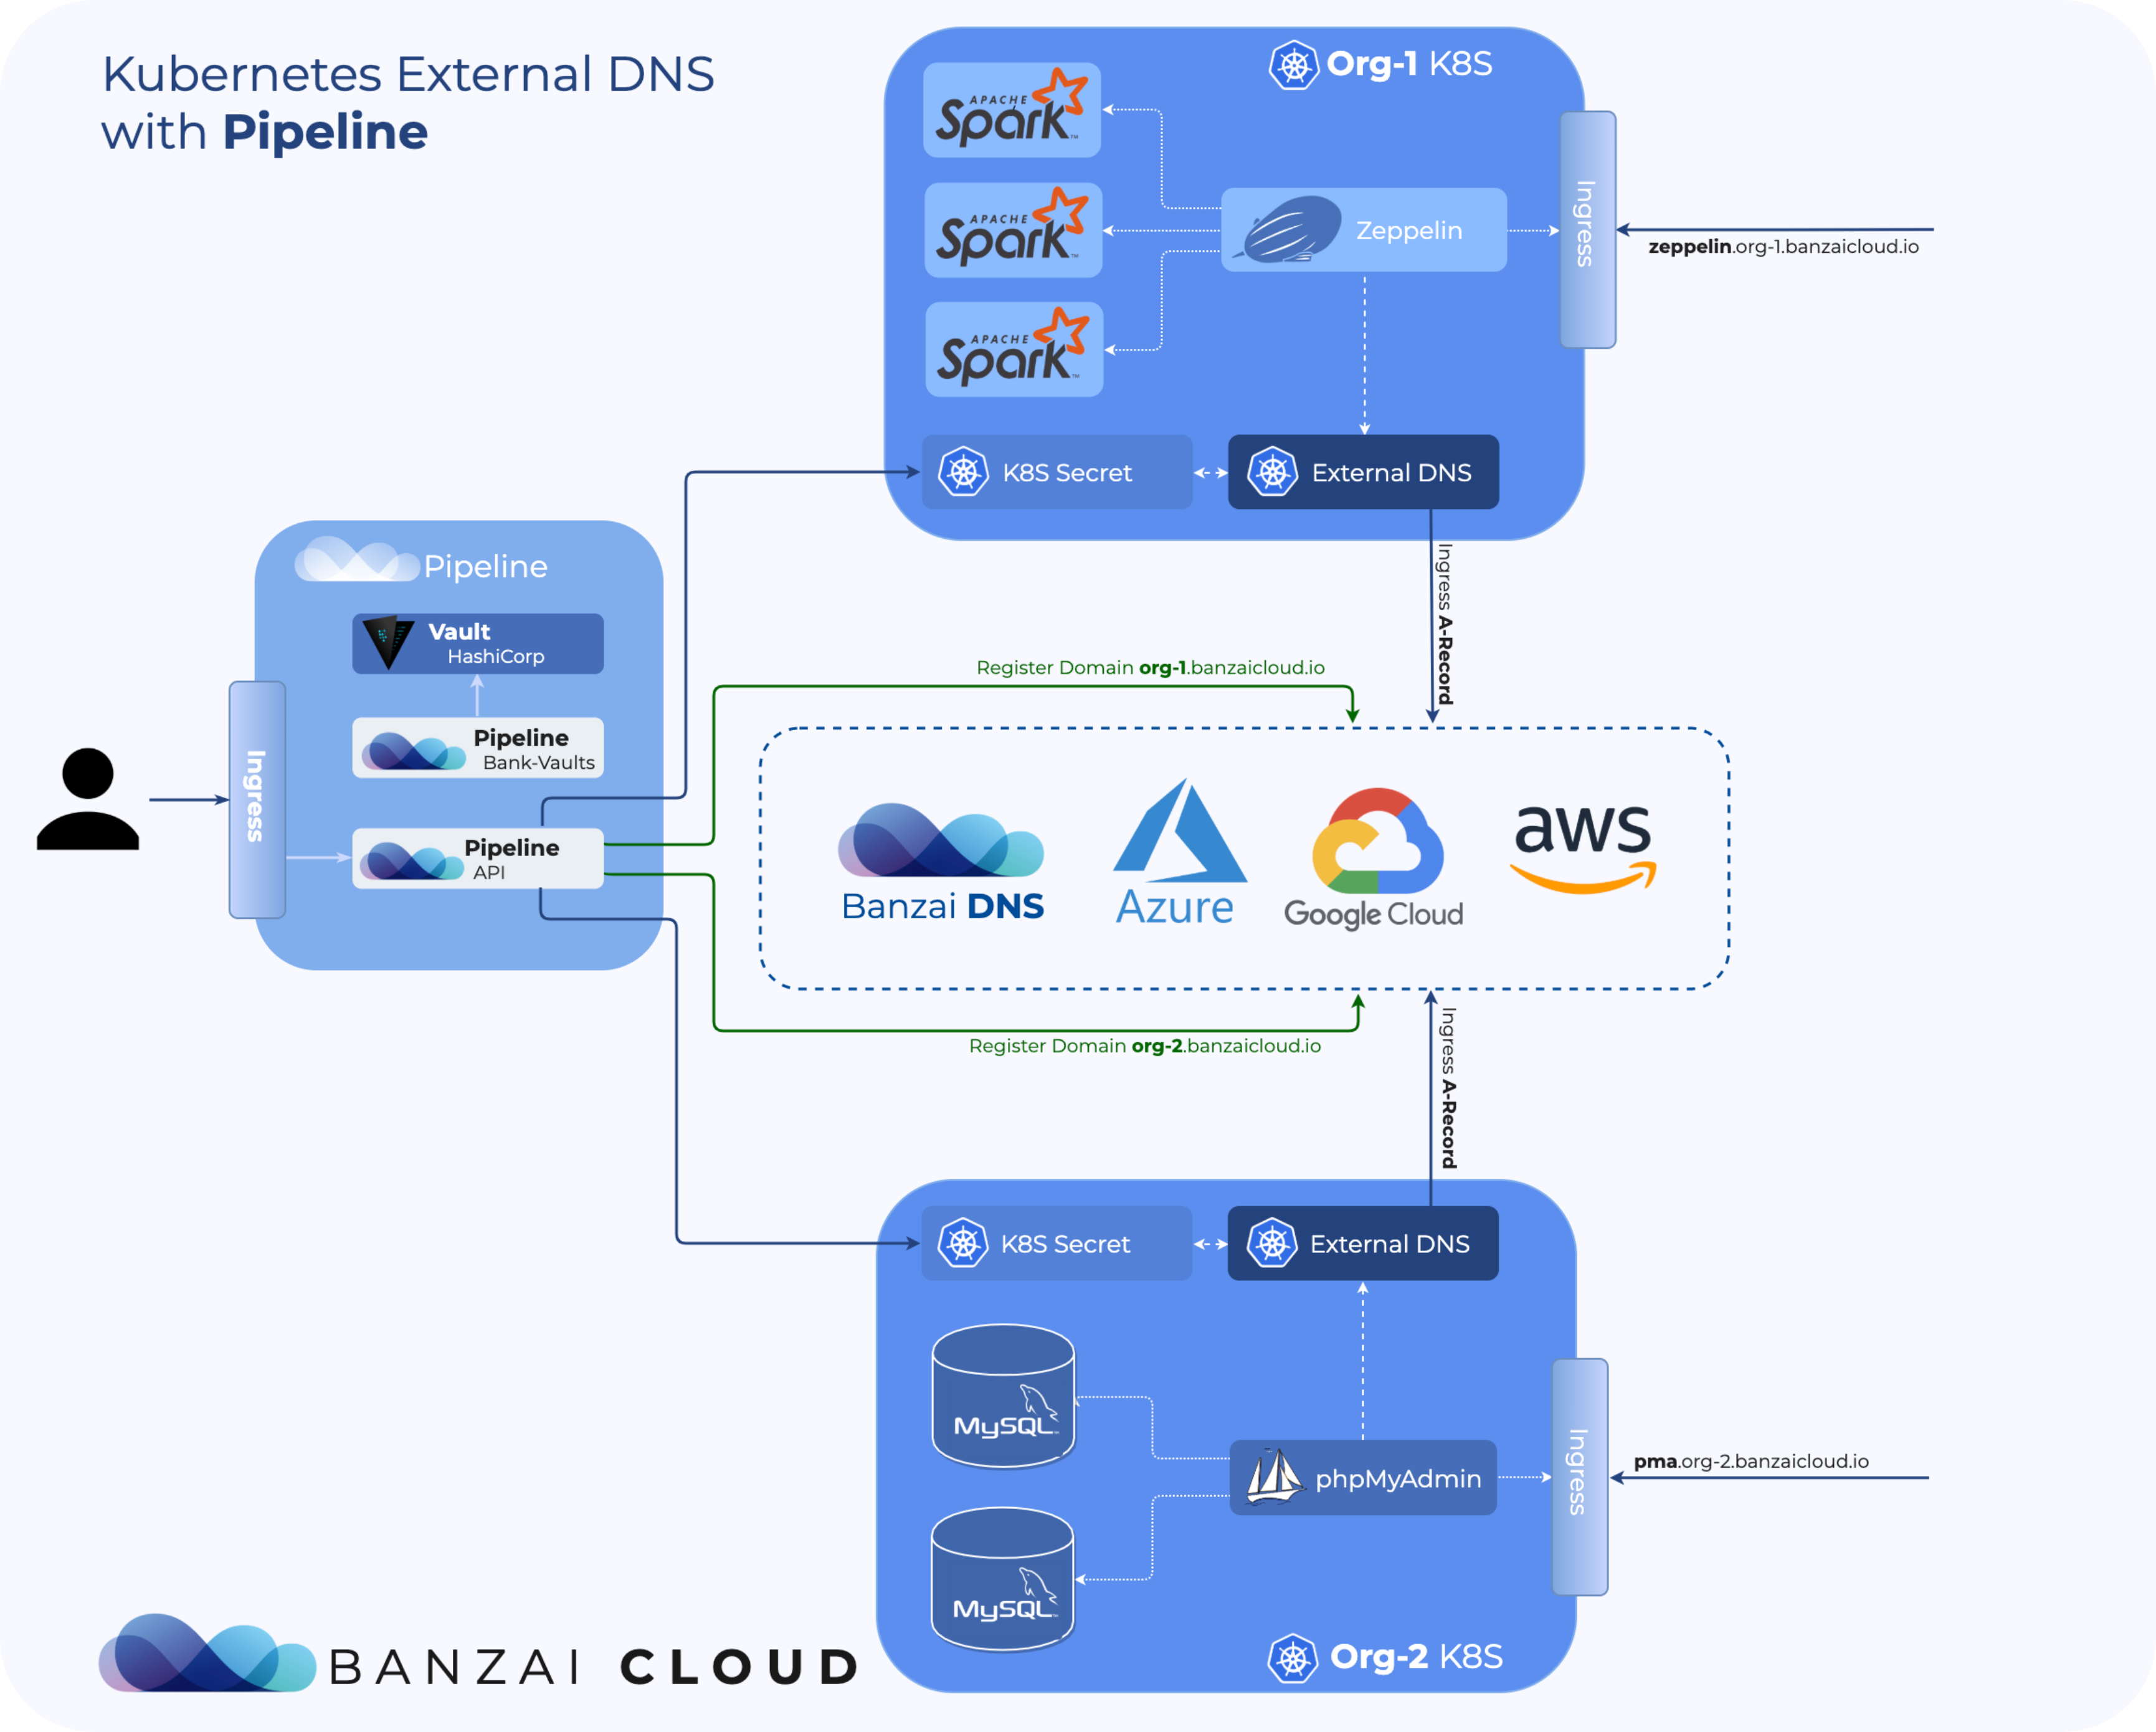
At its foundation, the integrated service for DNS uses ExternalDNS to provide similar automatic DNS adjustments by manipulating external DNS provider services like AWS Route53 or Google Cloud DNS. These, in turn, make Kubernetes resources — like services or ingresses — available publicly via DNS. ExternalDNS can work with many DNS providers of which we currently only support AWS Route53, Azure DNS and Google Cloud DNS, but more will be added in the future.

Apart from those supported by ExternalDNS, the service also supports our own Banzai Cloud DNS provider.
Banzai Cloud DNS 🔗︎
When using most other DNS providers, you have to manually register a DNS zone with your provider before you can ask it to create the desired DNS records. If you are an IT professional, you’re likely already deeply familiar with DNS terminology and configuration, but most users are not. Similarly, while a lot of users have basic privileges for managing specific cloud resources, most do not (and should not!) have the permissions required to configure DNS resources for reasons of security — see the principle of least privilege, etc. Other users either cannot be trusted with, or just don’t want to worry about these configuration details.
This is where Banzai Cloud DNS shines. It provides a straightforward DNS setup experience for Pipeline users, while automatically managing DNS zones in the background. When you activate the service with Banzai Cloud DNS selected, Pipeline will ensure that the required DNS zone is registered, that the associated credentials are used, and will even clean up resources once they’re no longer needed.
For Banzai DNS to be able to work its magic, it needs to be set up in the Banzai Cloud Pipeline configuration and its Vault secret store. The current implementation uses AWS Route53 as its underlying DNS provider, but in the near future we’d like to shift to using our own DNS service to keep Pipeline truly cloud independent.
Using the integrated DNS service 🔗︎
To activate the service through the web UI, first, go to your cluster details page. Under Integrated Services select the still inactive DNS card. This will take you to the service’s details page, where you can configure its parameters. Banzai Cloud DNS provides the most user-friendly activation experience, wherein you don’t have to change any parameters or supply new ones so long as you’re fine with the defaults. For the other three providers, you must specify at least the credentials to be used for authentication with the DNS provider service.
Note: At the date of publication, some configuration values cannot be modified using the web UI.
If you’re satisfied with your configuration, click ACTIVATE at the bottom of the page. You’ll be brought back to the cluster details page, where the service’s status will be shown as PENDING while the system finishes the activation process.
When the service is active, its components’ details are displayed next to the configuration values you specified. You can also change an active service’s configuration and click SAVE ALL CHANGES to apply your modifications.
To turn off a service, just go to its details page and click on DEACTIVATE.
Takeaway 🔗︎
Simply put, integrated cluster services provide a convenient way of activating cluster-related services. With the integrated DNS service, you can easily make the services on your Kubernetes clusters available via public DNS. And finally, our Banzai Cloud DNS makes DNS configuration a breeze without making any compromises to security.


