In Kubernetes clusters, the number of Operators and their managed CRDs is constantly increasing. As the complexity of these systems grows, so does the demand for competent user interfaces and flexible APIs.
At Banzai Cloud we write lots of operators (e.g. Vault, Istio, Logging, Kafka, HPA, etc) and we believe that whatever system you’re working with, whether it’s a service mesh, a distributed logging system or a centralized message broker operated through CRDs, you will eventually find yourself in need of enhanced observability and more flexible management capabilities.
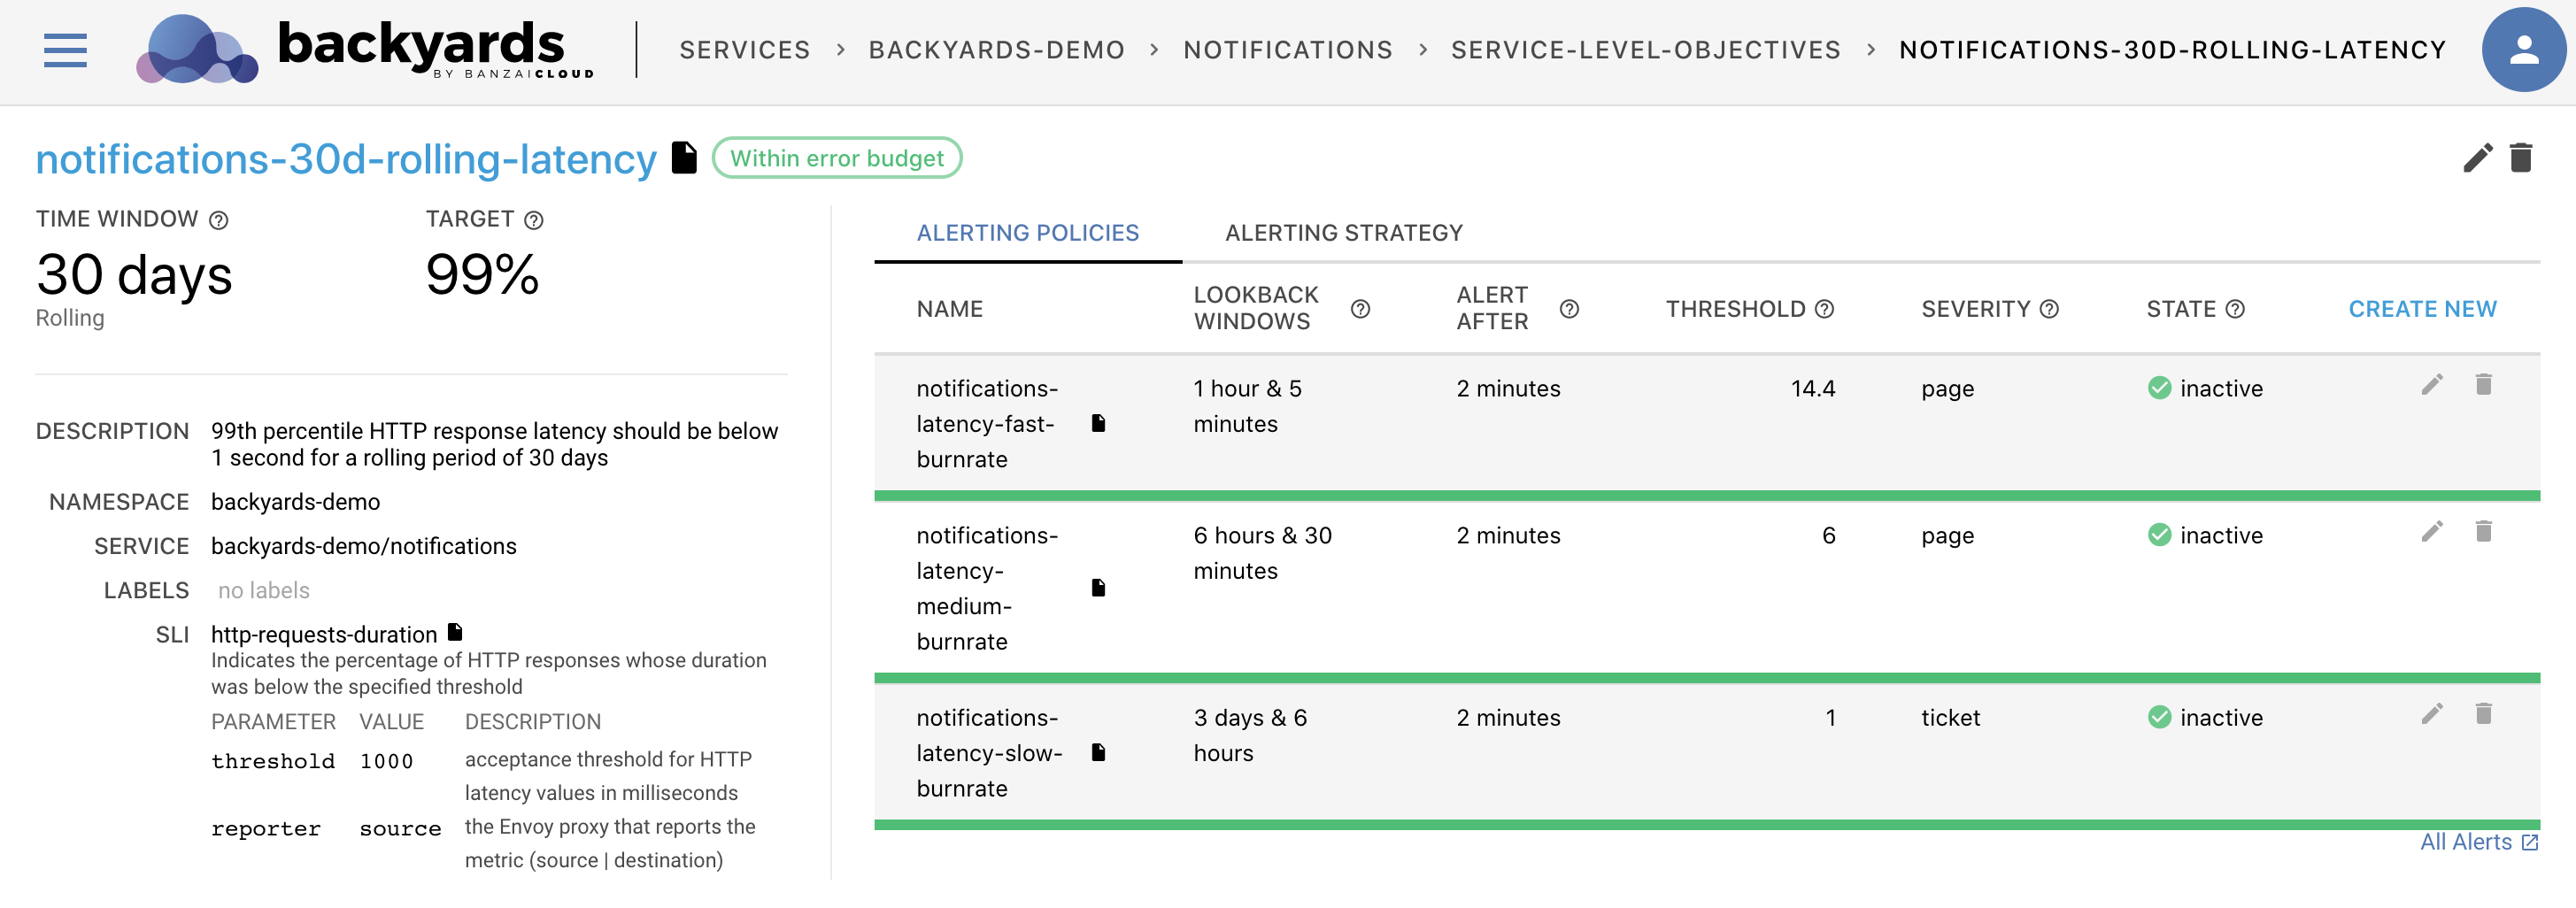
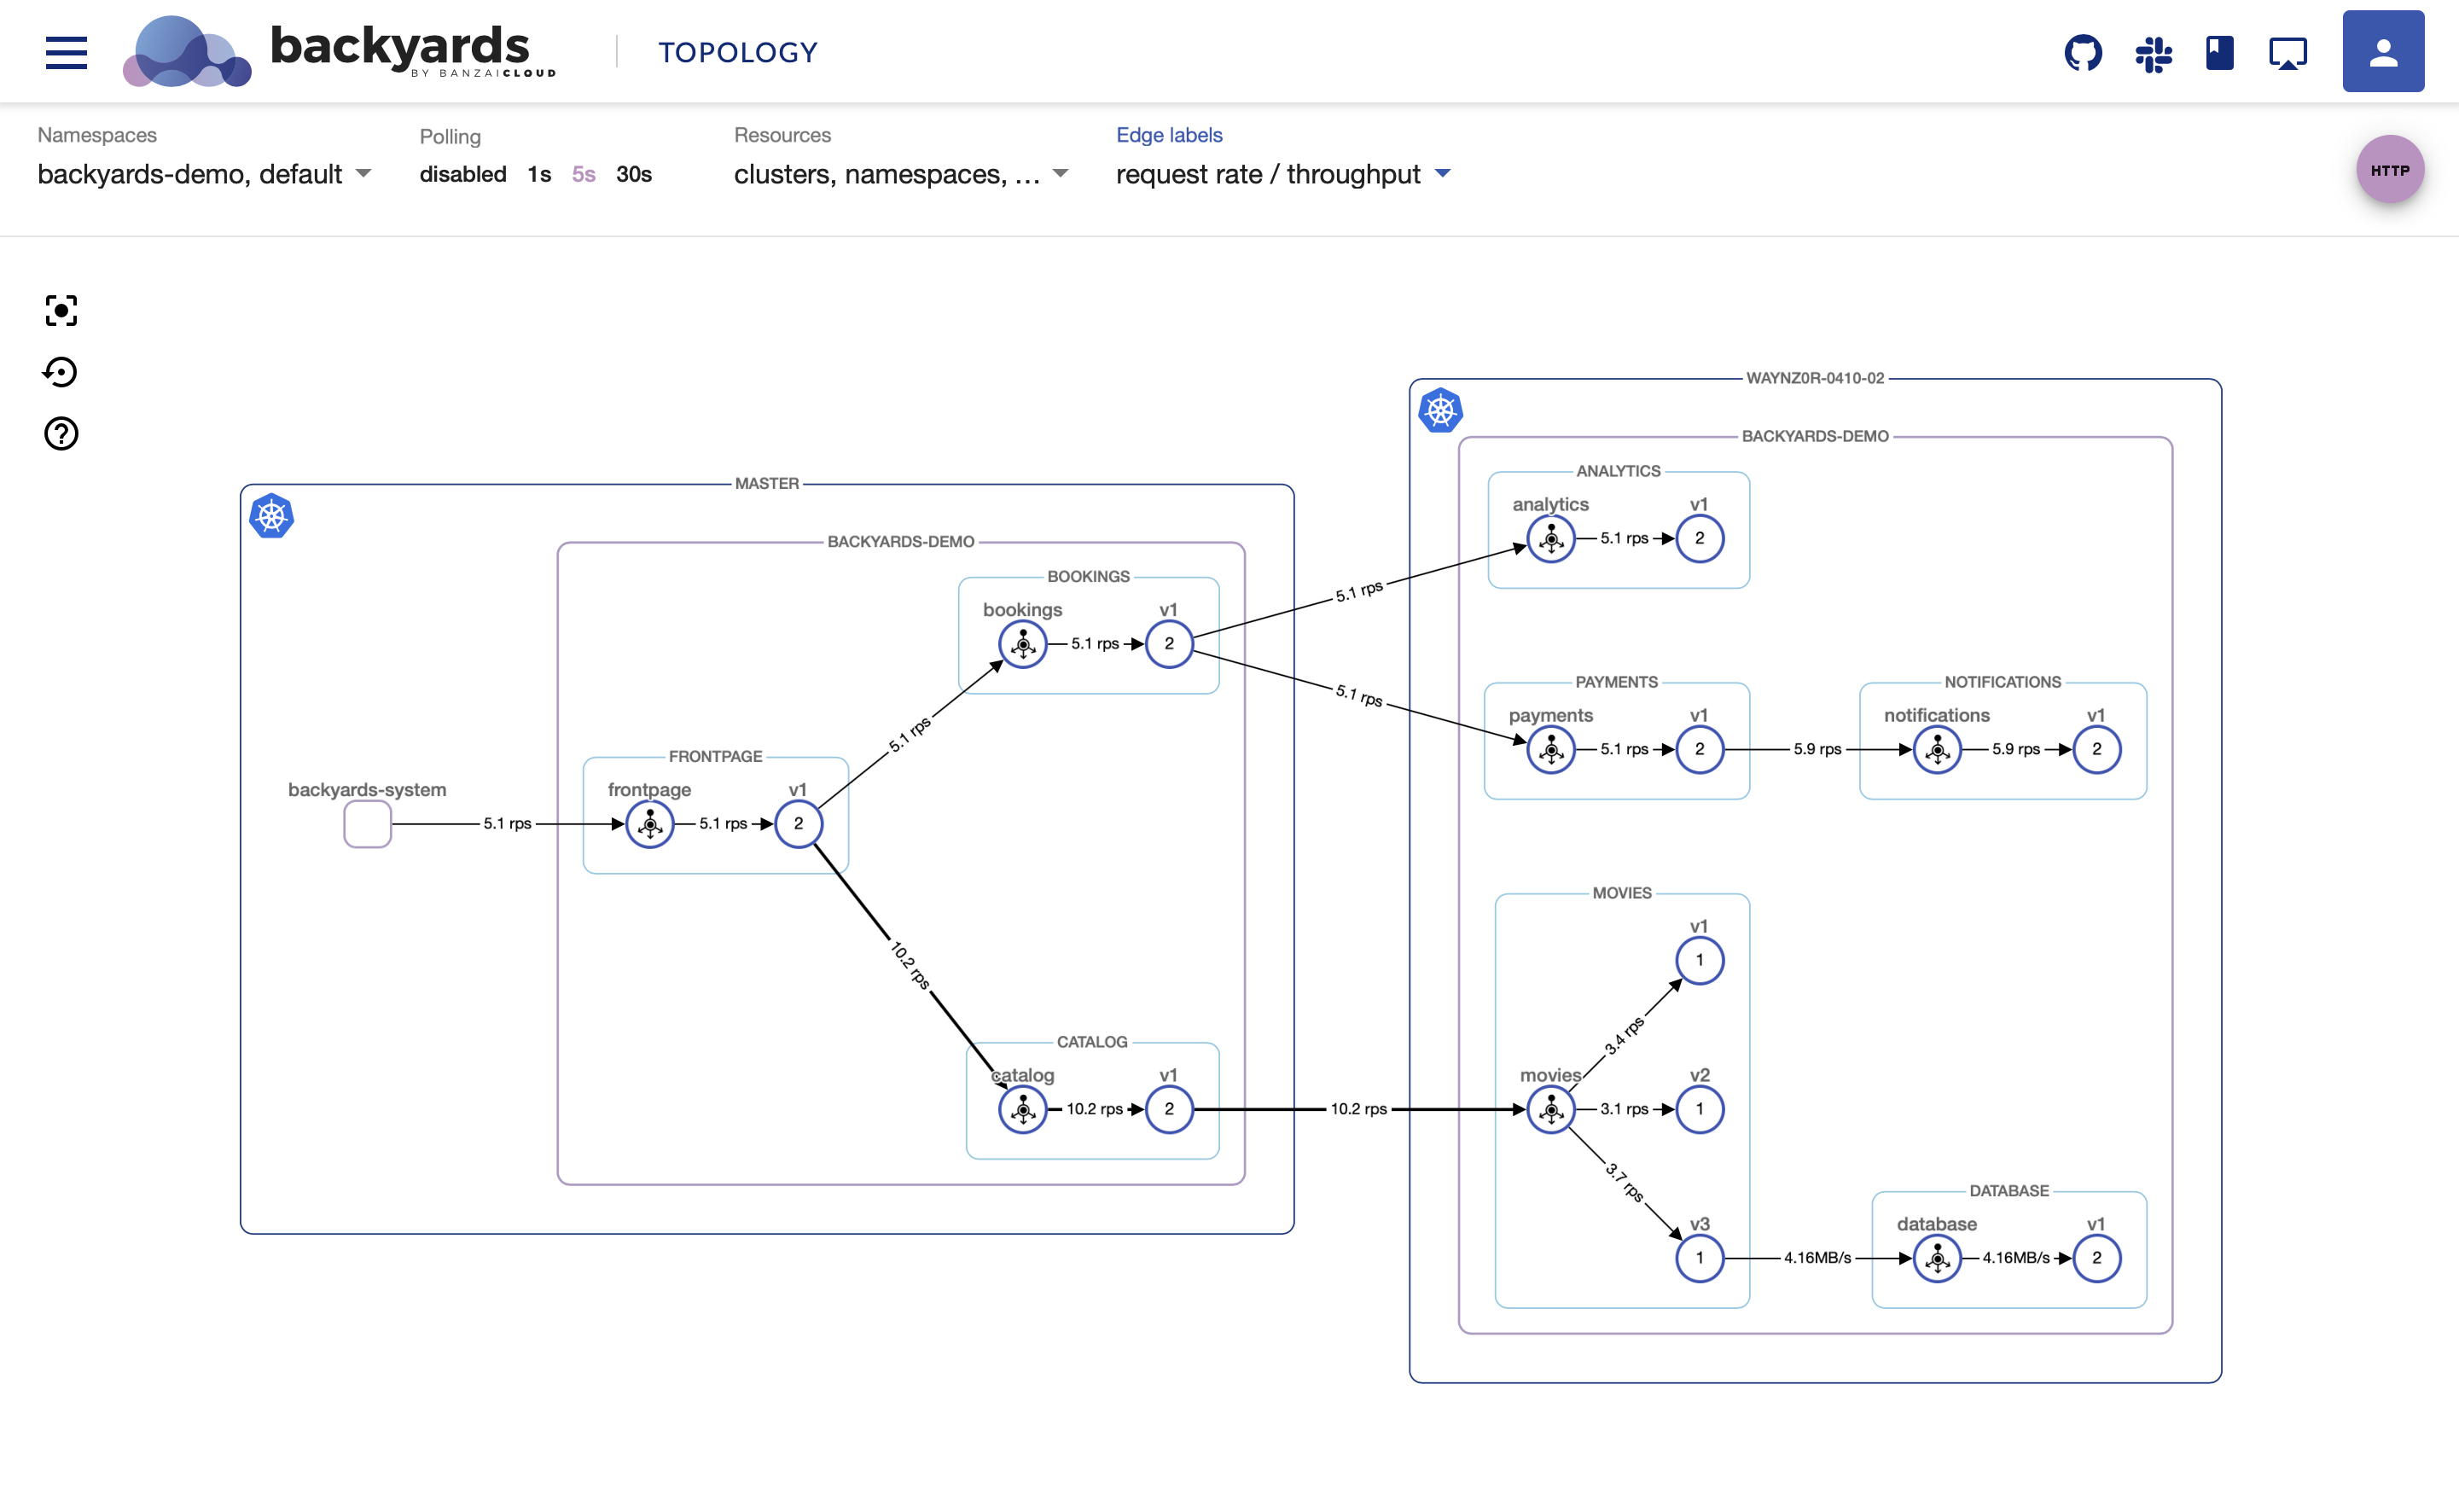
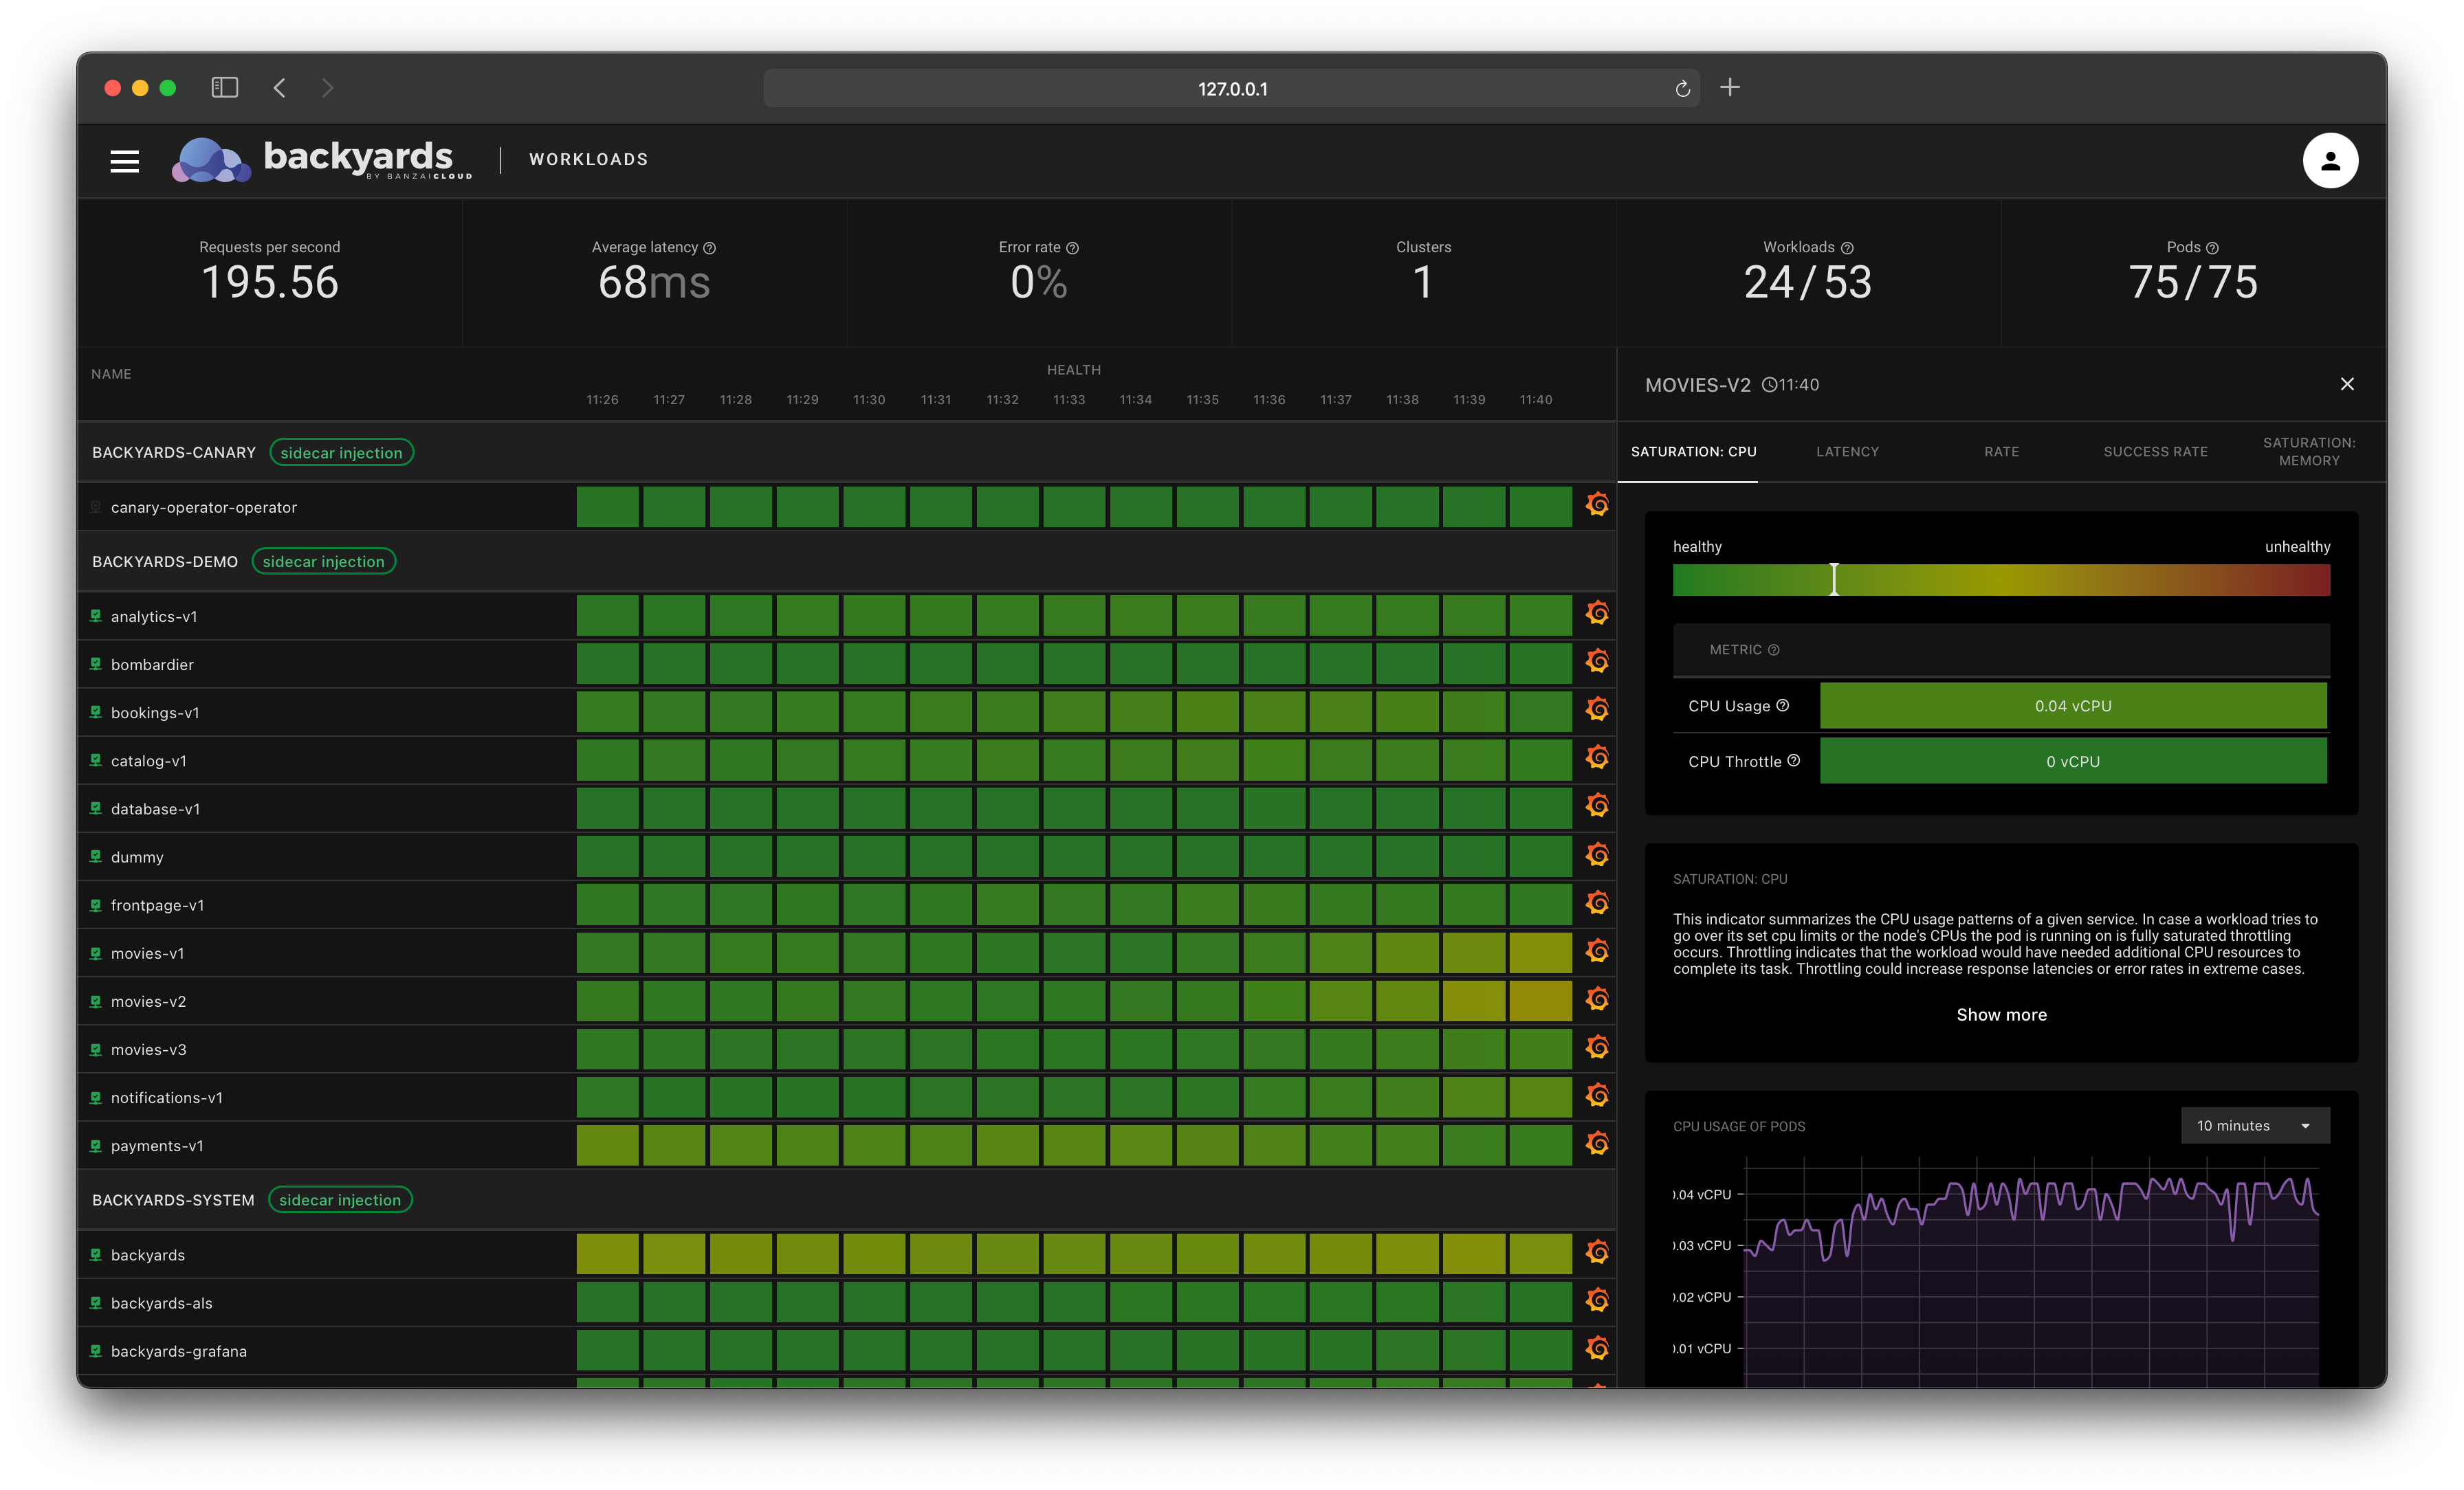
This is why we’ve been building Backyards (now Cisco Service Mesh Manager), our automated and operationalized service mesh built on top of Istio. Backyards (now Cisco Service Mesh Manager) is an Operations Dashboard on top of a GraphQL API that makes Istio more powerful through easier management.
In order to seamlessly bootstrap such an application, there are a few prerequisites that must be dealt with in the first place. Access and authentication are two of these, so we quickly began trying to figure out the best, most agile way to handle them. By agile we mean: do the simplest thing that could possibly work, that is secure, and that can grow with your application and team.
The solution we came up with, described here, supports the bootstrap experience of Backyards (now Cisco Service Mesh Manager) but will also be made available through several other Banzai Cloud products.
tl;dr: 🔗︎
Take a quick look at our zero touch authentication flow on Kubernetes or read on to dig into details.

Backyards architecture 🔗︎
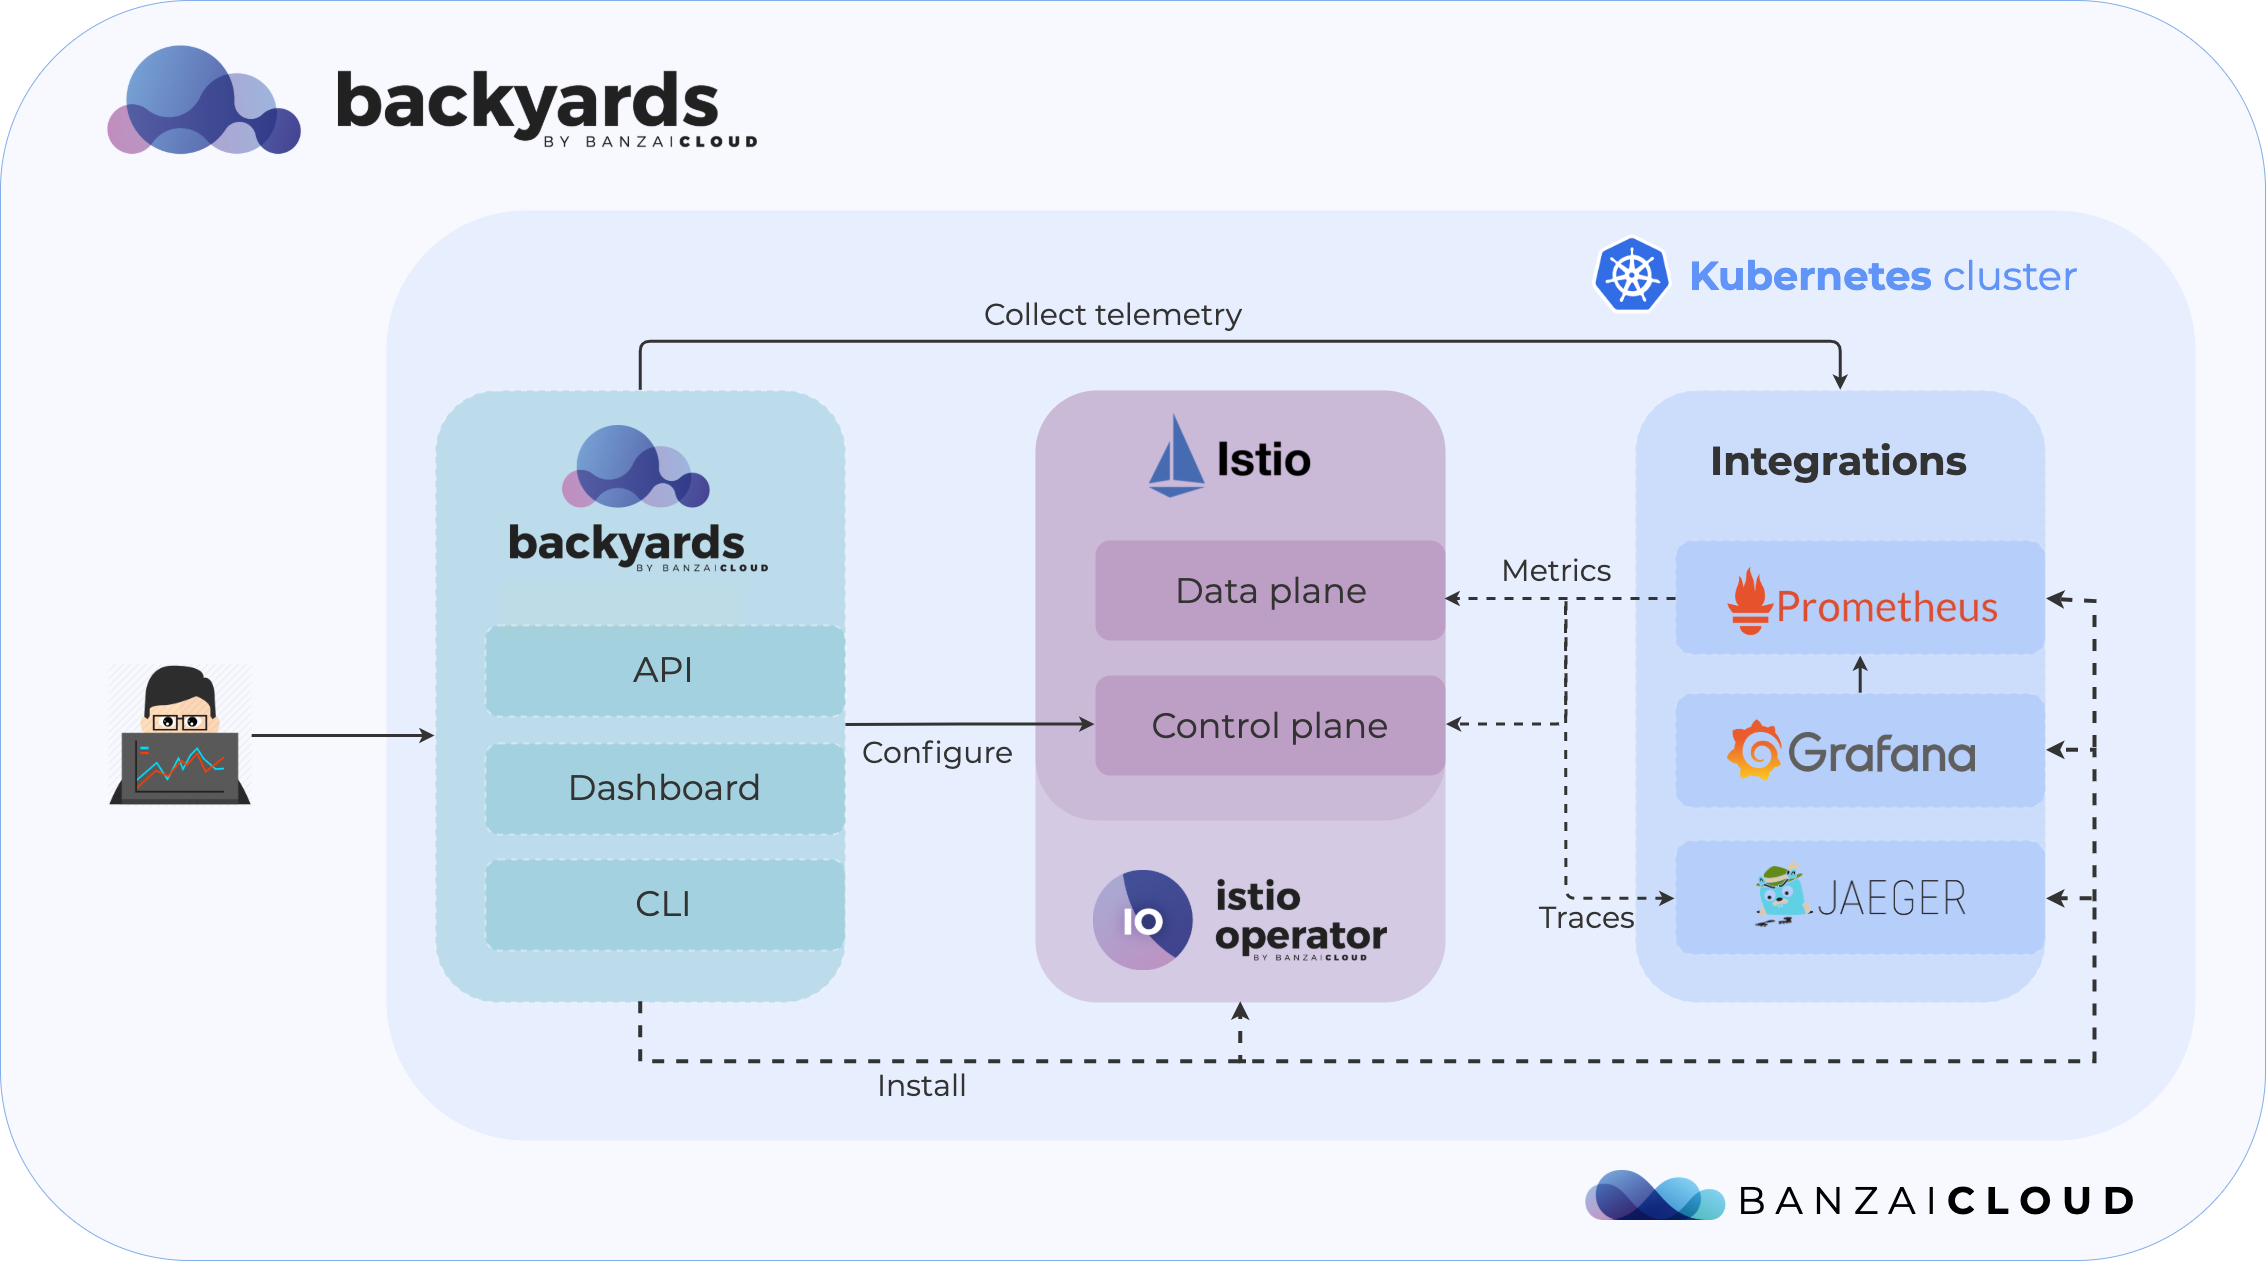
Backyards’ main component is the GraphQL API Server. It primarily communicates with the Kubernetes API server and enriches Custom Resources to provide flexible data structures for its UI and CLI. It has no persistent state management, so it has no databases, just in-memory caches.
There is also a Backyards CLI that streamlines the installation process and brings all features of the UI to the command line.

Check out Backyards in action on your own clusters!
Want to know more? Get in touch with us, or delve into the details of the latest release.
Or just take a look at some of the Istio features that Backyards automates and simplifies for you, and which we’ve already blogged about.
The ultimate goal, zero touch authentication 🔗︎
As discussed, our goal was to create a zero touch authentication configuration that just works, even when installing the Backyards CLI for the first time. We were well aware that single sign-on was, and is, the standard, and that there were great tools like Dex out there that make it easy to set up and use, but we wanted something even simpler - something that depended exclusively on the user’s Kubeconfig.
The other major challenge we faced was to provide access to the Backyards API endpoint while it was being installed in the Kubernetes cluster. Setting up public access to a remote endpoint is common practice, but it involves configuring several components: a Load Balancer, Firewall, DNS as well as Trusted Certificates.
A simpler method was to work with a Kubeconfig to leverage the Kubernetes API Server proxy. It’s a great choice if you want to launch an app and start experimenting with it alongside folks who already have a Kubeconfig.
This was the simplest setup we could come up with. The user just switches to their Kubernetes context and then the installer sets everything up and launches the dashboard with a single command. Through this method, we could wait to set up proper public access until it was absolutely necessary.
An example to learn from: the Kubernetes Dashboard 🔗︎
Let’s look at a tool that functions in a similar manner, the Kubernetes dashboard.
The Kubernetes Dashboard docs recommend using kubectl proxy as a way of providing access. That method is effective, but not great in terms of user experience.
As for authentication, the login form gives users two options. They can provide a token or a Kubeconfig file. Initially, this might seem convenient but, under the hood, it has significant limitations. The Kubeconfig based method only supports static credentials, and thus only works with User/Password (Basic Auth), Bearer Tokens and Client Certs.
The question is, then: Why does the Kubernetes Dashboard only support static credentials?
Probably because that’s the most straightforward way of handling authentication. Static credentials can be used without implementing custom protocols or using custom binaries. The problem is that Client Certificates or Bearer tokens will eventually expire, causing requests to fail, while, in contrast, default Service Account tokens have an unlimited lifetime and are unbound, resulting in security concerns.
Note: To be fair, the Kubernetes Dashboard supports forwarding impersonation headers, as long as those headers come from a trusted authenticating proxy. However, we’re looking for an agile solution, and that’s something that requires extra steps to set up correctly.
Bound Service Account tokens 🔗︎
Service Accounts are users managed by the Kubernetes API. Tokens created as Kubernetes Secrets for Service Accounts are, by default, bound only to a specific namespace, but have no other limitations. This is why - as an administrator - you can grab a Service Account token from the cluster and give it to the Kubernetes Dashboard so it can authenticate on your behalf. This is a dangerous practice, as Service Account tokens are not meant to be used like this.
Bound Service Account Tokens implemented with the TokenRequest API and Service Account Token Volume Projection are much more limited and secure, they’re just not the default yet.
Bearer authentication 🔗︎
Bearer authentication provides access to whoever presents the token without any further authentication steps. Service Account tokens are Bearer tokens, where the token itself is encoded with information about the user, i.e. its UID, and a list of group memberships for authorization. OpenID Connect takes it a step further by decoupling the authentication provider from the API Server. It also makes the authentication flow scalable by allowing the tokens to be decoded and verified by the API Server, without reaching out to the OIDC provider upon each request. This is possible because OIDC is tightly integrated into Kubernetes, and because the provider’s public verification keys are discoverable by the Kubernetes API Server.
A different type of Bearer authentication works with opaque tokens, where the API Server is configured to trust a third party authentication provider. The third party has to understand the TokenReview API and respond to token verification requests, since the Kubernetes API Server is unable to decode any information from the token itself. In Kubernetes, this is implemented as Webhook Token Authentication
Challenges of dynamic authentication strategies 🔗︎
These schemes define methods of extracting a limited lifetime credential from a trusted authentication provider. Some of these (e.g. OIDC) are integrated into the Kubernetes toolchain, while others are loosely coupled through client-go credential plugins and Webhook Token Authentication (e.g. AWS IAM Authenticator).
Credential plugins require custom binaries and all of these methods require that a user’s secret keys be authenticated against a third party provider. These things cannot be prompted for in a login form.
We realized we could do this the Kubernetes way, but instead of using kubectl itself, we could leverage our existing Backyards CLI and use the client-go library to allow users to authenticate locally and log in to the remote Backyards (now Cisco Service Mesh Manager) dashboard, using locally resolved credentials.
The problem was that the lifetime of these credentials was limited; they usually expired within a few minutes for security reasons. So we asked the question, do we really need the user’s credentials for the whole session? Can’t we just verify users during the login flow and get all the information we need? Enter user impersonation.
Impersonation 🔗︎
A user can act as another user through impersonation headers. These let requests manually override the user info a request authenticates as.
Technically, once the user has been verified for access to the Kubernetes API Server, Backyards (now Cisco Service Mesh Manager) can authenticate via its own Service Account but will be authorized as the user it impersonates. Backyards can even issue it’s own JWT, encoding all the user’s groups and capabilities for subsequent requests. When the user performs the request, Backyards verifies the JWT and extracts user and group information for use in impersonation headers.
Some Gaps 🔗︎
There are still some gaps in this story.
- How might we produce the Bearer token?
We figured out that we want to use our Backyards CLI to log in, but how exactly can we do this? We were hoping for a client-go library function that simply returns a token in exchange for a Kubeconfig, but unfortunately no such function exists. client-go has a wrapper around HTTP requests that perform authentication, but currently there is no way to get the raw authentication token directly. Fortunately, we can use this same wrapper to access Backyards the same way we access the Kubernetes API Server.
- How to pass the token from the Backyards CLI to the UI?
The CLI has a dashboard command that opens a browser tab pointing to the UI, so that the user can immediately start working with Backyards. We wanted things to be seamless, but there are still some problems here. Namely, how can we pass the token to the browser if we can only use GET request and no HTTP Headers and so the token will end up in access logs?
Our first idea was to use one-time tokens, but that would require some sort of persistent store, which we wanted to avoid, since Backyards is supposed to be completely stateless.
Our next idea, which we ended up implementing, was to generate a very short lifetime encrypted token - a JWE - to wrap the actual JWT in the login flow, and let the CLI use that to open the browser tab. Once Backyards receives an encrypted JWE, it checks it’s validity, decrypts it, sets it in a secure cookie and performs an HTTP redirect to the dashboard. The wrapped, encrypted token will still be available in access logs, but since it will soon expire, the attack surface is very limited.
- How to verify Tokens and Client Certificates?
Bearer tokens can be easily verified using the TokenReview API, but Client Certificates cannot. Therefore, we needed to create a dedicated client instance that was configured with the cert. This was so we could call the Kubernetes API Server and verify that the user was actually authenticated. Also, the list of groups had to be parsed from the cert directly. We used the SubjectAccessReview API to get a user’s capabilities, which enhanced User Experience by alerting the user if we knew they didn’t have the right to do something, rather than relying on their behaviour generating an Unauthorized error (we consider that a cop out). Unfortunately, we cannot use this API if the user authenticates with Client Certificates.
The Authentication Flow 🔗︎
This is how the whole flow looks, now that we’ve figured out all the missing pieces:
- The user uses the Backyards CLI to perform a Backyards command.
- The Backyards CLI creates a proxy endpoint to reach the Backyards service (we call it the “Server” from here on in), on a local port.
- The Backyards CLI uses
client-goto create an HTTP Transport that will automatically authenticate against the auth provider and will add a valid Bearer token to every request, except when Client Certificates are being used. In the event that Client Certificates are being used, the CLI will simply add the Client Certificates to theloginrequest’s body. - The Backyards CLI calls the
loginAPI on the Server. - The Server verifies Bearer Tokens using the
TokenReviewAPI (or the Server verifies Client Certificates through a separate client) - The Server also uses the
SubjectAccessReviewAPI to get information about the user’s capabilities. - The Server issues a JWT, encoding all the user’s groups and capabilities with a longer expiration (10h), and wraps it in an encrypted JWE with a shorter expiration (5s).
- The Backyards CLI receives the tokens, and can cache and work with the JWT for as long as it’s valid.
- If the user calls the dashboard command, then the Backyards CLI has to use the encrypted JWE to open the browser tab.

Takeaway 🔗︎
We’ve demonstrated how to leverage the Kubernetes authentication and authorization system to provide a secure stateless, opinionated API and UI on top of raw Kubernetes CRDs.


