Over the past few years, Kubernetes has become the de facto standard platform on which the world runs its cloud native applications. Although it has a great value proposition for use in all kinds of cases, its ecosystem is immensely complex and it requires a lot of expertise to operate. This is where the Banzai Cloud Pipeline platform comes in.
Our mission is to help integrate Kubernetes into existing organizations, and to make the Kubernetes experience better for everyone:
- Developers can focus on their applications without having to become a Kubernetes expert
- Operators get a single cockpit with full visibility and control over their clusters
- Managers can avoid the cost of hiring a team of Kubernetes experts and save on infrastructure by using our suite of optimization tools
Introducing Integrated Services 🔗︎
Operating applications is consistently difficult. Operating mission critical applications without the necessary expertise and/or tooling is, at best, brave and, at worst, catastrophic.
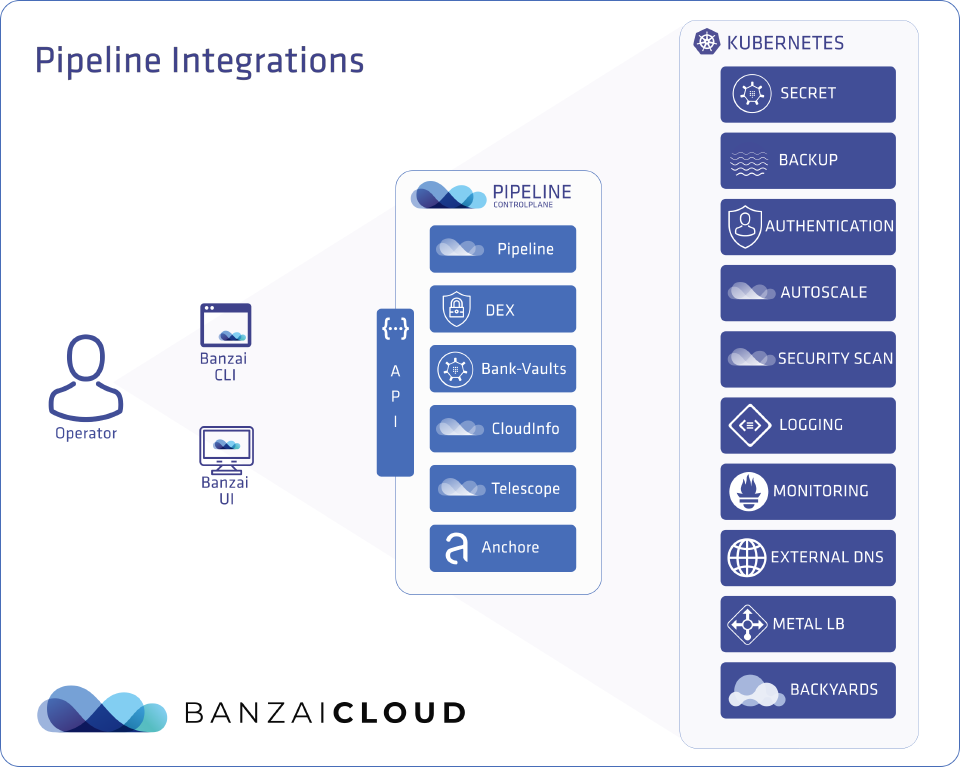
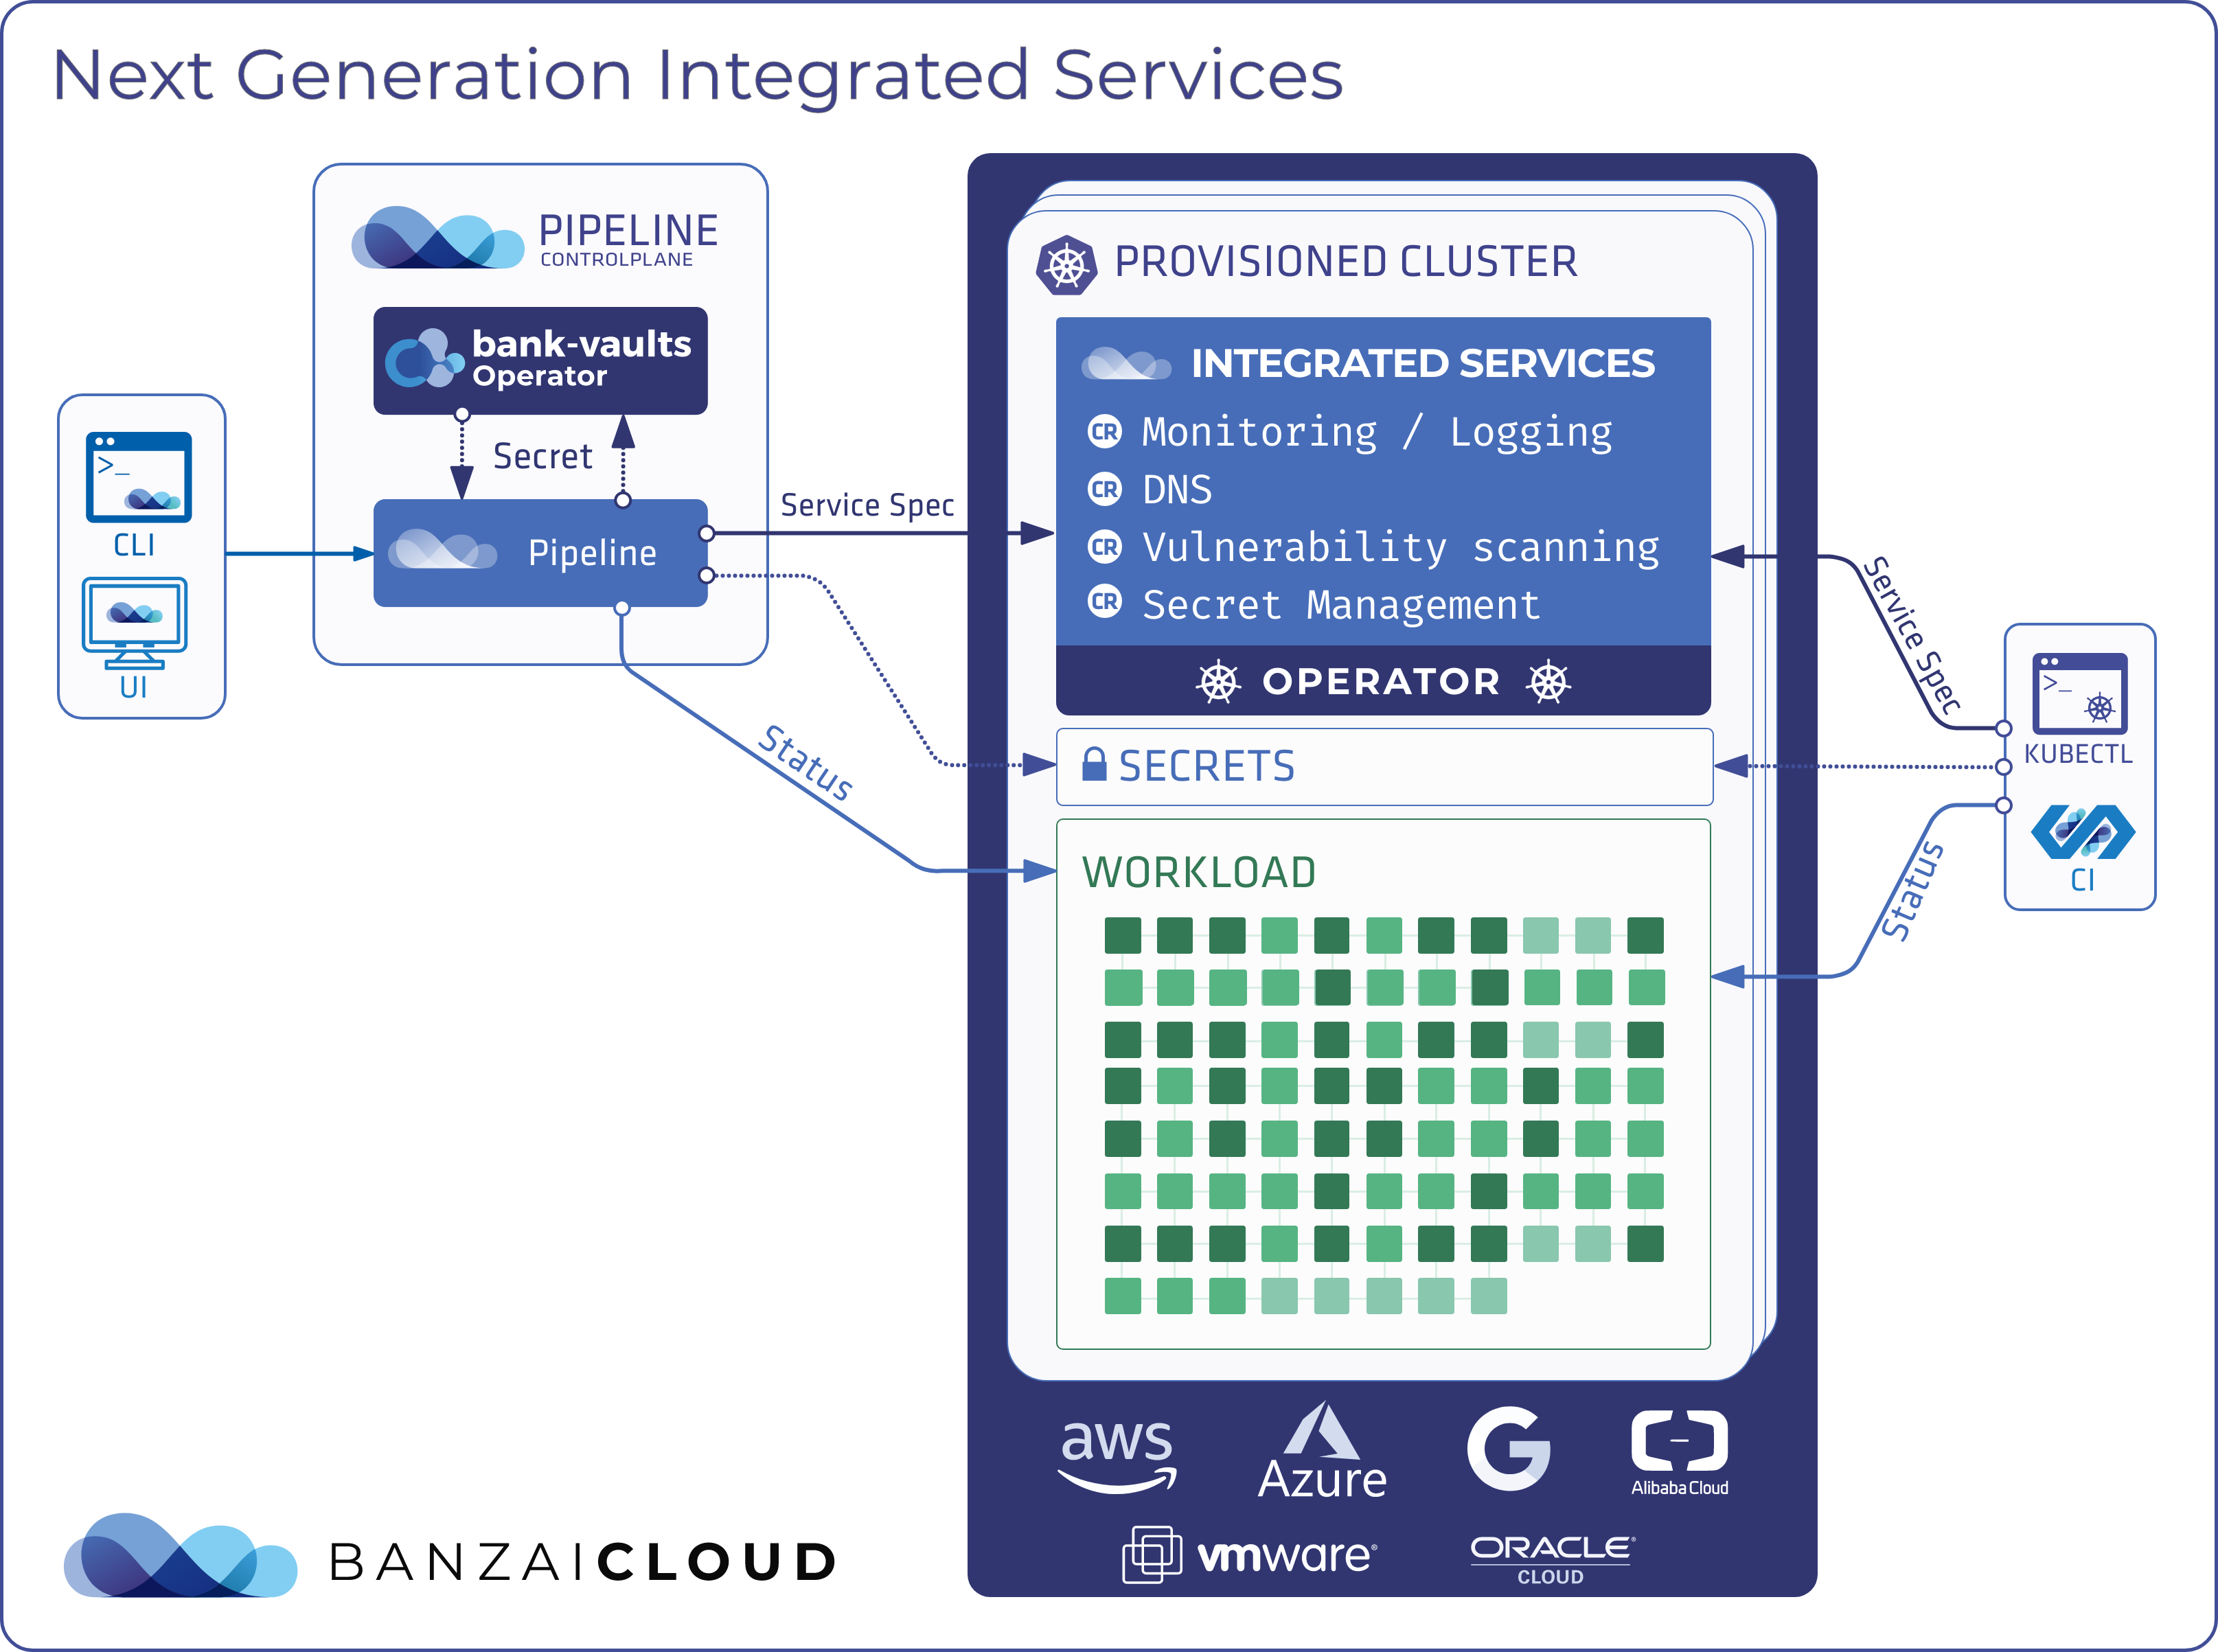
This is why we’ve integrated a handful of those tools into our Pipeline platform and made them as easy to use as possible, so developers don’t have to become operations experts in order to install and configure them:
Integrated services take care of a lot of operational tasks, allowing developers to focus on their applications. Here is a list of integrated services that we consider most important from an operational standpoint:
- Ingress: by default, we install an ingress controller on each cluster, so developers can start using their applications immeadiately after installing them.
- Monitoring: Prometheus and Grafana are industry standard tools and crucial for monitoring applications. We install them and make them work automagically with expressive dashboards.
- Logging: our Logging Operator can be easily installed and will rapidly start forwarding logs to various destinations (eg. object stores, Elastic, etc).
- Autoscaling: Cluster and Horizontal Pod Autoscalers are enabled by default, so applications won’t run out of resources (works even with custom metrics).
- DNS: automatically registers applications in DNS.
- Secret management: Kubernetes secrets are anything but secret, so our Bank-Vaults operator for Vault and webhook inject secrets directly into Pods.
Demo 🔗︎
Enough talking, let’s take a look at these integrated services in action!
You will need the following for this demo:
- Credentials for your cloud provider (we support the five major providers: AWS, GCP, Azure, and on-prem clusters: VMware, bare metal)
- the Banzai CLI tool
You can install the Banzai CLI tool with this one, simple command:
curl https://getpipeline.sh | shFor simplicity’s sake, let’s go ahead and use the hosted Developer Preview version of Pipeline. If you’d like to install an evaluation version of Pipeline in your own environment, that’s easy: just follow this quickstart guide. (It also takes just one command.)
The commercial version of our product also includes a number of additional features that accelerate production use-cases such as HA setup, various integrations and Kubernetes cluster upgrade flows.
The first thing that you’ll have to do is sign up for our Developer Preview with your GitHub account.
Just go to https://try.pipeline.banzai.cloud and follow the instructions on your screen.
Once you’ve logged in, you can authenticate the CLI tool (by continuing to follow instructions):
banzai loginCreating your first cluster 🔗︎
After authenticating, you need to add a secret for your cloud provider to use. For AWS, you can use the CLI tool and it will automatically detect your credentials:
All credentials (Secrets) on the Pipeline platform are stored in Vault.
SECRET_NAME=aws
banzai secret create --magic --name $SECRET_NAME --type amazon
For other providers, please see our documentation.
Once you’ve added your credentials, you can create your first cluster (in this example we’re using Amazon EKS, however you could just as easily use our own CNCF-certified Kubernetes distribution, PKE):
CLUSTER_NAME=integrated-services-demo-$RANDOM
CLUSTER_LOCATION=us-east-1
banzai cluster create <<EOF
{
  "name": "$CLUSTER_NAME",
  "location": "$CLUSTER_LOCATION",
  "cloud": "amazon",
  "secretName": "$SECRET_NAME",
  "properties": {
    "eks": {
      "version": "1.14.7",
      "nodePools": {
        "pool1": {
          "spotPrice": "0.03",
          "count": 3,
          "minCount": 3,
          "maxCount": 4,
          "autoscaling": true,
          "instanceType": "t2.medium"
        }
      }
    }
  }
}
EOF
For other providers, please see our documentation.
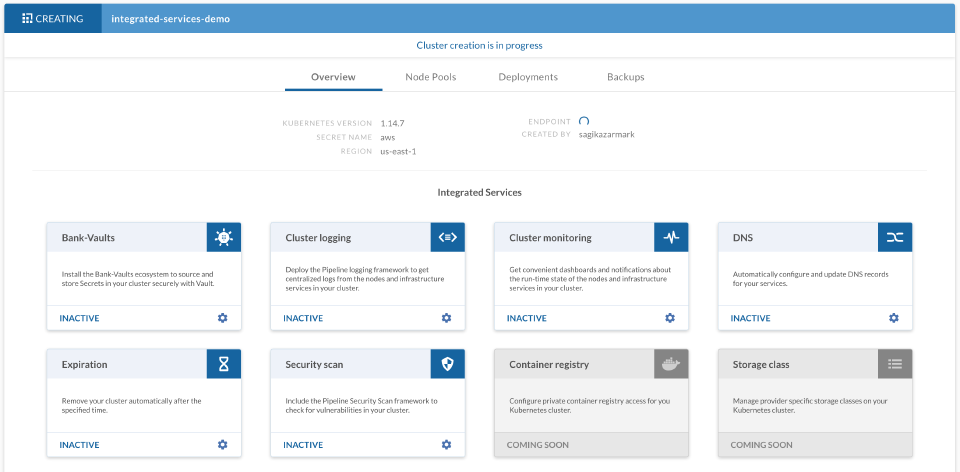
While your cluster is being created, you can check its progress on the dashboard.
You can then move immediately on to enabling integrated services; you don’t have to wait for the cluster to be ready.
DNS 🔗︎
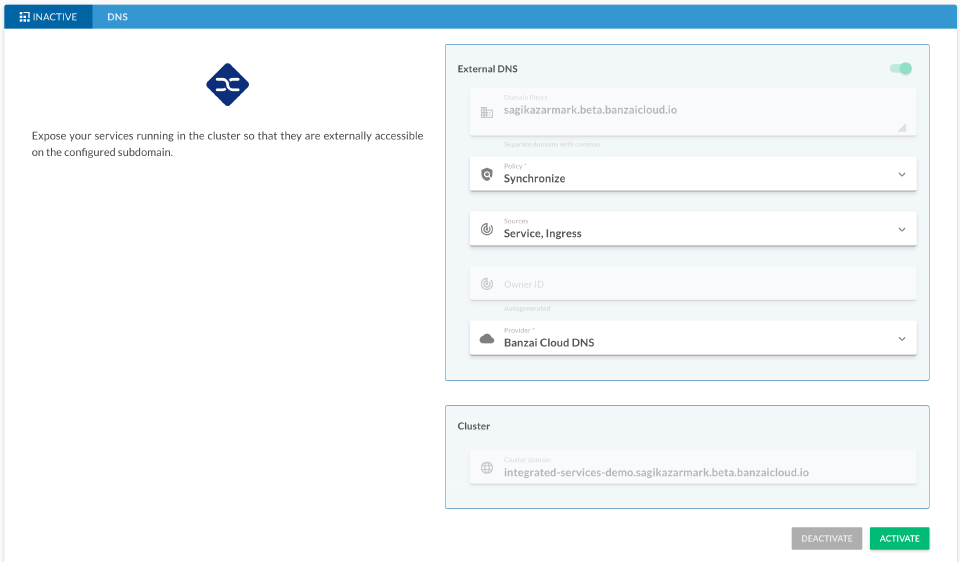
The DNS integrated service installs the External DNS component, watches Kubernetes services/ingresses for DNS records and creates/updates those records in the chosen DNS provider.
You can install this service using the following command:
banzai cluster service --cluster-name $CLUSTER_NAME dns activateOur developer preview comes with a built-in DNS provider (called banzaicloud-dns) that registers DNS records under our shared domain.
Make sure to select it when following these steps.
Customize the rest of the parameters in whatever way you’d like, but the service will also work using the default parameters.
Alternatively, you can configure the service on the dashboard:
Monitoring 🔗︎
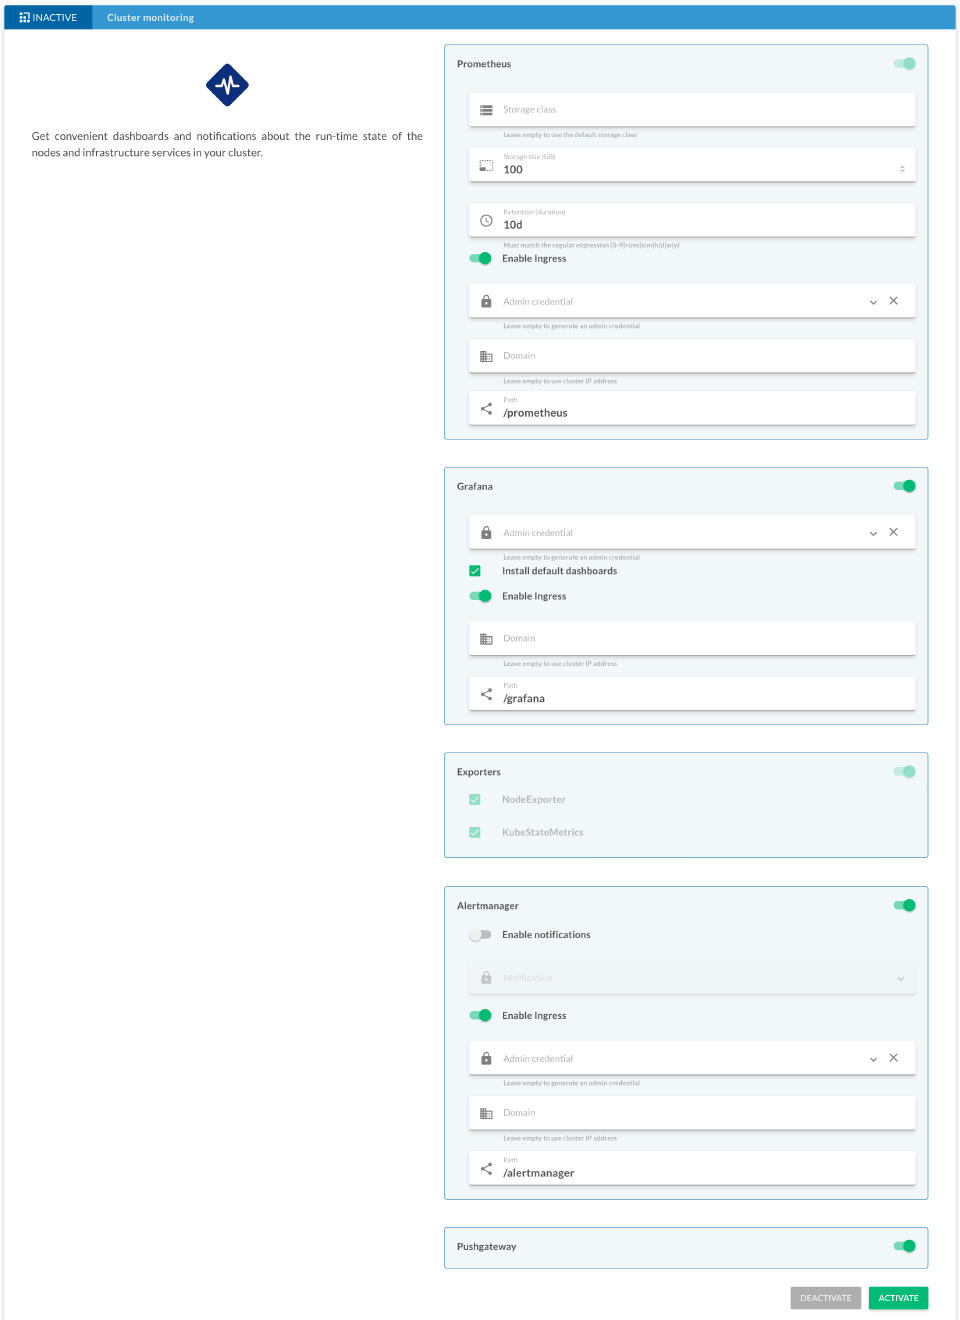
Our monitoring service consists of installing and configuring Prometheus and Grafana on the cluster, alongside a set of default dashboards that give you better insight into what’s happening under the surface.
You can install our monitoring service using the following command:
banzai cluster service --cluster-name $CLUSTER_NAME monitoring activateThe service can be installed with no configuration (is okay with default parameters).
Alternatively, you can configure the service on the dashboard:
Logging 🔗︎
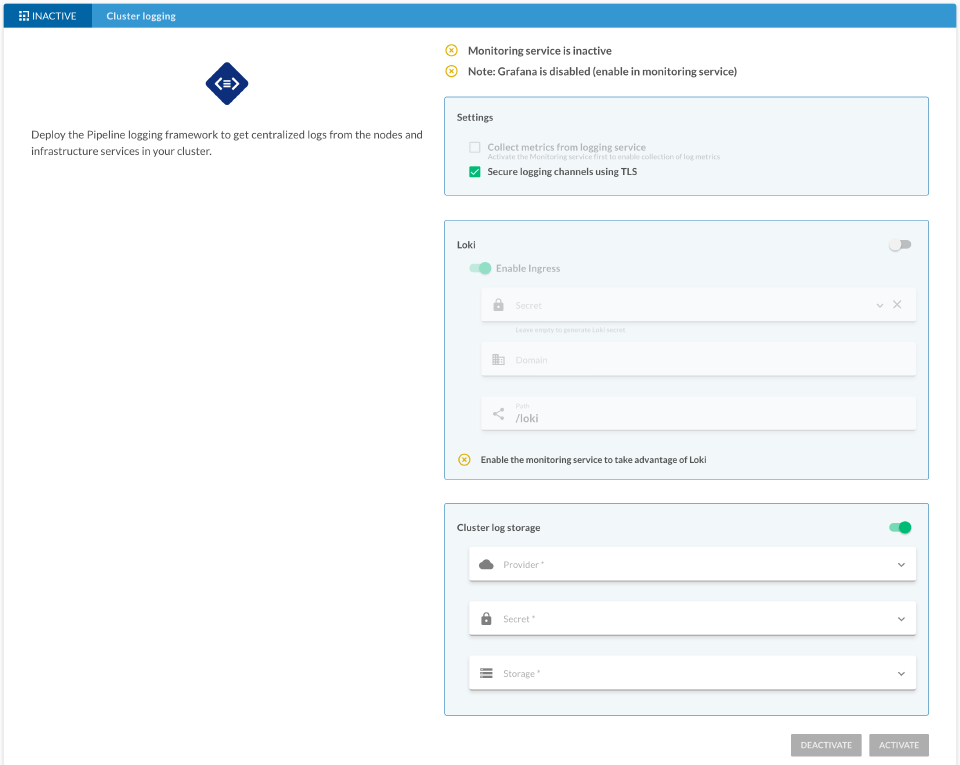
Our logging service installs and configures our Logging Operator with a default storage bucket for output. Consequently, before enabling the service, you should create a new bucket:
BUCKET_NAME=integrated-services-demo-$RANDOM
echo $BUCKET_NAME
banzai bucket create --cloud amazon --location eu-west-1 $BUCKET_NAME
After that you can proceed to installing the Logging Operator by using the following command:
banzai cluster service --cluster-name $CLUSTER_NAME logging activateMake sure to select the created bucket when prompted.
Alternatively, you can configure the service on the dashboard:
Deploying the demo application 🔗︎
Once you have enabled all these integrated services (and the cluster has become ready), you can deploy our example application to test them. Open a subshell with the environment set for the context of the cluster:
banzai cluster shell --cluster-name $CLUSTER_NAMEDeploy the application:
CLUSTER_HOST="${BANZAI_CURRENT_CLUSTER_NAME}.${BANZAI_CURRENT_ORG_NAME}.try.pipeline.banzai.cloud"
helm repo add banzaicloud-examples https://charts.banzaicloud.io/gh/banzaicloud-examples
helm upgrade --install --set "ingress.hosts[0]=${CLUSTER_HOST}/demo" demo banzaicloud-examples/integrated-services-demo-app
If you chose banzaicloud-dns provider when you enabled the DNS service, you should be able to access the app using the following command (make sure to give DNS a few minutes to propagate):
curl "http://${CLUSTER_HOST}/demo"You should see something like this:
Welcome to Banzai Cloud Pipeline!

Your secret is: vault:secret/data/mysql#MYSQL_PASSWORD
You can access Prometheus and Grafana from our monitoring service dashboard to visualize metrics (use xdg-open or echo instead of open on Linux):
open "<your-pipeline-url>/pipeline/ui/${BANZAI_CURRENT_ORG_NAME}/cluster/${BANZAI_CURRENT_CLUSTER_ID}/monitoring"You should also see some logs in the bucket you created earlier.
Secret management 🔗︎
In the previous section you deployed an example application demonstrating how easy it is to set up a cluster and run your application on it. However, applications often have additional dependencies, like Vault for storing secrets.
The example application awaits its “secret” in an environment variable, called SECRET.
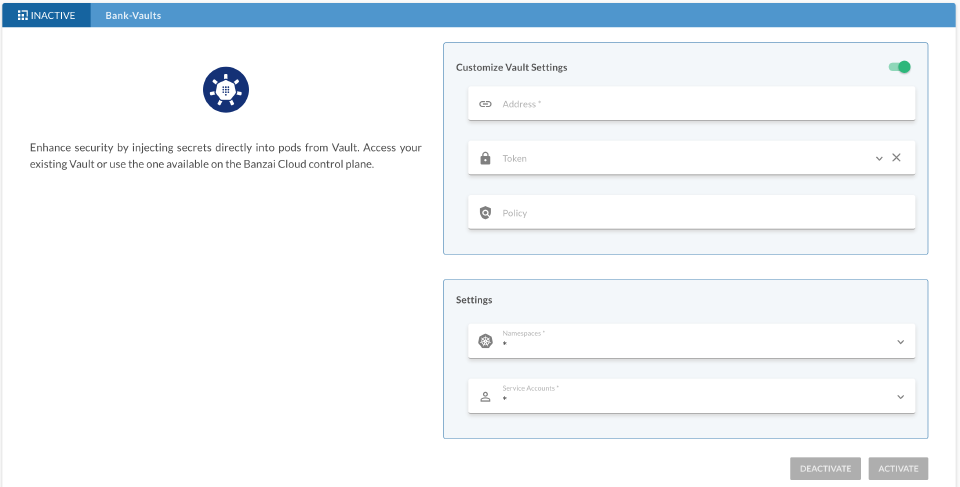
The current value of this variable (vault:secret/data/mysql#MYSQL_PASSWORD) is a special value recognized by our Bank-Vaults webhook which can be installed using the Bank-Vaults integrated service.
Our developer preview does not come with a shared Vault instance (for security reasons), so you will have to install it manually:
VAULT_HOST=vault-$CLUSTER_HOST
helm upgrade --install vault-operator banzaicloud-stable/vault-operator
kubectl apply -f https://raw.githubusercontent.com/banzaicloud/bank-vaults/master/operator/deploy/rbac.yaml
curl https://banzaicloud.com/blog/k8s-integrated-services/vault-cr.yaml | sed "s/INGRESS_HOST/$VAULT_HOST/g" | kubectl apply -f -
The next step is creating a Vault type secret:
# Copy the output of the following command
kubectl get secret vault-unseal-keys -o 'go-template={{index .data "vault-root"}}' | base64 --decode

# Then create a vault type secret
banzai secret create --type vault --name vault
After you’ve installed Vault, you can configure the webhook with the following command:
curl https://banzaicloud.com/blog/k8s-integrated-services/vault-service.json | sed "s/VAULT_HOST/$VAULT_HOST/g; s/SECRET_ID/$(banzai secret get --name vault -o json | jq -r '.[0].id')/g" | banzai cluster service --cluster-name $CLUSTER_NAME vault activate -f -Alternatively, you can configure this service on the dashboard:
After restarting the demo application, you should see the real value of the secret:
kubectl delete po -l "app.kubernetes.io/name=integrated-services-demo-app"
curl "http://$CLUSTER_HOST/demo"
Cleaning up 🔗︎
When you are finished with the demo, you can clean up the created resources by following these steps:
Let’s begin cleaning up by removing the cluster:
banzai cluster delete
exit # exit from the cluster shell
Next, we can remove the bucket we created for the logs:
banzai bucket delete --cloud amazon $BUCKET_NAMEAnd finally, once the cluster and the bucket are both deleted, we can delete the secret as well:
banzai secret delete --name $SECRET_NAME
banzai secret delete --name vault
Summary 🔗︎
The Pipeline platform’s suite of integrated services makes it easy to install components vital to the operation of any Kubernetes cluster, allowing developers to focus on their applications and to operate them reliably without becoming operations experts. As a side note, everything we have done here using the Banzai CLI is available thorugh the UI as well.
Read more about our integrated services in our documentation.


