


Apache Spark on Kubernetes series:
Introduction to Spark on Kubernetes
Scaling Spark made simple on Kubernetes
The anatomy of Spark applications on Kubernetes
Monitoring Apache Spark with Prometheus
Spark History Server on Kubernetes
Spark scheduling on Kubernetes demystified
Apache Zeppelin on Kubernetes series:
Running Zeppelin Spark notebooks on Kubernetes
Running Zeppelin Spark notebooks on Kubernetes - deep dive
Apache Kafka on Kubernetes series:
Kafka on Kubernetes - using etcd
Note: The Pipeline CI/CD module mentioned in this post is outdated and not available anymore. You can integrate Pipeline to your CI/CD solution using the Pipeline API. Contact us for details.
There is a newer version of Pipeline, 0.3.0 available. Accordingly, the value of this blogpost may have depreciated, so we highly recommend that you check Pipeline’s documentation for the latest howto.
This blog post will quickly and concisely present how to a perform a basic CI/CD workflow setup using our platform. We have also prepared a few projects in our GitHub repo that can be used as starting points (see the links at the end of this post).
These example projects make use of resources (Spark clusters on k8s on AWS) provisioned on-demand during their CI/CD workflow. However, some workflow steps vary considerably (build details, run details).
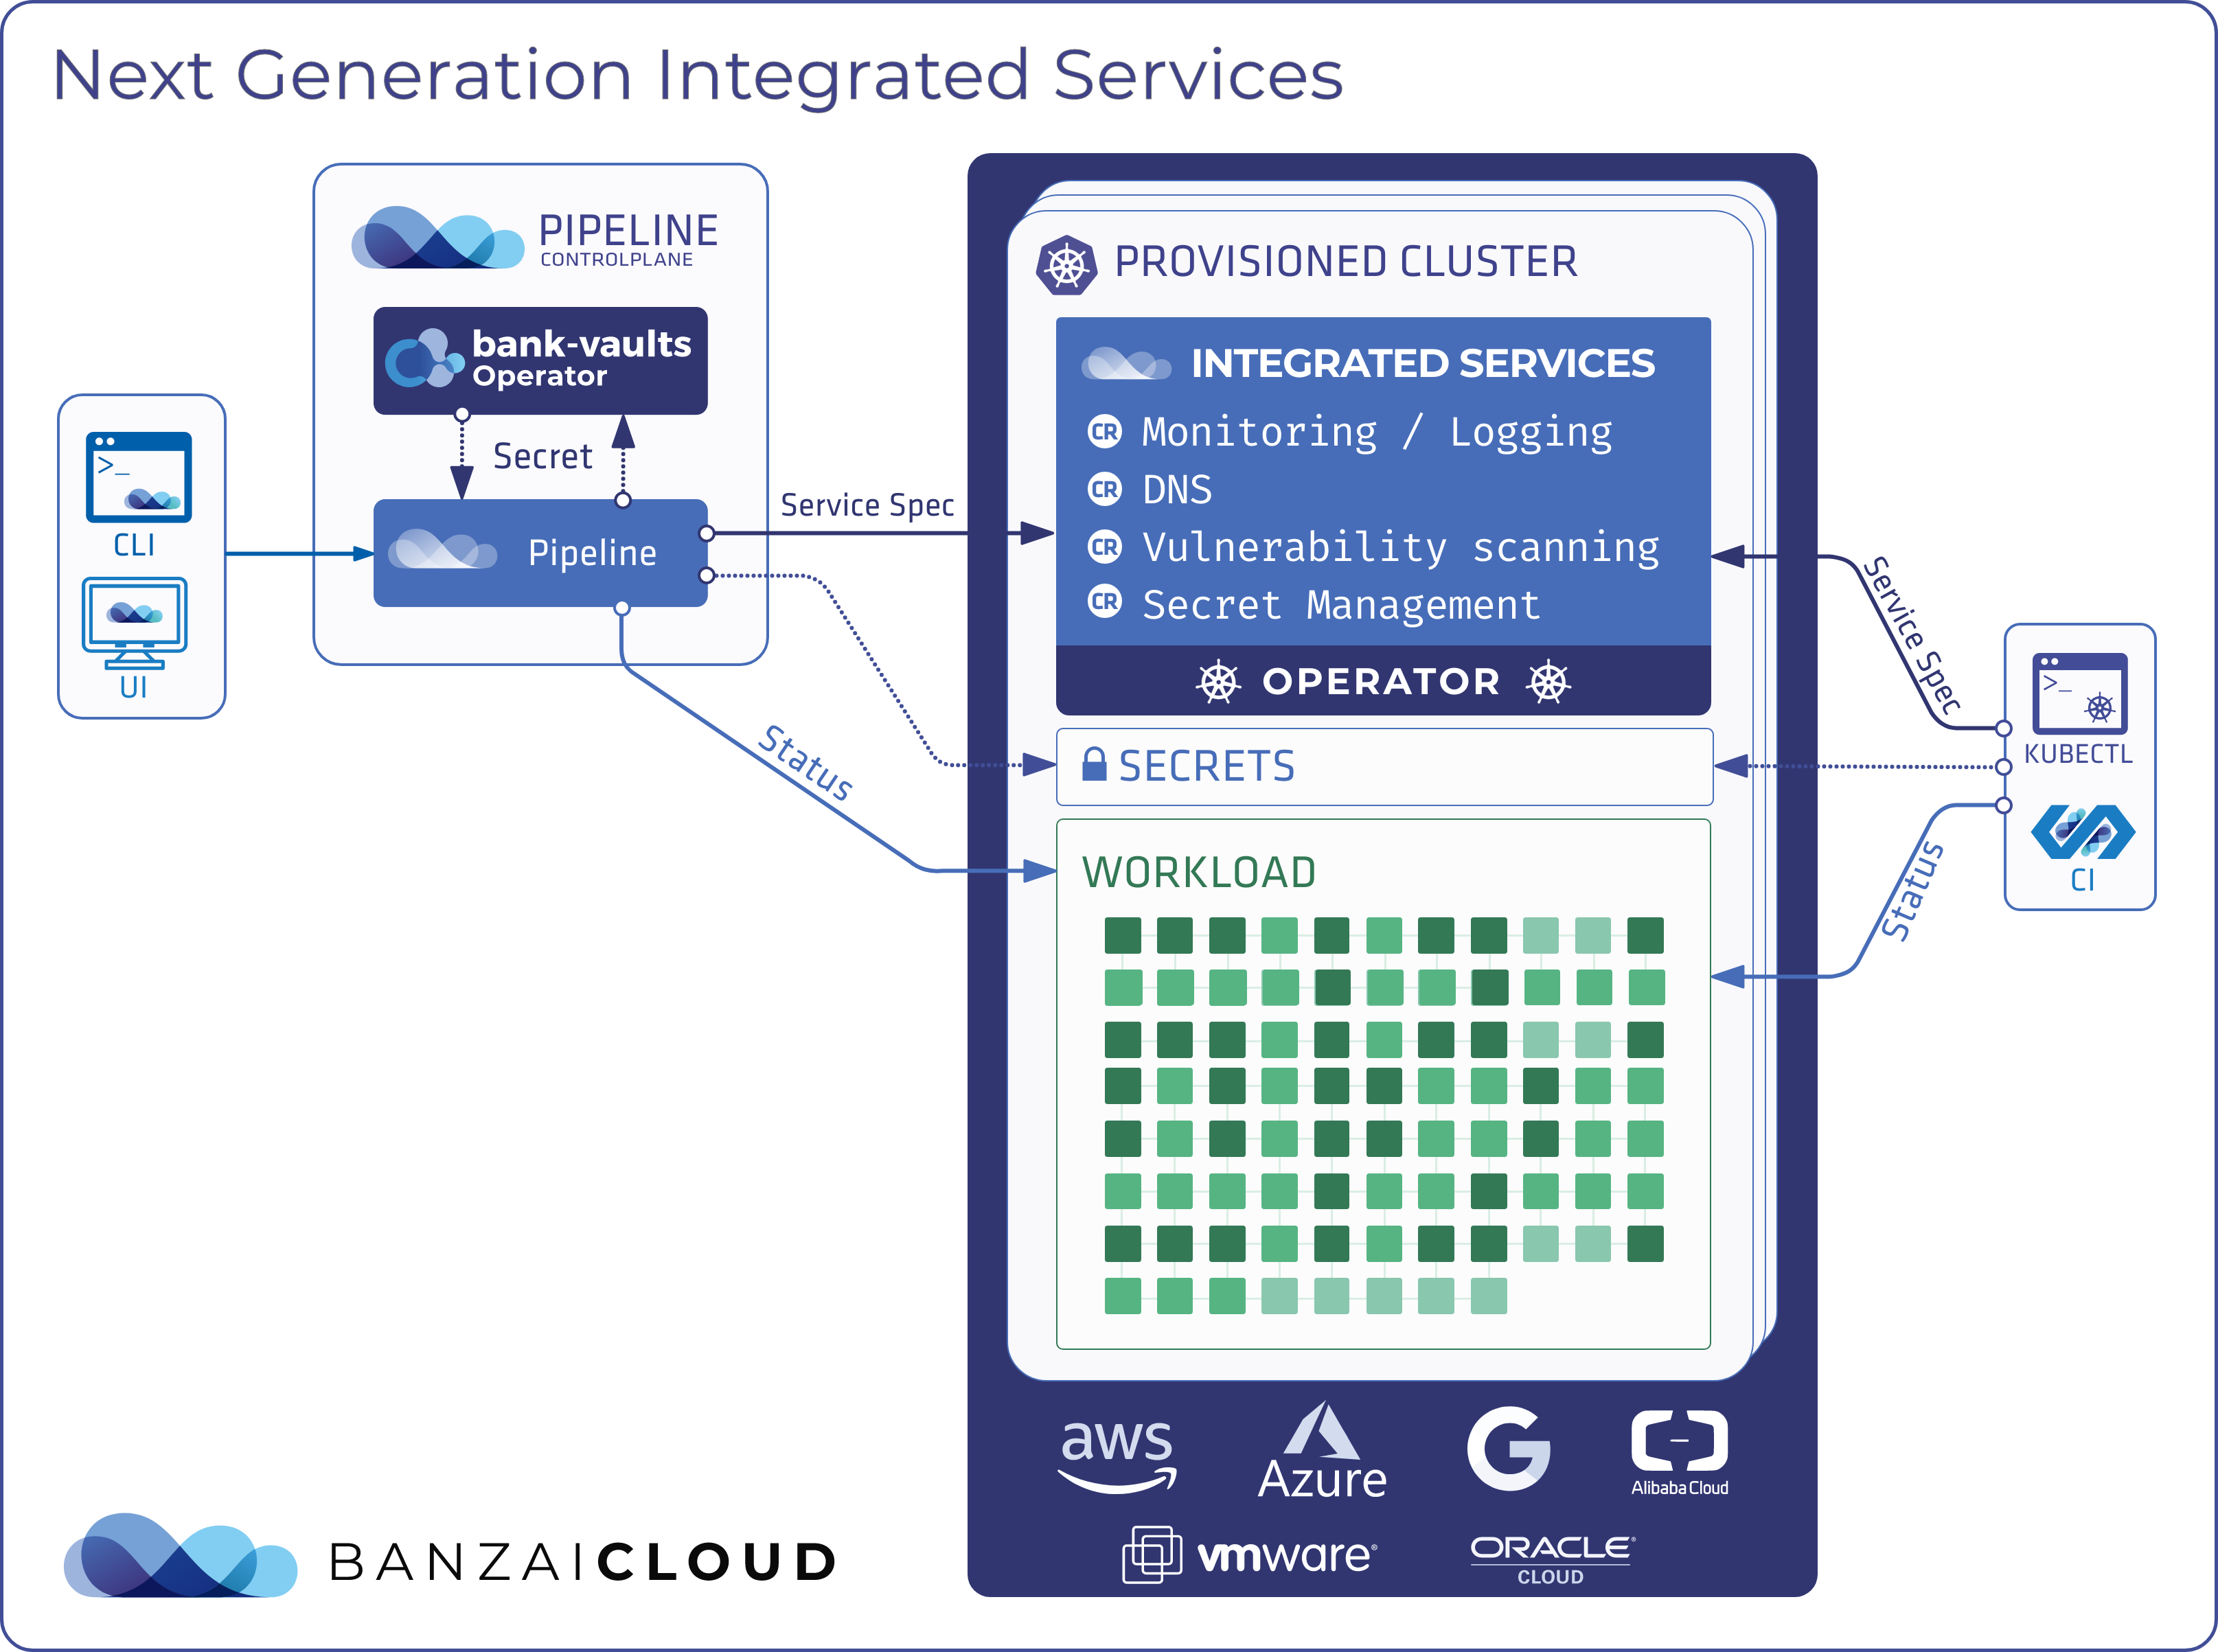
This example will focus on Spark, but you should note that Pipeline is a generic microservice platform that’s not exclusively tied to use with big data workloads - is able to run any containerized, distributed workflow. Our next example in this series will involve databases, as we are moving towards JEE support, a key component of which is a persistent datastore.
To hook a Spark project into the CI/CD workflow of Banzai Cloud Pipeline, watch the video we’ve provided or follow the instructions below.
Getting Started 🔗︎
It’s easy to make the assumption that the source of a given Spark application is stored in GitHub and its user has an AWS account, since example CI flows run on EC2 instances provisioned on demand. Nevertheless, Pipeline is not tied to a particular cloud provider, but supports a variety of cloud and managed K8S providers (see Pipeline’s documentation).
Prerequisites 🔗︎
- Account on GitHub
- Repository on GitHub for the Spark application source code
- AWS account
- AWS EC2 key pair
Register OAuth on GitHub 🔗︎
Register an OAuth application on GitHub for the Pipeline CI/CD workflow.
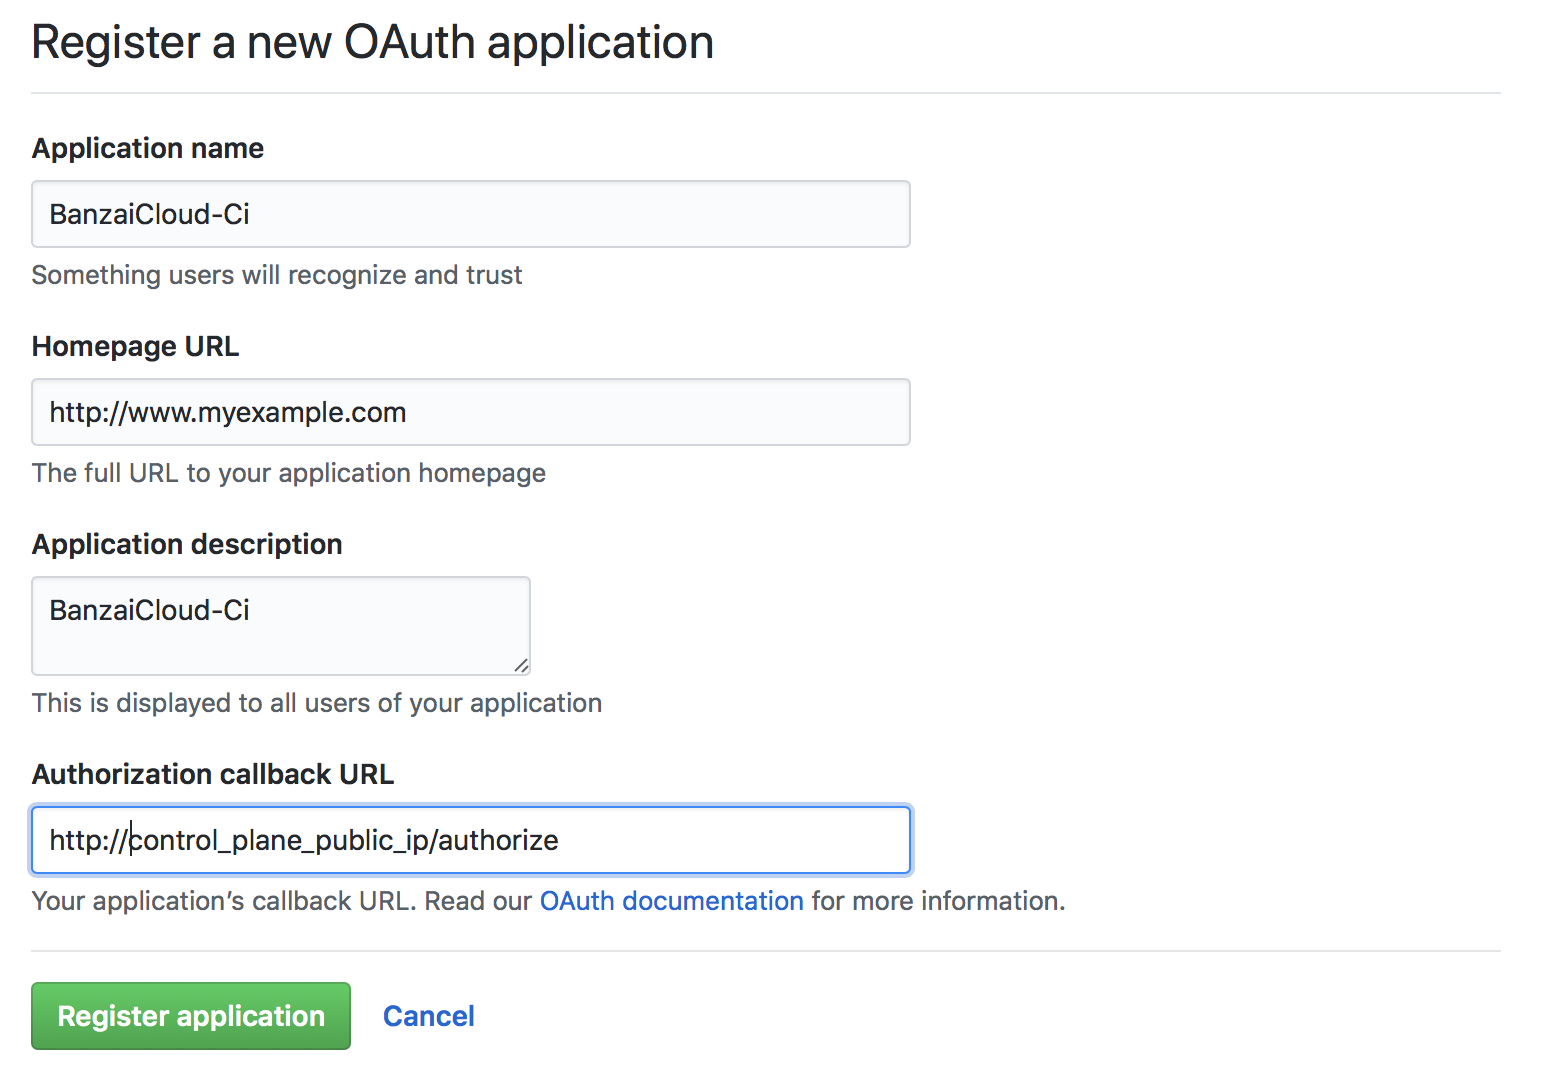
For now, fill in the Authorization callback URL with a dummy value. This field will be updated once the Control Plane is up and running, using an IP address or DNS name.
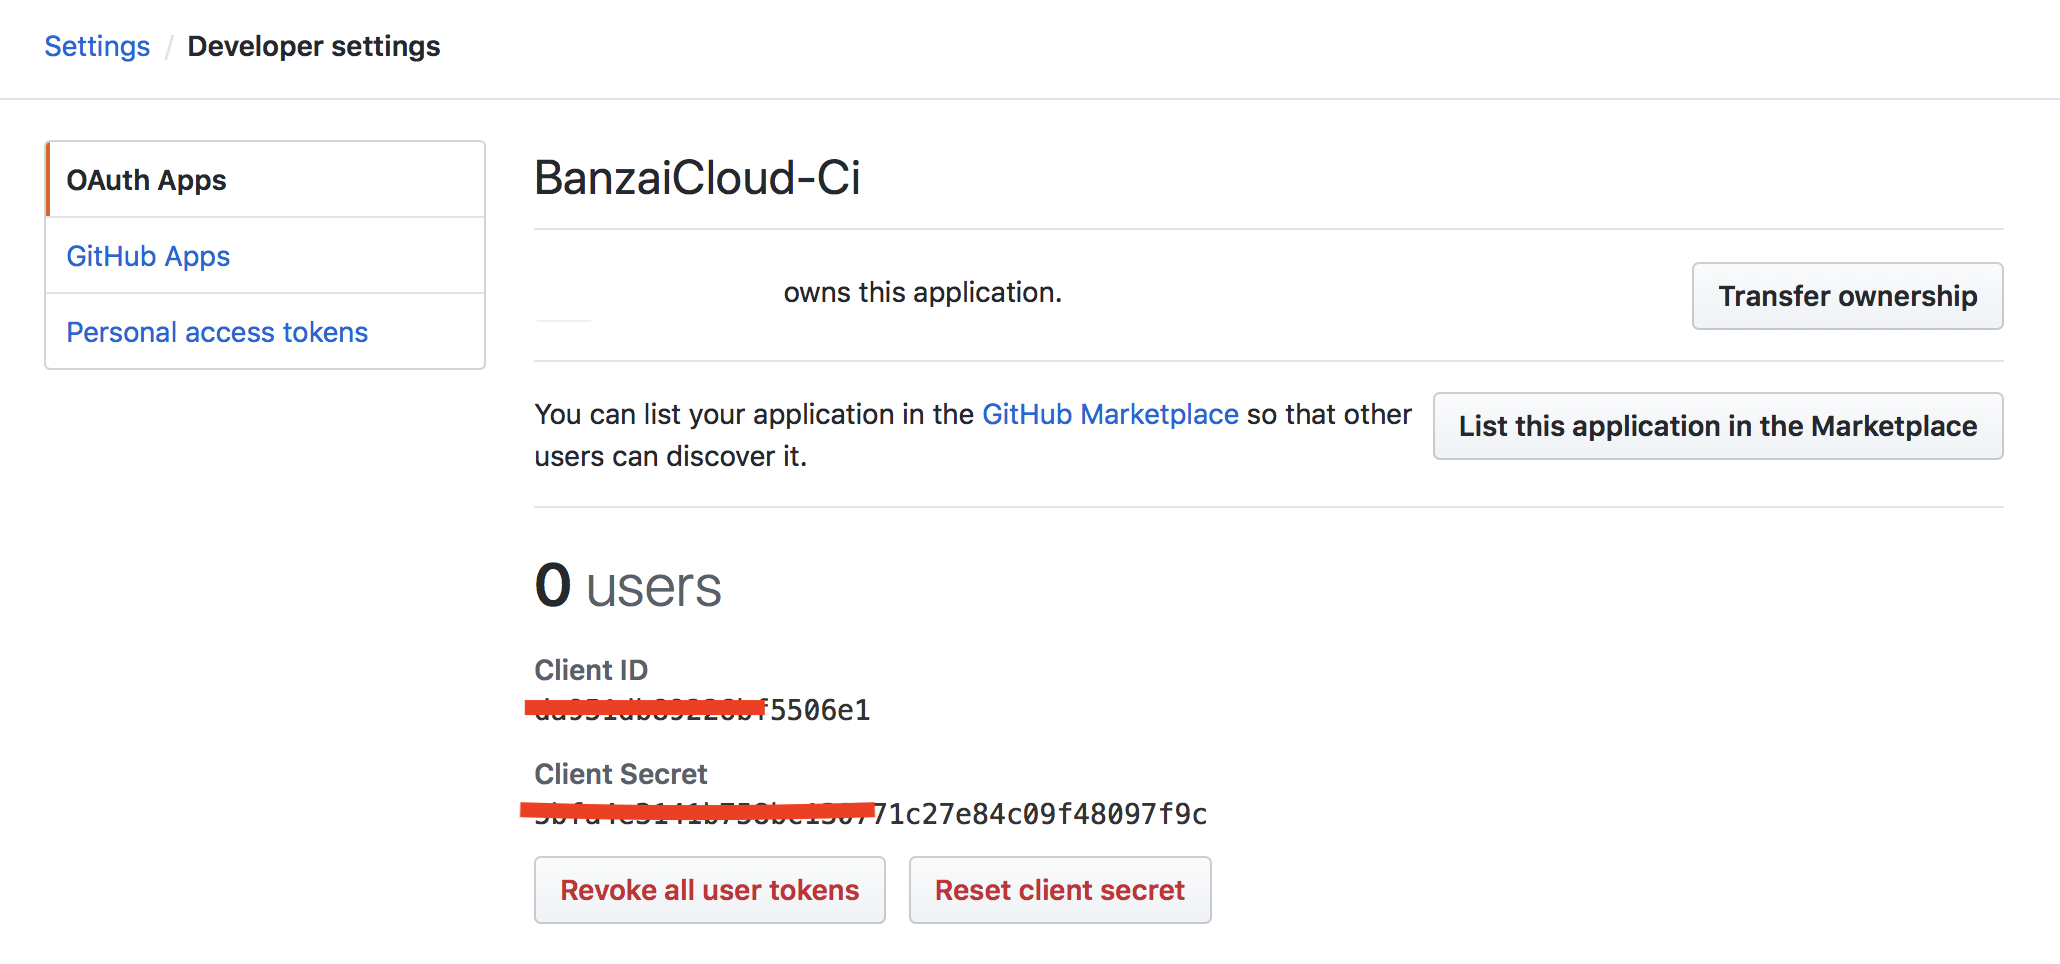
Take note of the Client ID and Client Secret, as these are required to launch the Pipeline Control Plane.
Launch Pipeline Control Plane 🔗︎
The easiest way to run a Pipeline Control Plane is to use a Cloudformation template.
-
Navigate to: https://eu-west-1.console.aws.amazon.com/cloudformation/home?region=eu-west-1#/stacks/new
-
Select
Specify an Amazon S3 template URLand add the URL to our templatehttps://s3-eu-west-1.amazonaws.com/cf-templates-grr4ysncvcdl-eu-west-1/2017340oCy-new.templatei5xlidcwt4p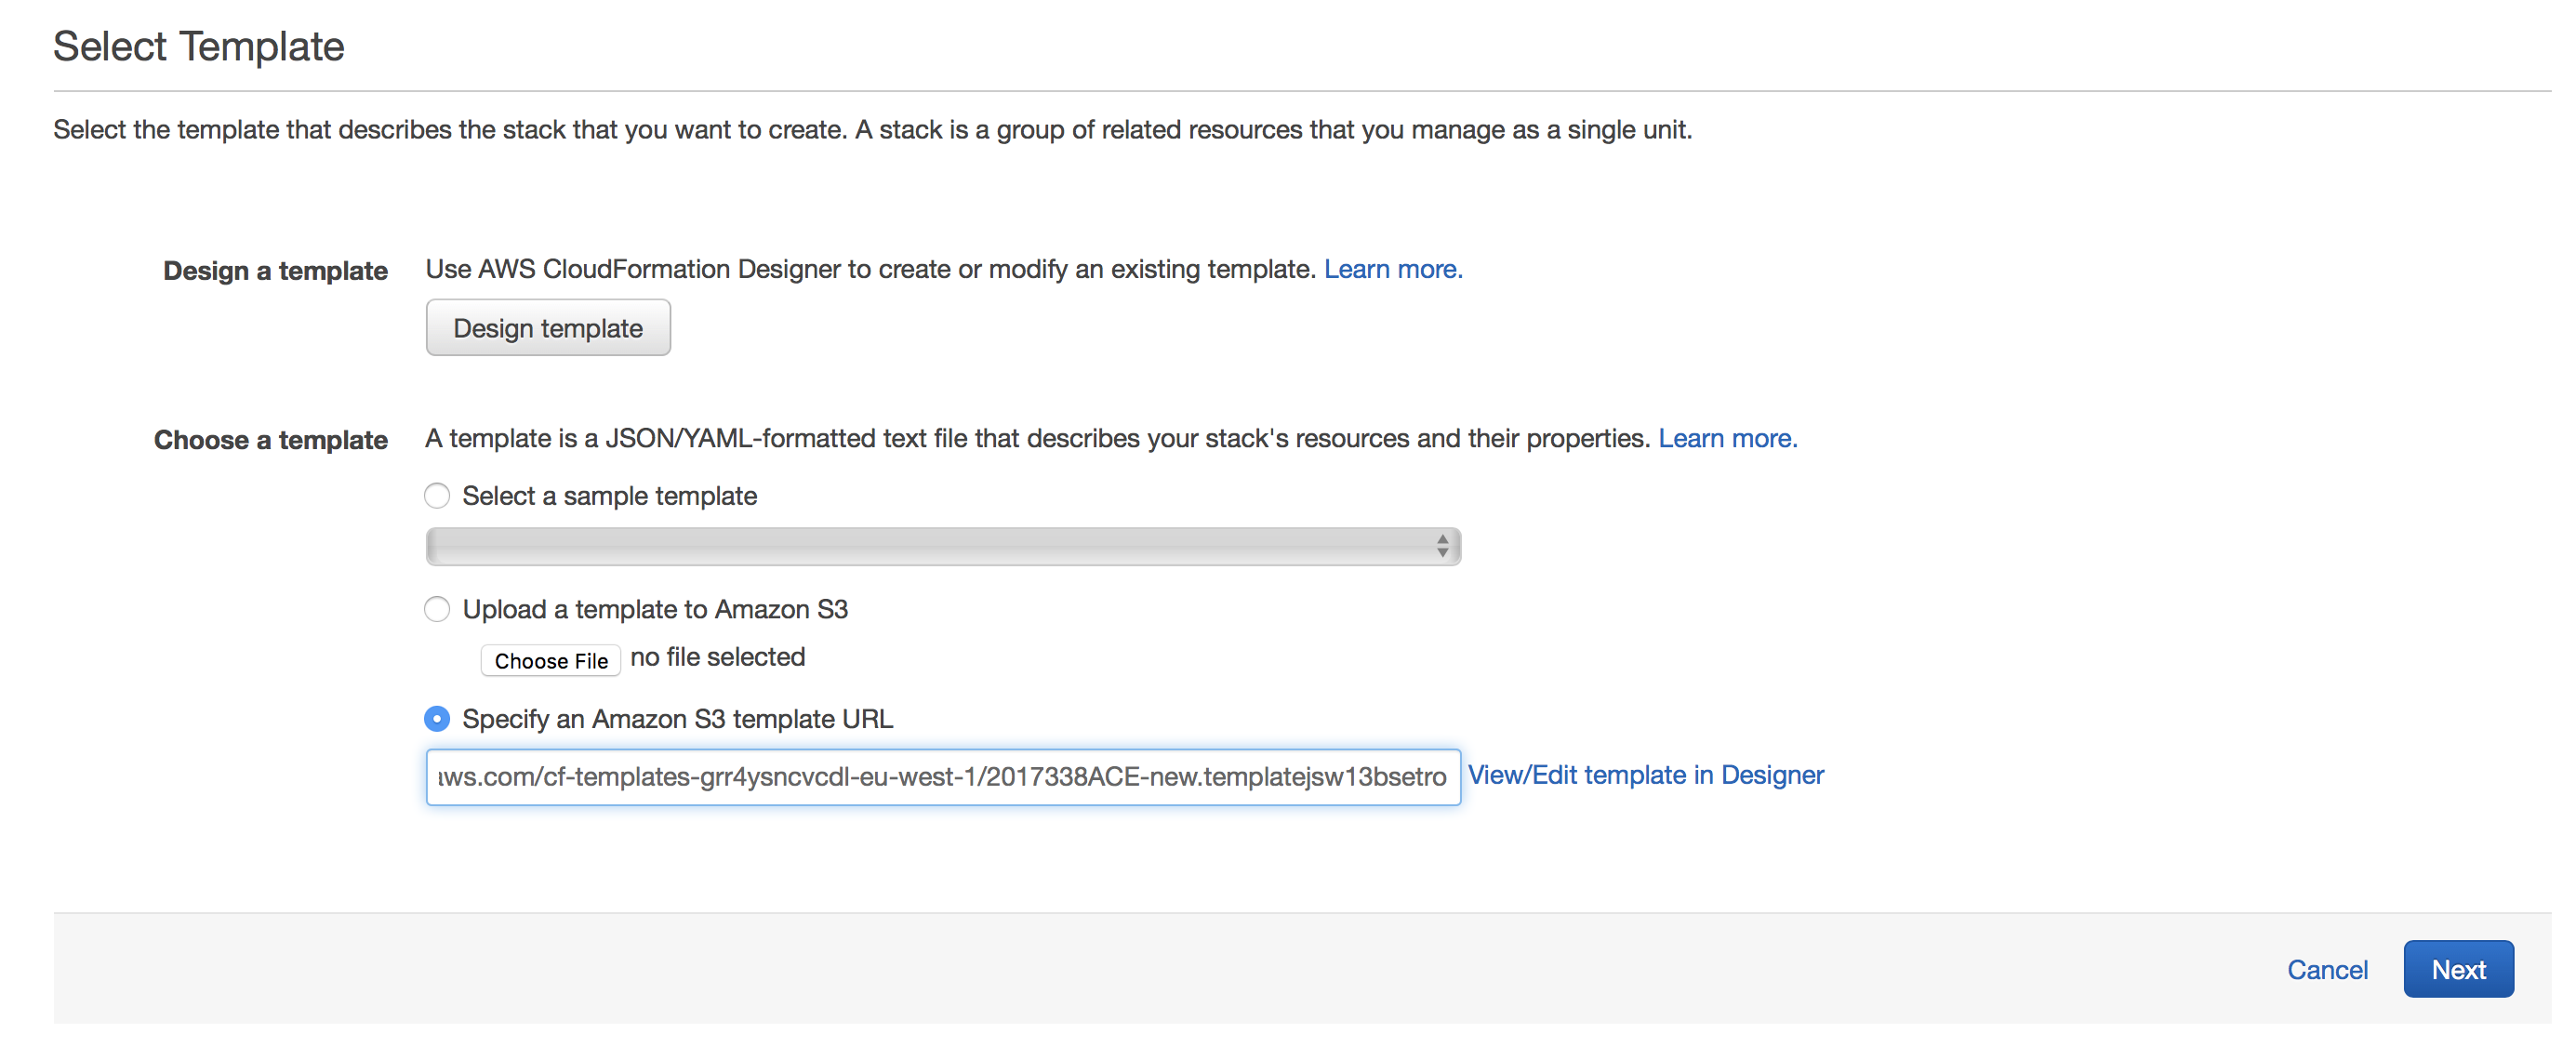
-
Fill in the following fields on the form:
-
Stack name
-
specify a name for the Control Plane deployment

-
-
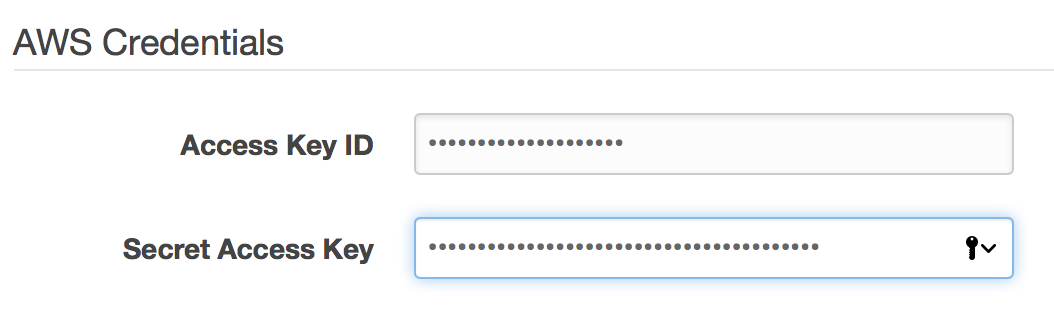
AWS Credentials
- Amazon access key id - specify your access key id
- Amazon secret access key - specify your secret access key
-
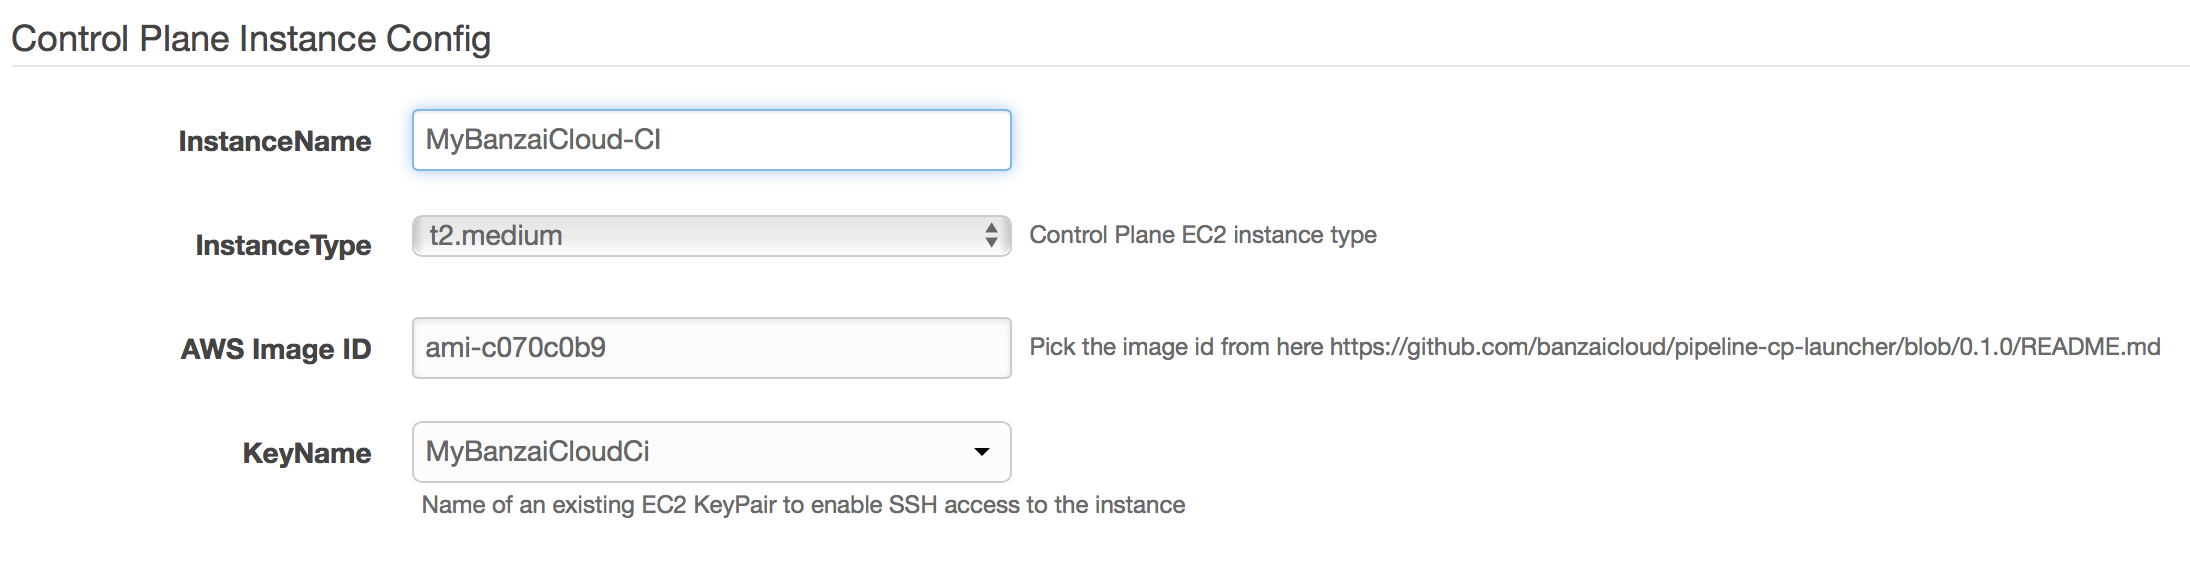
Control Plane Instance Config
- InstanceName - name of the EC2 instance that will host the Control Plane
- ImageId - select the image id from the README
- KeyName - specify your AWS EC2 key pair
-
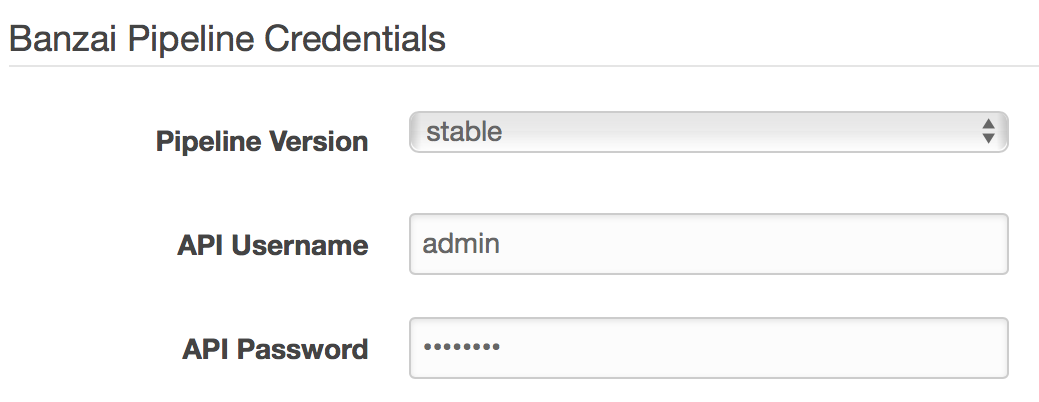
Pipeline Credentials
- Pipeline API Password - specify the password for accessing the Pipeline REST API exposed by the Pipeline PaaS. Please note your user name and password, as those will be required when setting secrets for GitHub repositories in the CI/CD workflow.
-
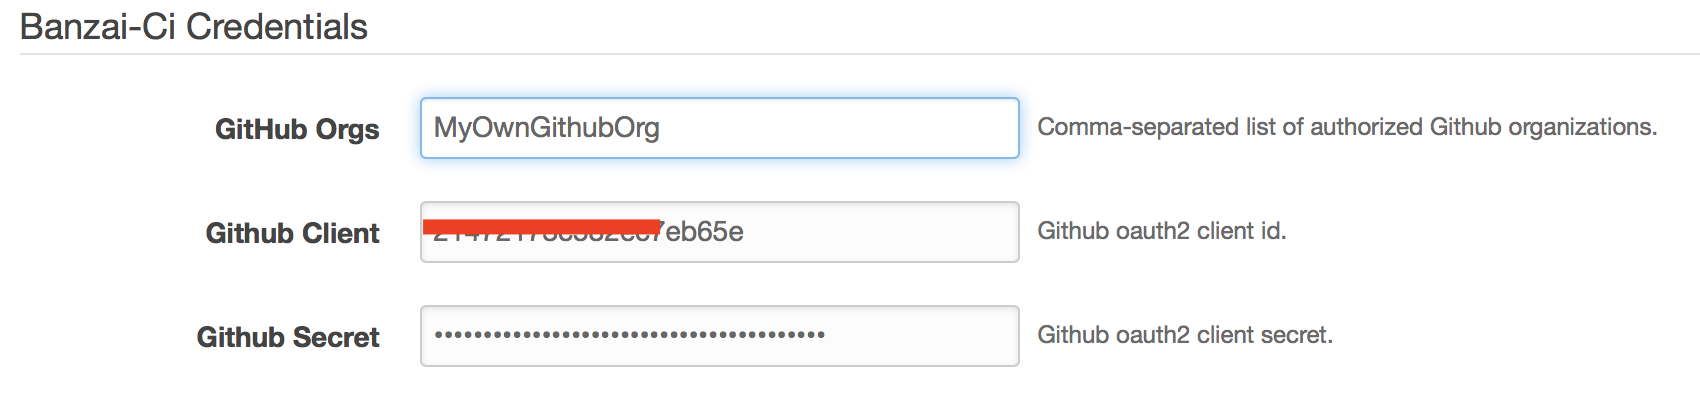
Banzai-Ci Credentials
- Orgs - comma-separated list of Github organizations whose members to grant access to use Banzai Cloud Pipeline’s CI/CD workflow
- GithubClient - GitHub OAuth
Client Id - GithubSecret - Github OAuth
Client Secret
-
Grafana Dashboard
- Grafana Dashboard Password - specify a password for accessing the Grafana dashboard - defaults are application specific

-
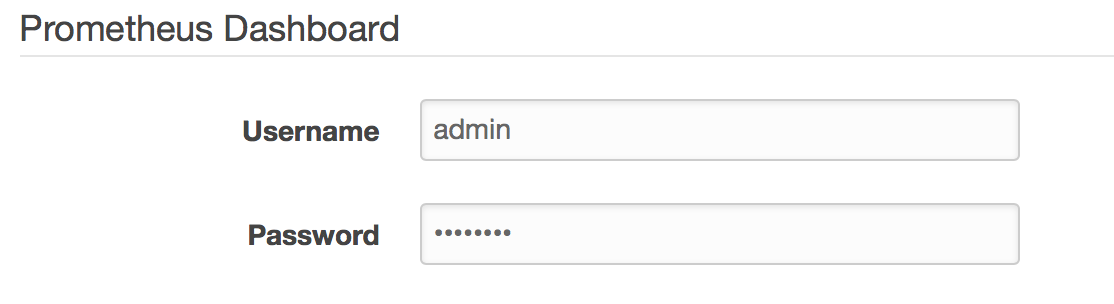
Prometheus Dashboard
- Prometheus Password - specify a password for accessing Prometheus, which collects cluster metrics
-
Advanced Pipeline Options
- PipelineImageTag - specify
0.3.0to use the current stable Pipeline release.
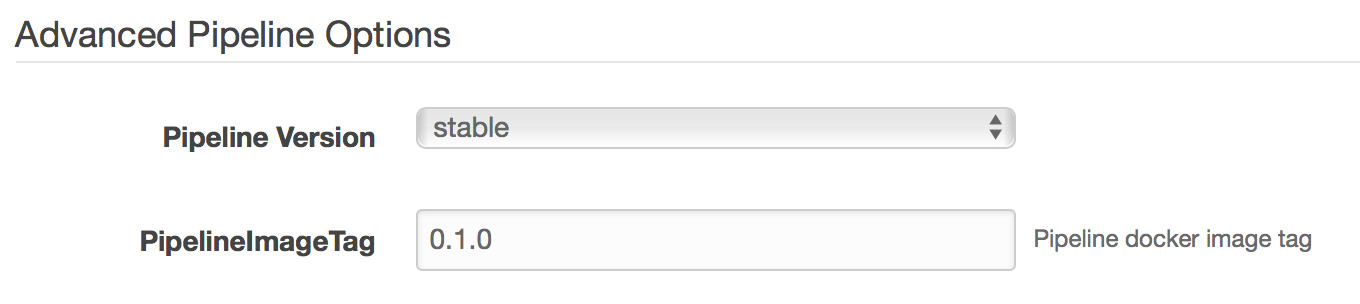
- PipelineImageTag - specify
-
Slack Credentials
- this section is optional. Complete this section to receive cluster-related alerts via Slack push notifications.
-
Alert SMTP Credentials
- this section is optional. Fill it in to receive cluster-related alerts via email.
-
-
Finish the wizard to create a
Control Planeinstance. -
Please note the PublicIP of the generated Stack. We refer to this as the PublicIP of the
Control Plane.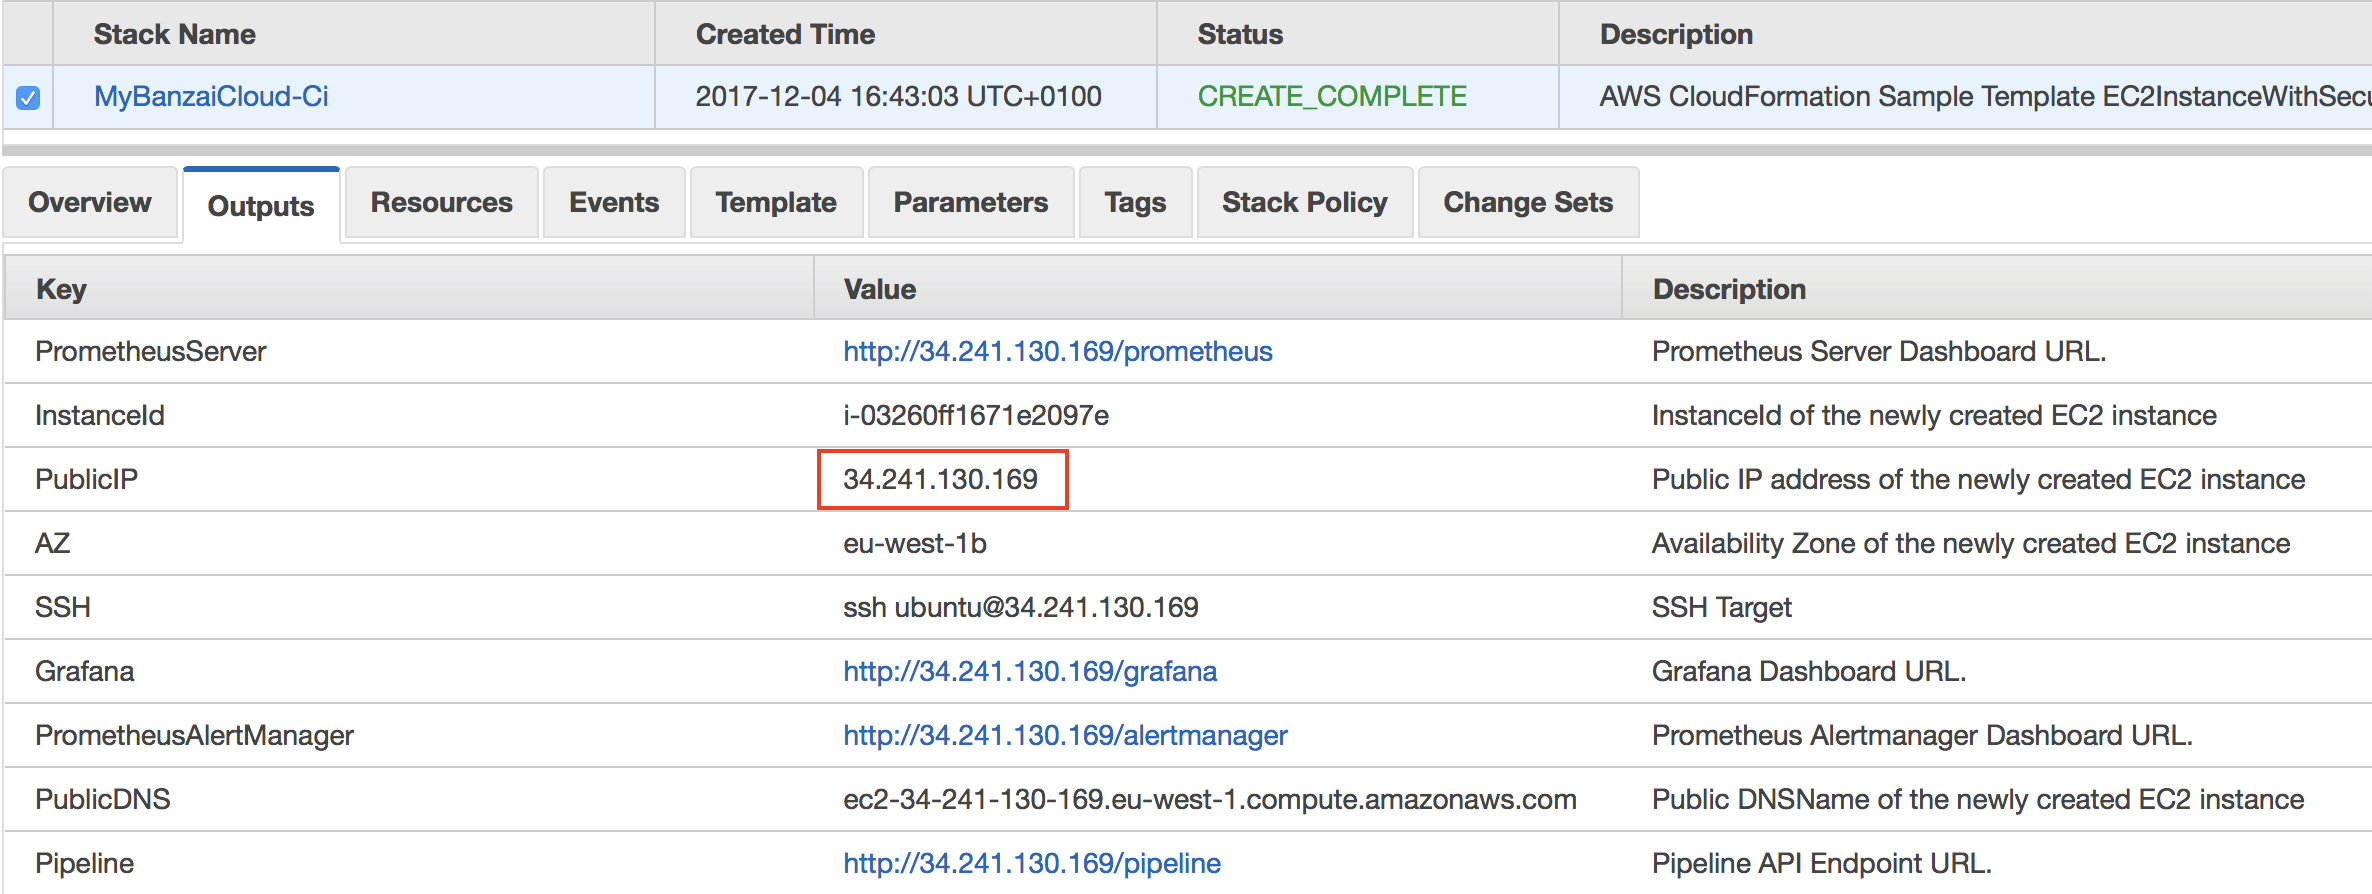
-
Go back to your previously created GitHub OAuth application and modify it. Set the
Authorization callback URLfield tohttp://{control_plane_public_ip}/authorize
Define a .pipeline.yml pipeline workflow configuration for your Spark application 🔗︎
The steps of the workflow executed by the CI/CD flow are described in the .pipeline.yml file, which must be placed in the root directory of the Spark application’s source code. The file has to be pushed to the GitHub repo along with the source files of the application.
Here’s an example Spark application, spark-pi-example, which can be used to try out the CI/CD pipeline.
Note: To accomplish this, fork that repository into your own!
In order to set up your own spark application for the workflow, start by customizing the .pipeline.yml configuration file in spark-pi-example.
The following sections need to be modified:
-
the command for building your application
remote_build: ... original_commands: - mvn clean package -s settings.xml -
the Main class of your application
run: ... spark_class: banzaicloud.SparkPi -
the name of your application
run: ... spark_app_name: sparkpi -
the application artifact
This is the relative path to your Spark application’s
jar. Thejaris generated by this build command.run: ... spark_app_source: target/spark-pi-1.0-SNAPSHOT.jar -
the application arguments
run:
  ...
  spark_app_args: 1000
Grant access to desired GitHub organizations 🔗︎
Navigate to http://{control_plane_public_ip} in your web browser and grant access for the organizations that contain the GitHub repositories that you want to hook into the CI/CD workflow. Then click authorize access.
It may take some time for all of Pipeline’s services to fully initialize, and so the page may not load at first. If this happens, please wait a little and retry.
Hook repositories to CI/CD flow 🔗︎
Navigate to http://{control_plane_public_ip}, bringing you to the CI/CD user interface. Select Repositories from the top left menu. This lists all the repositories that the Pipeline has access to.
Select the repositories you want to be hooked into the CI/CD flow.

CI/CD secrets 🔗︎
For the hooked repositories set the following secrets:


-
plugin_endpoint- specifyhttp://{control_plane_public_ip}/pipeline/api/v1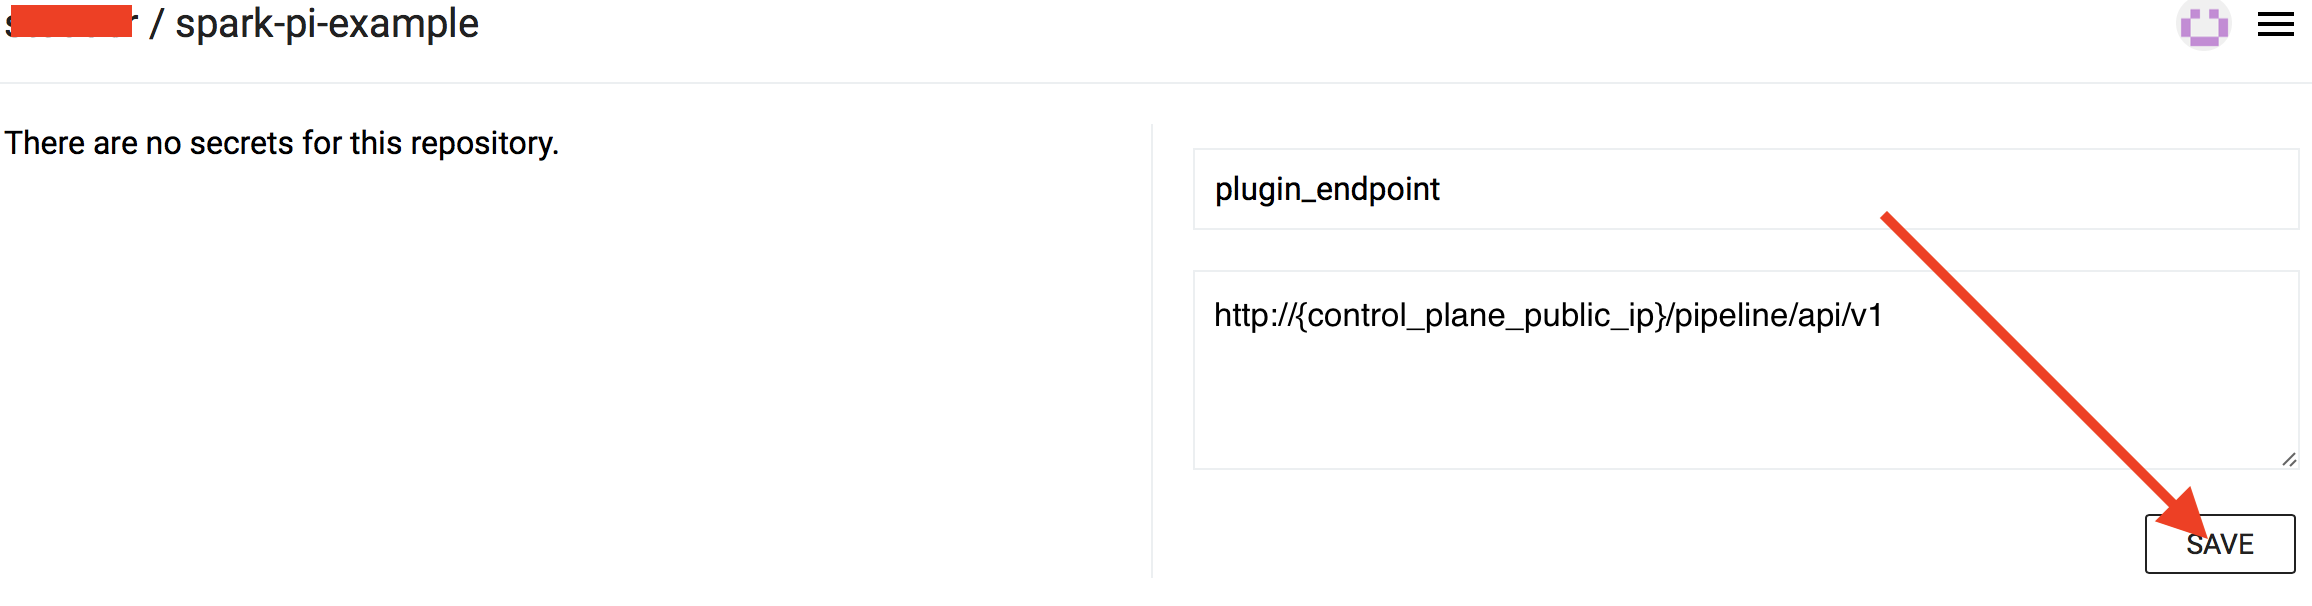
-
plugin_username- specify the same user name you used for Pipeline Credentials
-
plugin_password- specify the same password you used for Pipeline Credentials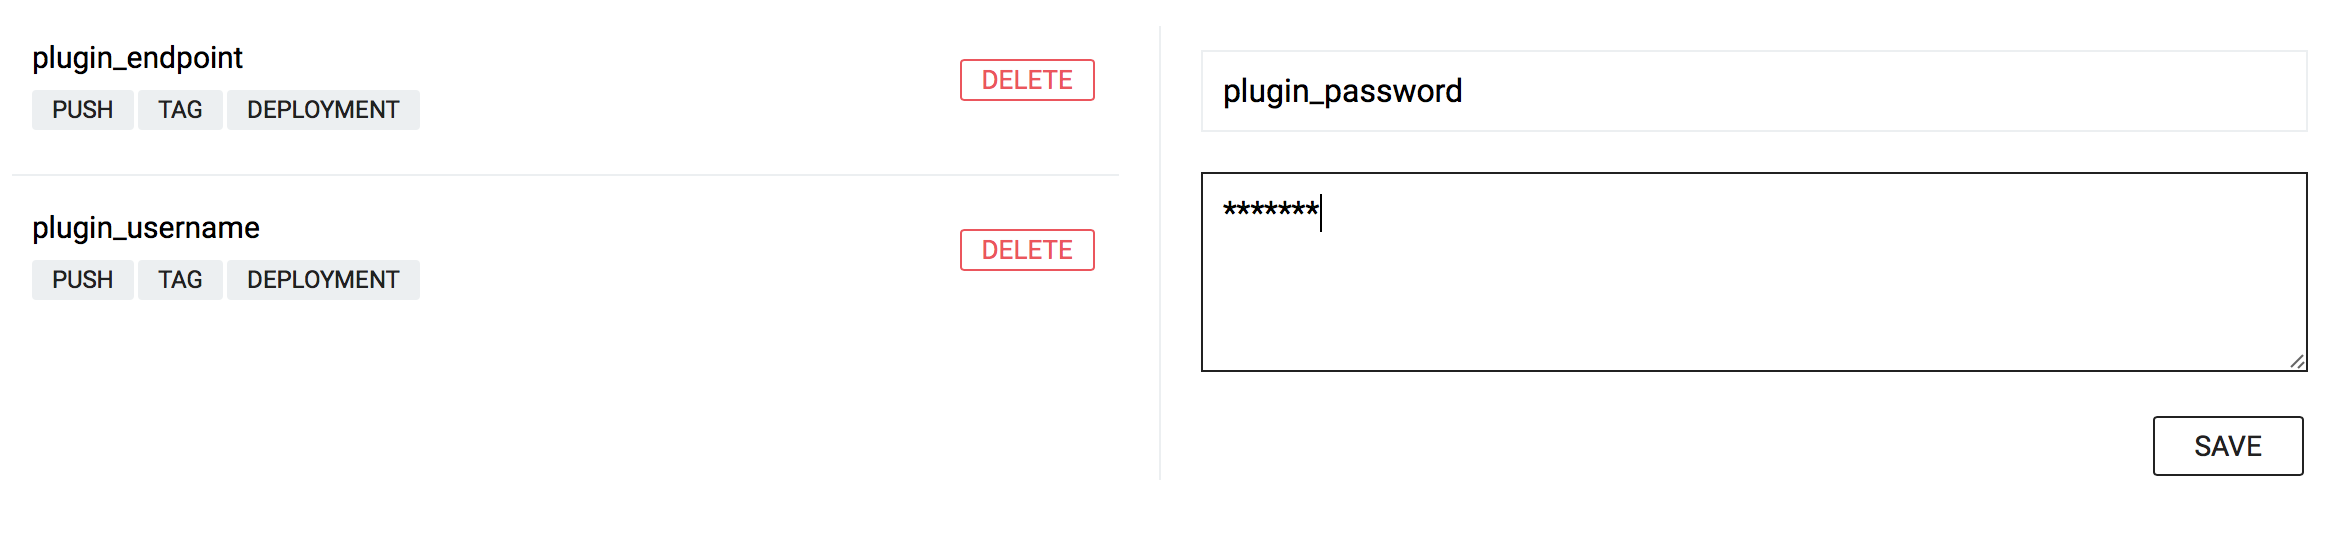

Submit your changes 🔗︎
Modify the source code of your Spark application. Commit changes and push them to the repository on GitHub. Pipeline is notified about commits through GitHub webhooks, and will trigger the flow described in the watched repositories’ .pipeline.yml file.
Monitor running workflows 🔗︎
Any running CI/CD jobs can be monitored and managed at http://{control_plane_public_ip}/account/repos


In order to check the logs of the different steps in the CI/CD workflow, click on the desired commit message in the UI.

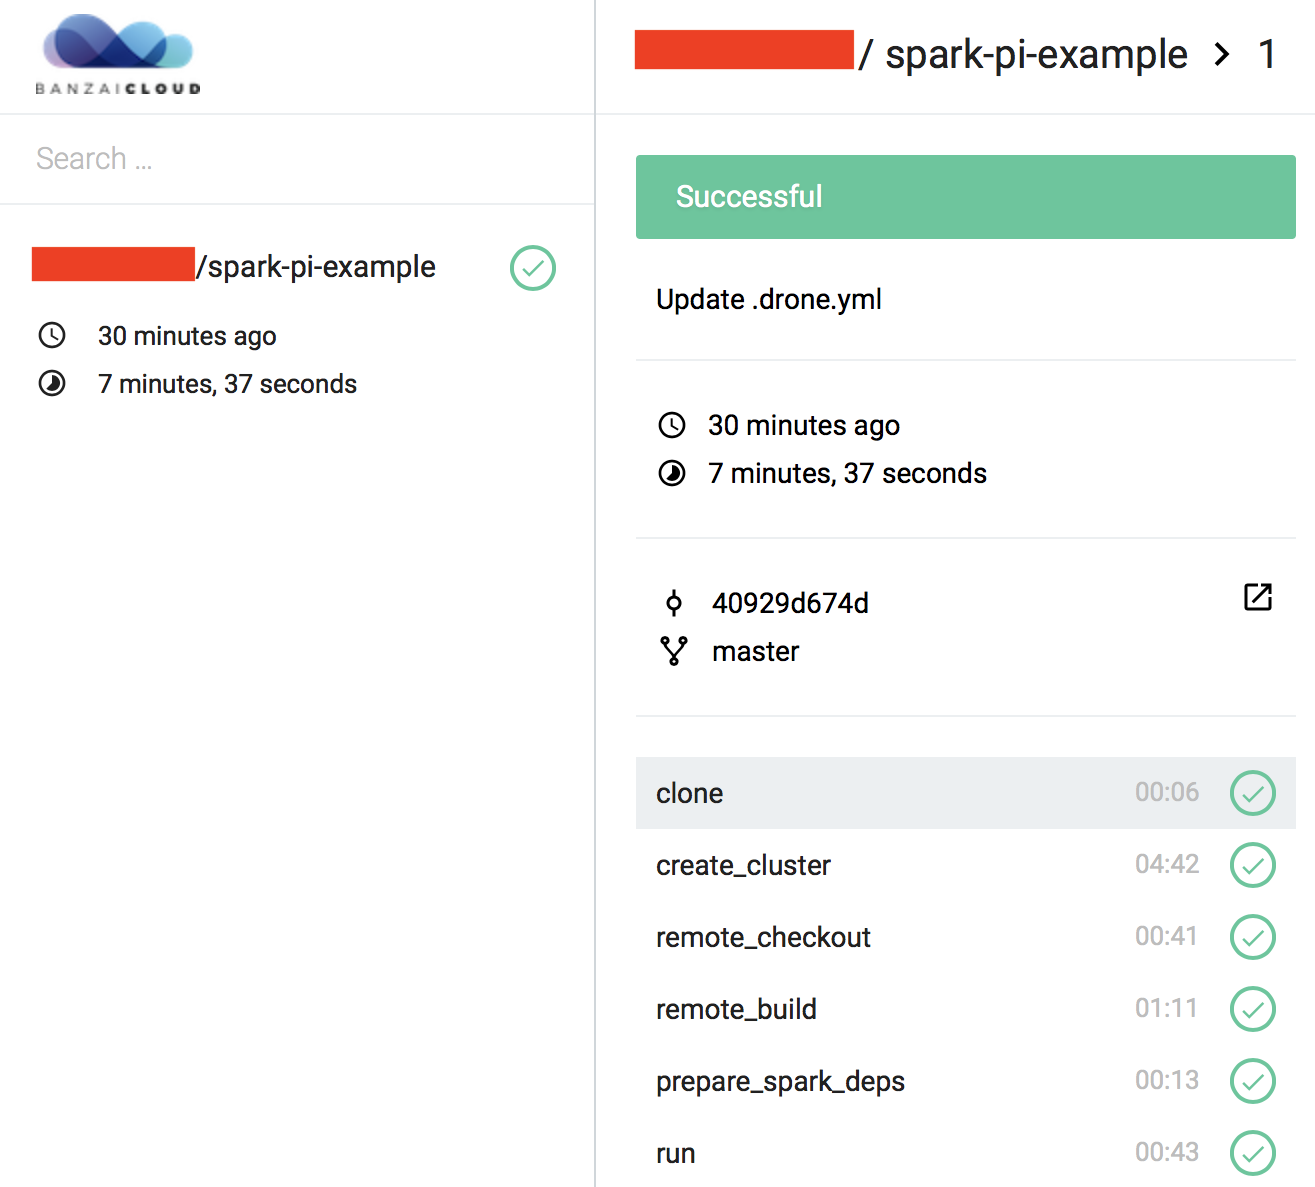
That’s it! Once configured, the Spark application will be built, deployed and executed for every commit pushed to the project’s repository. You can check on the workflow’s progress by clicking on the small orange dot beside the commit in the GitHub UI.
Here are some of our git repos that contain example projects with pipeline workflow configurations: