


Readers of this blog may remember a post we made in January about Bank-Vaults that touched on the topic of disaster recovery with multi datacenter replication. In that post we dicussed replication, mostly in the context of it being used as a form of hot backup. Today we’ll be exploring cold backups, another but equally important form of disaster recovery.
Why we use Velero 🔗︎
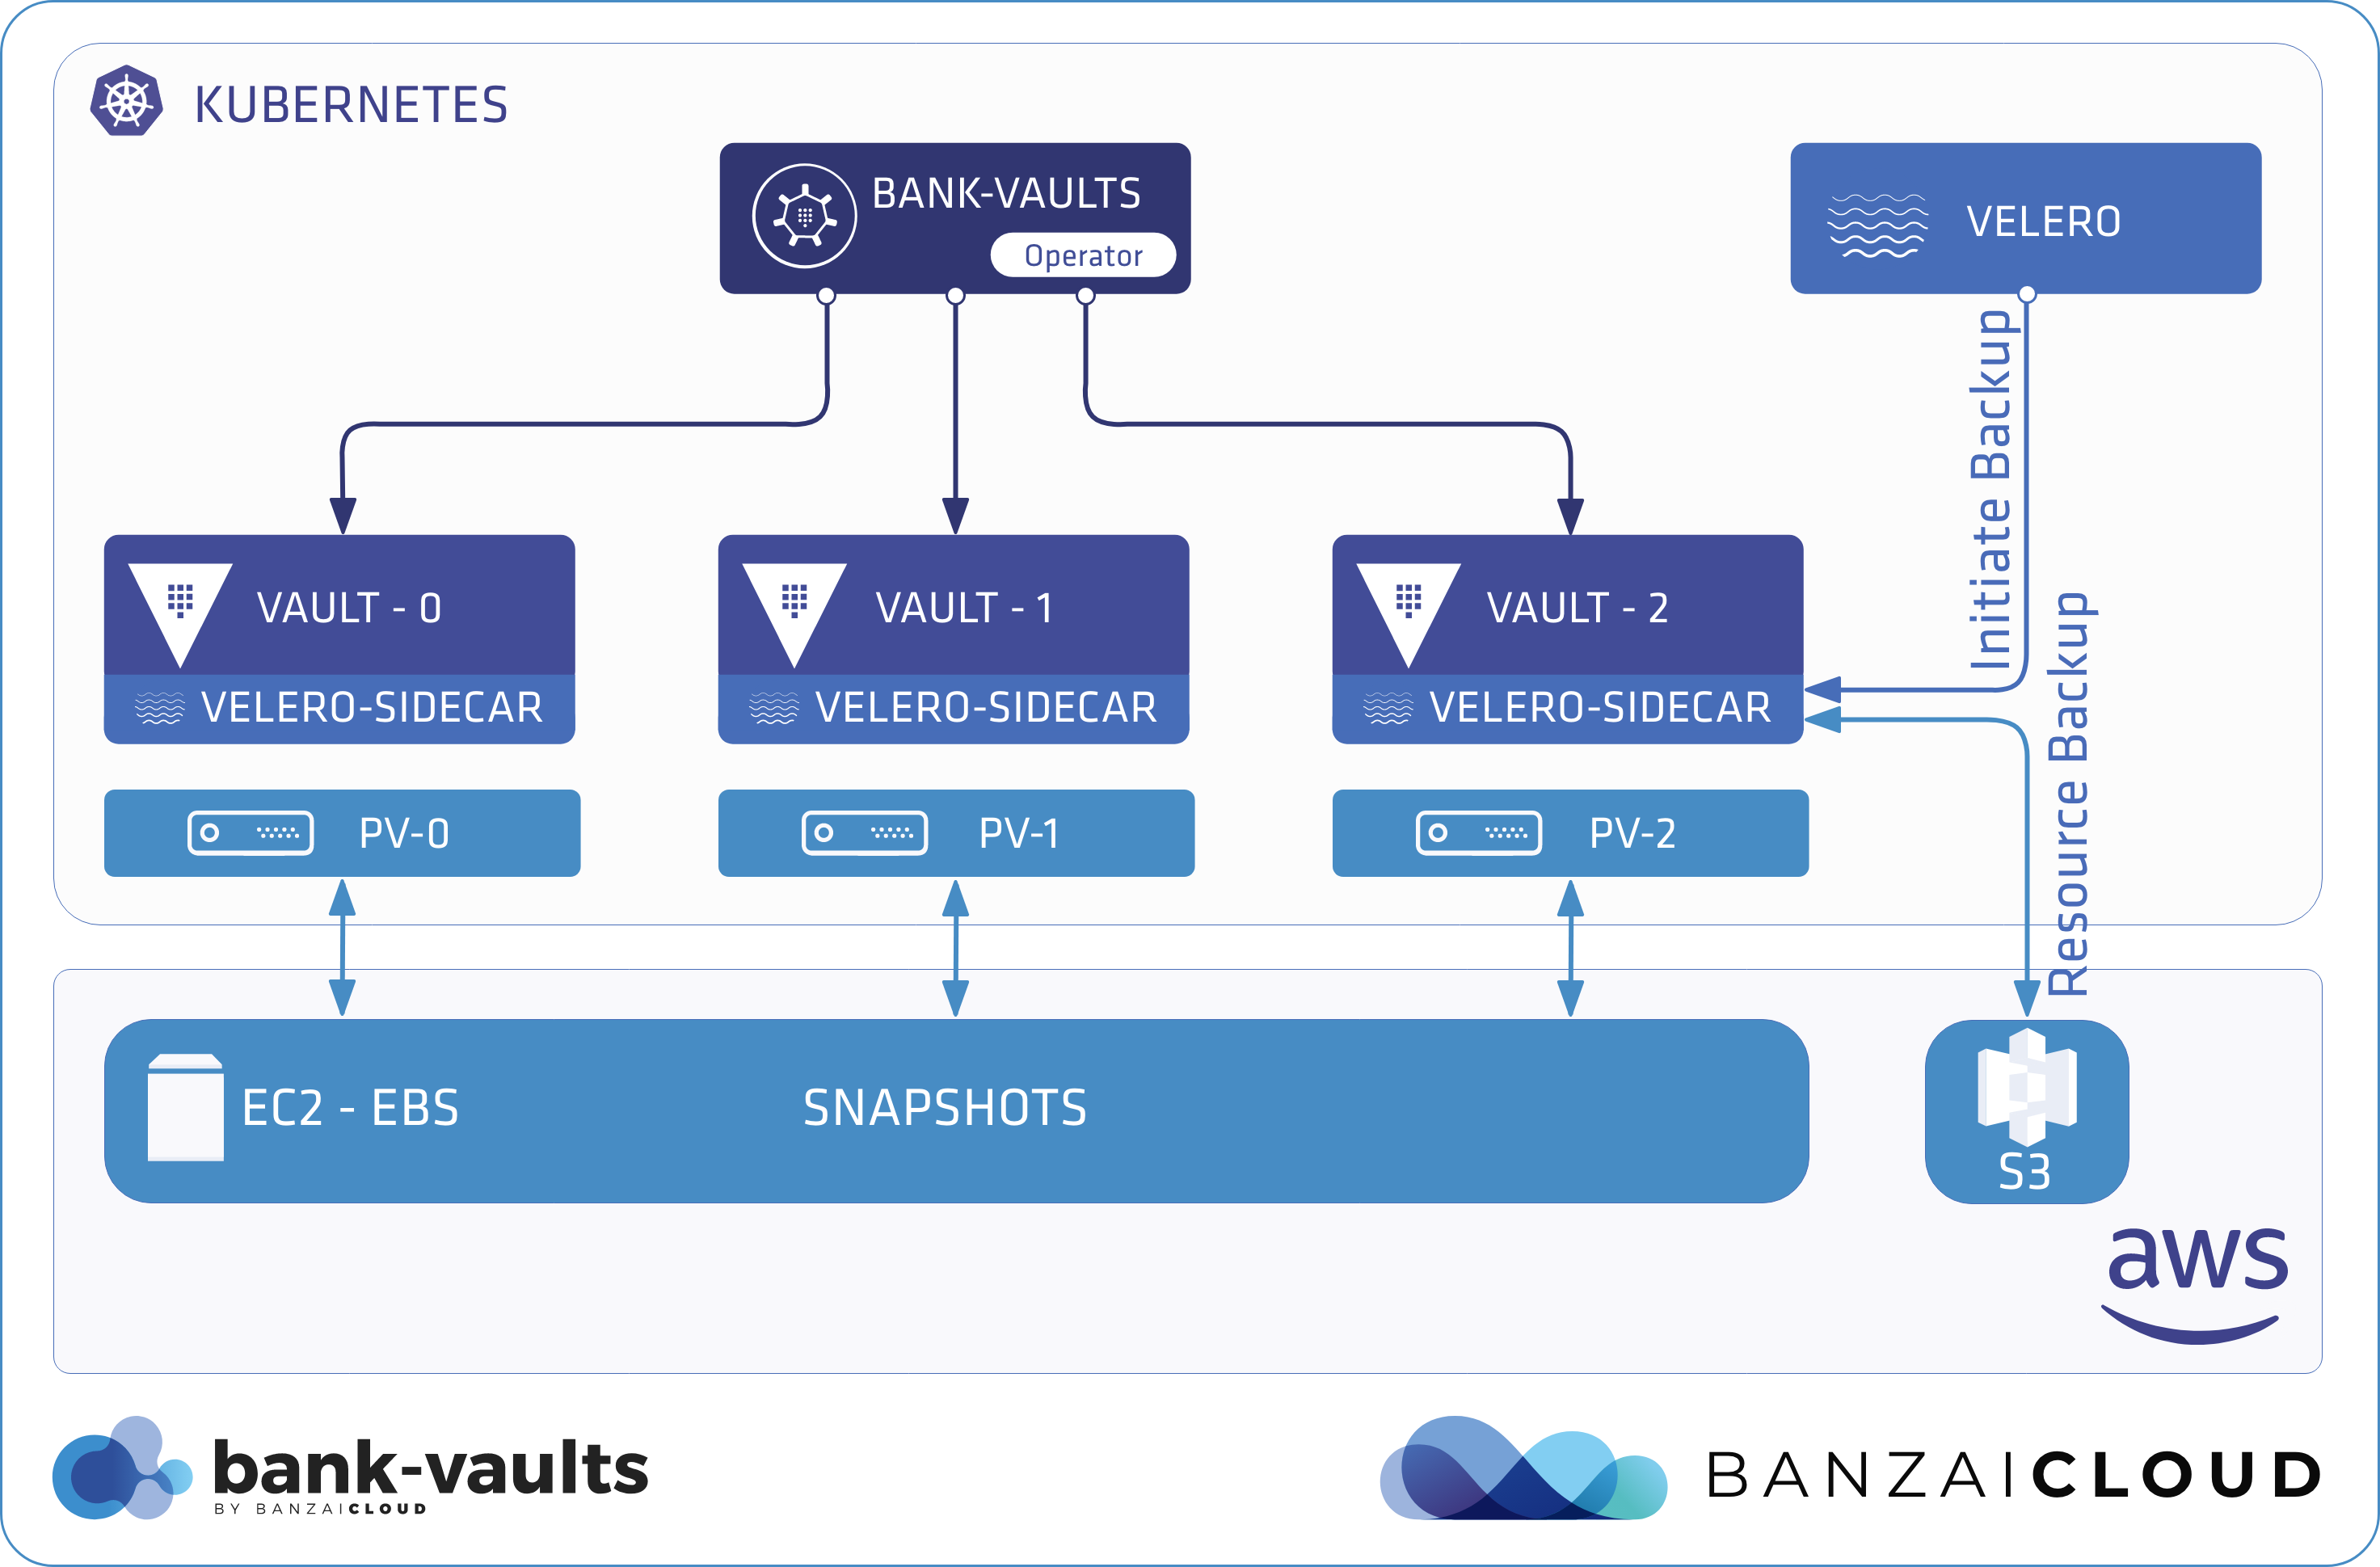
We use a toolset for Kubernetes disaster recovery called Velero. It reduces time until recovery in cases of infrastructure loss, data corruption, and service outages, and it’s already integrated into the Banzai Cloud Pipeline platform. In addition, Velero makes it easier to migrate cluster resources from one cluster to another.
Would you like to see Velero in action, and see how easy is to backup and recover Kubernetes clusters? Check out Pipeline, Banzai Cloud’s container management platform for hybrid clouds.
Installing Velero 🔗︎
The sample commands in this post assume that you are installing Velero by hand, and that the installation is to a PKE Kubernetes cluster running on AWS. You can start your cluster at any time using the free hosted version of the Banzai Cloud Pipeline platform, but of course you can use any other cloud provider that Velero supports.
-
Log in to the target cluster.
-
Add the Velero Helm repository:
helm repo add vmware-tanzu https://vmware-tanzu.github.io/helm-charts -
Create a namespace for Velero:
kubectl create namespace velero -
Just like in the example, we’re using AWS. We have also previously created an S3 bucket and KMS key called
bank-vaults-veleroin the Stockholm region to encrypt and store backup data. Create your own bucket and key, or, if you’re using a different provider, their equivalent. -
To be able to use PersistentVolume snapshots as well, install Velero with Restic by running the following command. Don’t forget to replace the values of certain parameters (for example, BUCKET and REGION) with your own.
BUCKET=bank-vaults-velero
REGION=eu-north-1
KMS_KEY_ID=alias/bank-vaults-velero
SECRET_FILE=~/.aws/credentials

helm upgrade --install velero --namespace velero \
          --set configuration.provider=aws \
          --set-file credentials.secretContents.cloud=${SECRET_FILE} \
          --set deployRestic=true \
          --set configuration.backupStorageLocation.name=aws \
          --set configuration.backupStorageLocation.bucket=${BUCKET} \
          --set configuration.backupStorageLocation.config.region=${REGION} \
          --set configuration.backupStorageLocation.config.kmsKeyId=${KMS_KEY_ID} \
          --set configuration.volumeSnapshotLocation.name=aws \
          --set configuration.volumeSnapshotLocation.config.region=${REGION} \
          --set "initContainers[0].name"=velero-plugin-for-aws \
          --set "initContainers[0].image"=velero/velero-plugin-for-aws:v1.0.0 \
          --set "initContainers[0].volumeMounts[0].mountPath"=/target \
          --set "initContainers[0].volumeMounts[0].name"=plugins \
          vmware-tanzu/velero
Installing and configuring the Bank-Vaults operator 🔗︎
We have added some support code, as well as a fully functional version of Velero to Bank-Vaults.
-
Install the Bank-Vaults operator.
helm upgrade --install vault-operator banzaicloud-stable/vault-operator -
Create a Vault instance from the examples in the repository:
kubectl apply -f https://raw.githubusercontent.com/banzaicloud/bank-vaults/master/operator/deploy/rbac.yaml kubectl apply -f https://raw.githubusercontent.com/banzaicloud/bank-vaults/master/operator/deploy/cr-raft.yaml -
Now, we’re going to configure the operator. The Vault CustomResource in
cr-raft.yamlhas a special flag calledveleroEnabled. You can set this flag totrueto make the operator “Velero-aware” for this Vault instance. This is particularly useful when working with file-based Vault storage backends (file,raft) that write to disks. Velero can freeze those disks before taking a PersistentVolume snapshot, then unfreeze them once the snapshot is complete. This is all made possible through Velero hooks. And freezing the file system ensures that all pending disk I/O operations have been completed before the snapshot is taken.# Add Velero fsfreeze sidecar container and supporting hook annotations to Vault Pods: # https://velero.io/docs/v1.2.0/hooks/ veleroEnabled: trueAfter enabling this flag, run the
kubectl get podscommand.$ k get pods NAME READY STATUS RESTARTS AGE vault-0 4/4 Running 0 29m vault-1 4/4 Running 0 29m vault-2 4/4 Running 0 29m vault-configurer-8774986d7-gp744 1/1 Running 0 29mYou can see that:
- Each Vault Pod has an additional
velero-fsfreezesidecar container (4 instead of 3) attached. - The pods mount the PersistentVolume.
Velero will
execinto this container later on. Note that these sidecar containers have only minor resource requirements:velero-fsfreeze: Container ID: docker://994f43364b36e34835427976e869031f9ff003ebda52eb9f5b5afcb1db2e05e3 Image: velero/fsfreeze-pause:latest Image ID: docker-pullable://velero/fsfreeze-pause@sha256:08fe6d510c250c8bafe0d2af7daf9d6403d9d7902db8aa60c25df412ac489e23 Port: <none> Host Port: <none> State: Running Started: Fri, 31 Jan 2020 09:51:56 +0100 Ready: True Restart Count: 0 Limits: cpu: 50m memory: 32Mi Requests: cpu: 50m memory: 32Mi Environment: <none> Mounts: /var/run/secrets/kubernetes.io/serviceaccount from vault-token-64nxw (ro) /vault/file from vault-raft (rw) - Each Vault Pod has an additional
-
Since fsfreeze uses protected syscalls, Velero needs to be allowed to
execinto thisprivilegedcontainer. To do that, disable the already deprecated DenyEscalatingExec admission controller on a given Kubernetes cluster. Otherwise the hooks will fail (in which case Velero works in a best-effort mode and continues to create backups).
Backup and restoration 🔗︎
Now we have a fully functional Velero-aware Vault cluster and our Velero service has been configured. It’s time to create a backup.
Creating a Velero backup 🔗︎
You can create a backup with the Velero CLI, or with the predefined Velero Backup CR from the Bank-Vaults repository.
To create the backup with the Bank-Vaults CR, run this command:
kubectl apply -f https://raw.githubusercontent.com/banzaicloud/bank-vaults/master/examples/backup/backup.yaml
To use the Velero CLI, complete the following steps:
-
Follow the Velero documentation to install the Velero CLI.
-
Create the backup by running the following command:
velero backup create --selector vault_cr=vault vault-1 -
Check that the Velero backup was successfully created, without any errors or warnings:
velero backup describe --details vault-1Expected output:
Name:         vault-1
Namespace:    velero
Labels:       velero.io/backup=vault-1
              velero.io/pv=pvc-6eb4d9c1-25cd-4a28-8868-90fa9d51503a
              velero.io/storage-location=default
Annotations:  <none>

Phase:  Completed

Namespaces:
  Included:  *
  Excluded:  <none>

Resources:
  Included:        *
  Excluded:        <none>
  Cluster-scoped:  auto

Label selector:  vault_cr=vault

Storage Location:  default

Snapshot PVs:  auto

TTL:  720h0m0s

Hooks:  <none>

Backup Format Version:  1

Started:    2020-01-29 14:17:41 +0100 CET
Completed:  2020-01-29 14:17:45 +0100 CET

Expiration:  2020-02-28 14:17:41 +0100 CET
Simulating a disaster 🔗︎
Let’s simulate catastrophic data loss by removing Vault from the cluster entirely and deleting all of its PersistentVolumeClaims.
CAUTION: Hazard of data loss
Make absolutely sure that you are running the following commands on your test cluster. We want to simulate a disaster not cause one.
-
Delete Vault from the cluster.
$ kubectl delete vault -l vault_cr=vault vault.vault.banzaicloud.com "vault" deleted -
Delete the PersistentVolumeClaims of Vault.
$ kubectl delete pvc -l vault_cr=vault
persistentvolumeclaim "vault-raft-vault-0" deleted
persistentvolumeclaim "vault-raft-vault-1" deleted
persistentvolumeclaim "vault-raft-vault-2" deleted
Recovering from the disaster 🔗︎
Now we can restore Vault from the backup.
-
Scale down the vault-operator, so it won’t reconcile during the restore process. That way you can avoid any race conditions to recreate the resources between Velero and the operator.
kubectl scale deployment vault-operator --replicas 0 -
Restore all Vault-related resources from the backup you created previously.
velero restore create --from-backup vault-1 -
Check that the restore has finished properly.
velero restore getExpected output:
NAME BACKUP STATUS WARNINGS ERRORS CREATED SELECTOR vault1-20200129142409 vault1 Completed 0 0 2020-01-29 14:24:09 +0100 CET <none> -
Check that all the Vault clusters have actually been restored and are status
Running:kubectl get podsExpected output:
NAME READY STATUS RESTARTS AGE vault-0 4/4 Running 0 1m42s vault-1 4/4 Running 0 1m42s vault-2 4/4 Running 0 1m42s vault-configurer-8774986d7-gp744 1/1 Running 0 1m42s -
To manage your restored instance, scale the operator up after the restore process has completed:
kubectl scale deployment vault-operator --replicas 1Since every resource created by the operator was fully restored from the backup, the operator has nothing to do, and will just keep watching for changes.
-
After finishing the test, you can delete the backup if you don’t need it anymore:
velero backup delete vault-1
Conclusion 🔗︎
Using Velero and the Bank-Vaults operator makes backing up your Vault instances safer and more reliable. In this post we’ve discussed how to perform a single backup and restore. Since Vault stores precious data, we highly recommend you create a scheduled backup. You can find a daily example of this in the Bank-Vaults repository.
This feature (Vault backups with Velero), Vault replication across multiple datacenters and HSM support with the Bank-Vaults operator are three major features in the upcoming Bank-Vaults release, so stay tuned.
If you’re interested in contributing, check out the Bank-Vaults repository, or give us a GitHub star.
Learn more about Bank-Vaults:
- Secret injection webhook improvements
- Backing up Vault with Velero
- Vault replication across multiple datacenters
- Vault secret injection webhook and Istio
- Mutate any kind of k8s resources
- HSM support
- Injecting dynamic configuration with templates
- OIDC issuer discovery for Kubernetes service accounts
- Show all posts related to Bank-Vaults
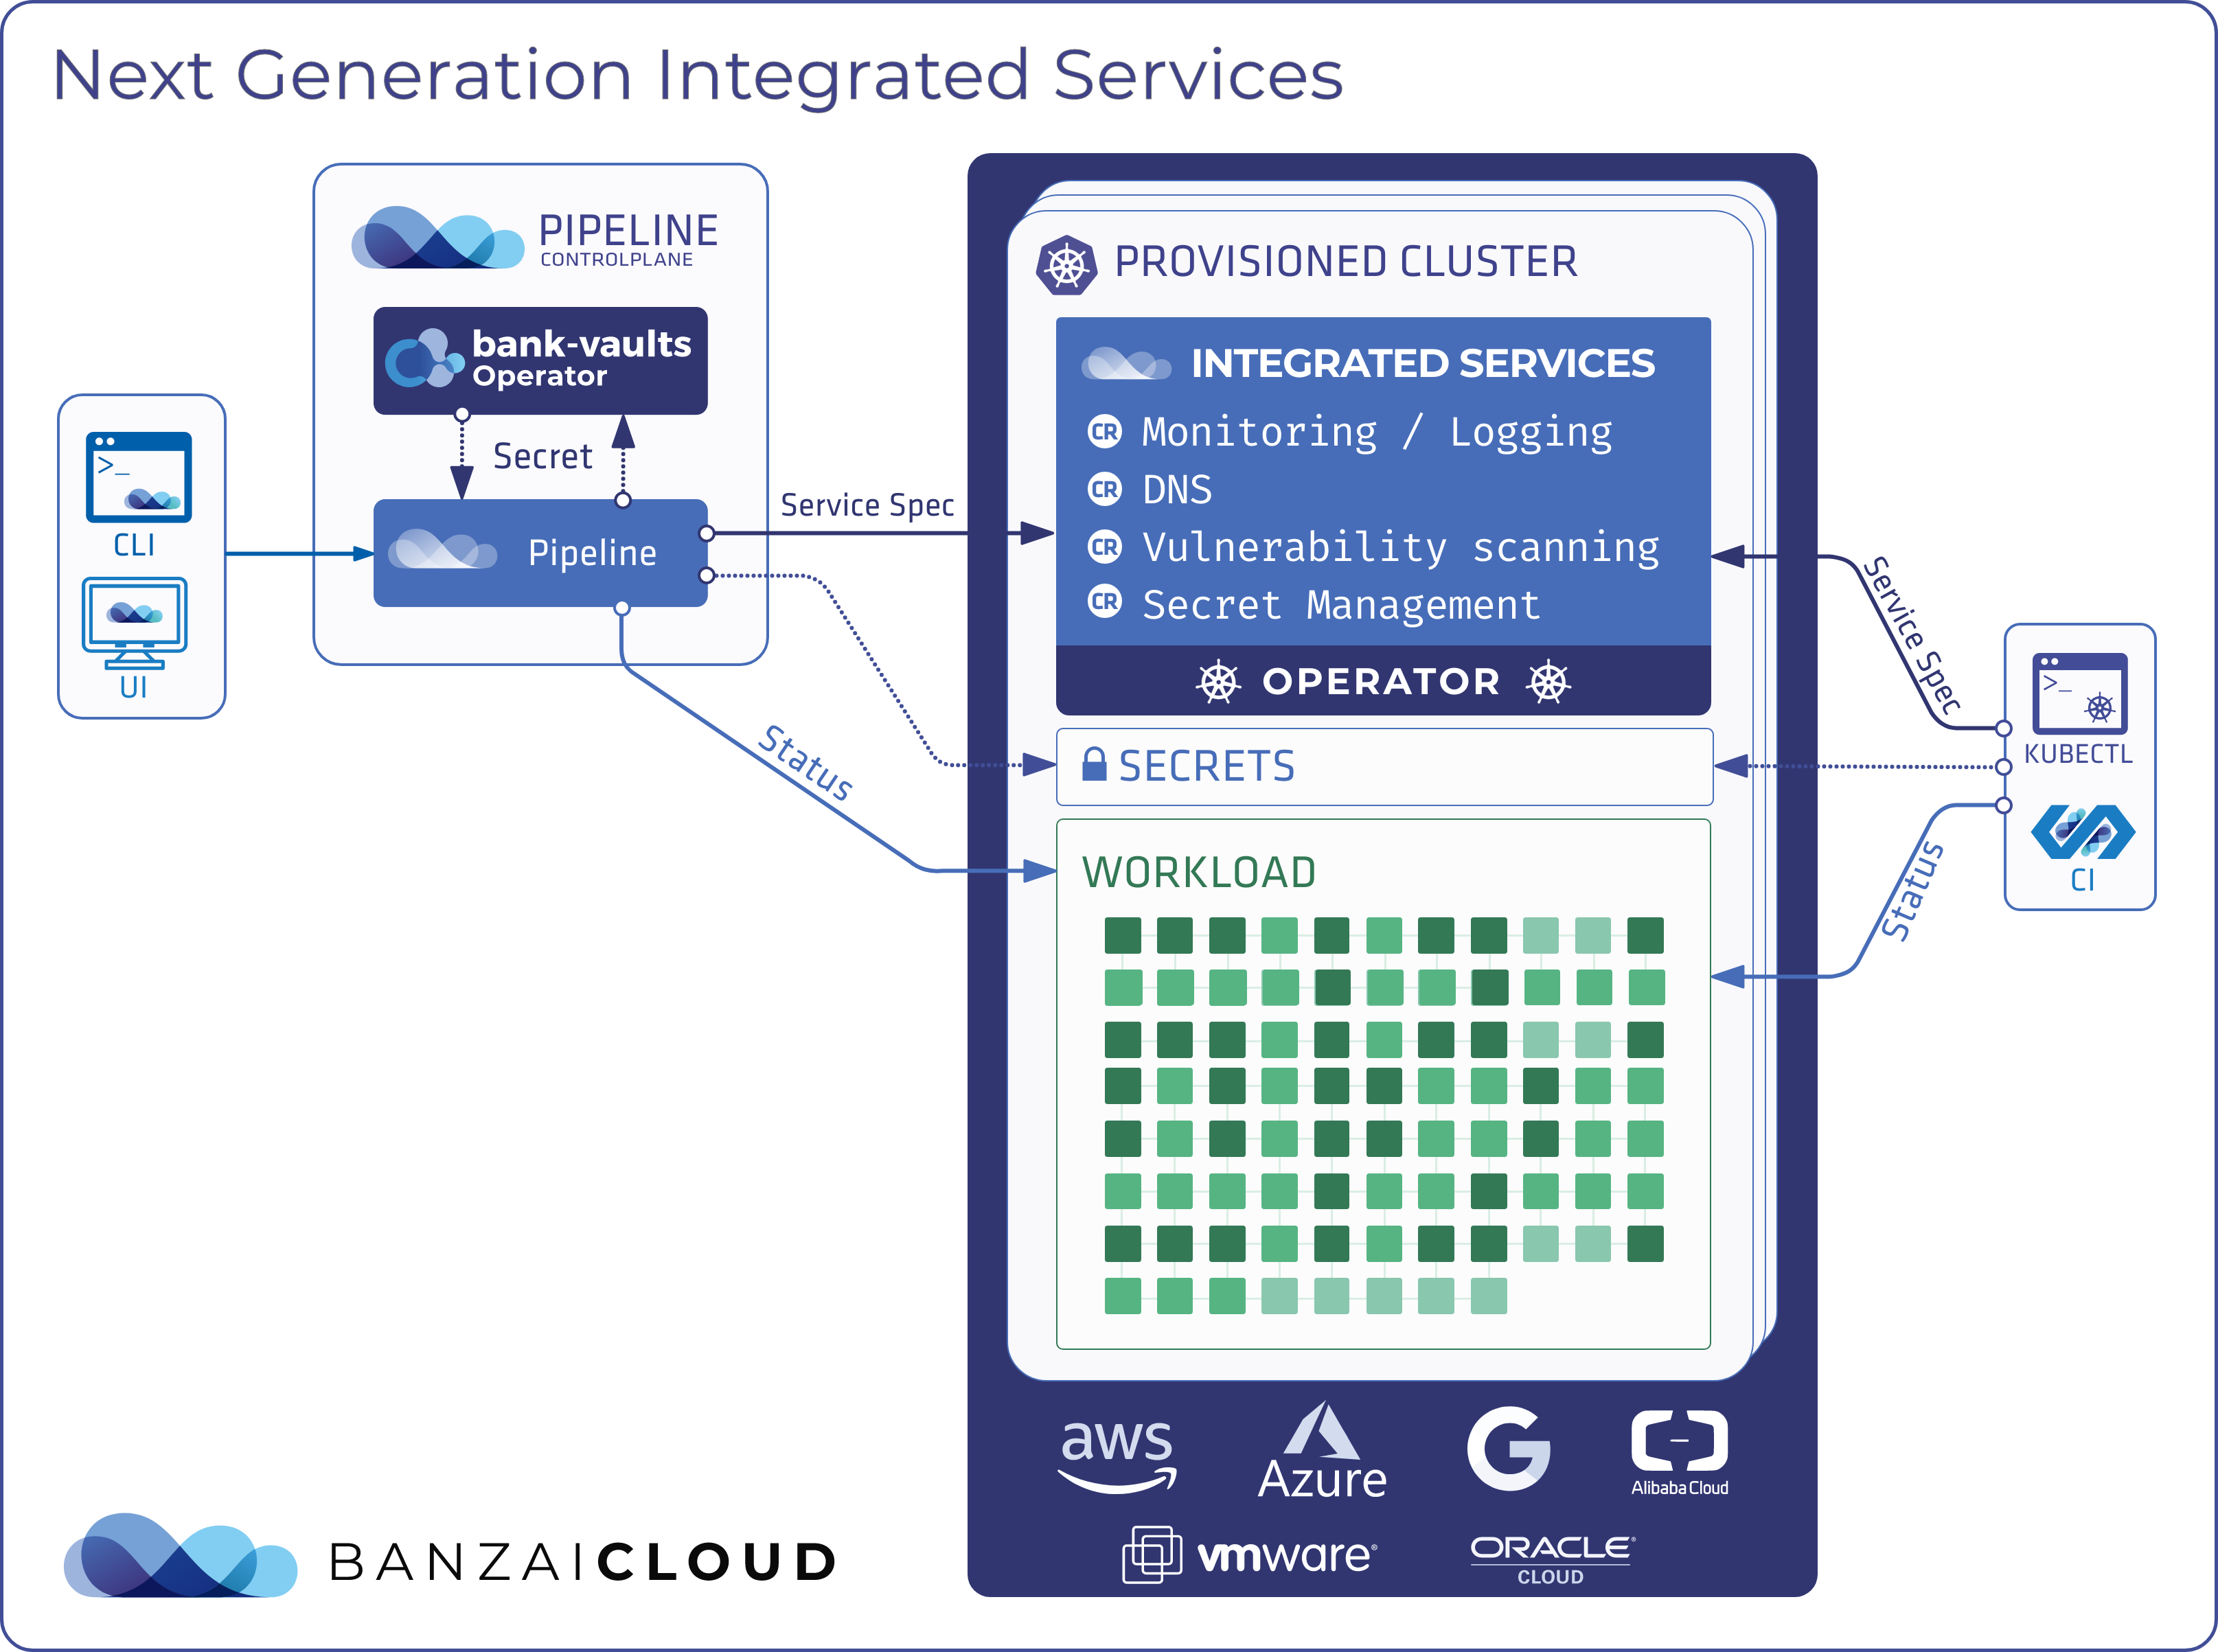
About Banzai Cloud Pipeline 🔗︎
Banzai Cloud’s Pipeline provides a platform for enterprises to develop, deploy, and scale container-based applications. It leverages best-of-breed cloud components, such as Kubernetes, to create a highly productive, yet flexible environment for developers and operations teams alike. Strong security measures — multiple authentication backends, fine-grained authorization, dynamic secret management, automated secure communications between components using TLS, vulnerability scans, static code analysis, CI/CD, and so on — are default features of the Pipeline platform.
#multicloud #hybridcloud #BanzaiCloud